Documentation
Admin Portal

Enter your Username and Password, then click the Sign In button to access the screen.

On dashboard screen you will be able to see total projects count + how many open projects + how many in progress + how many completed
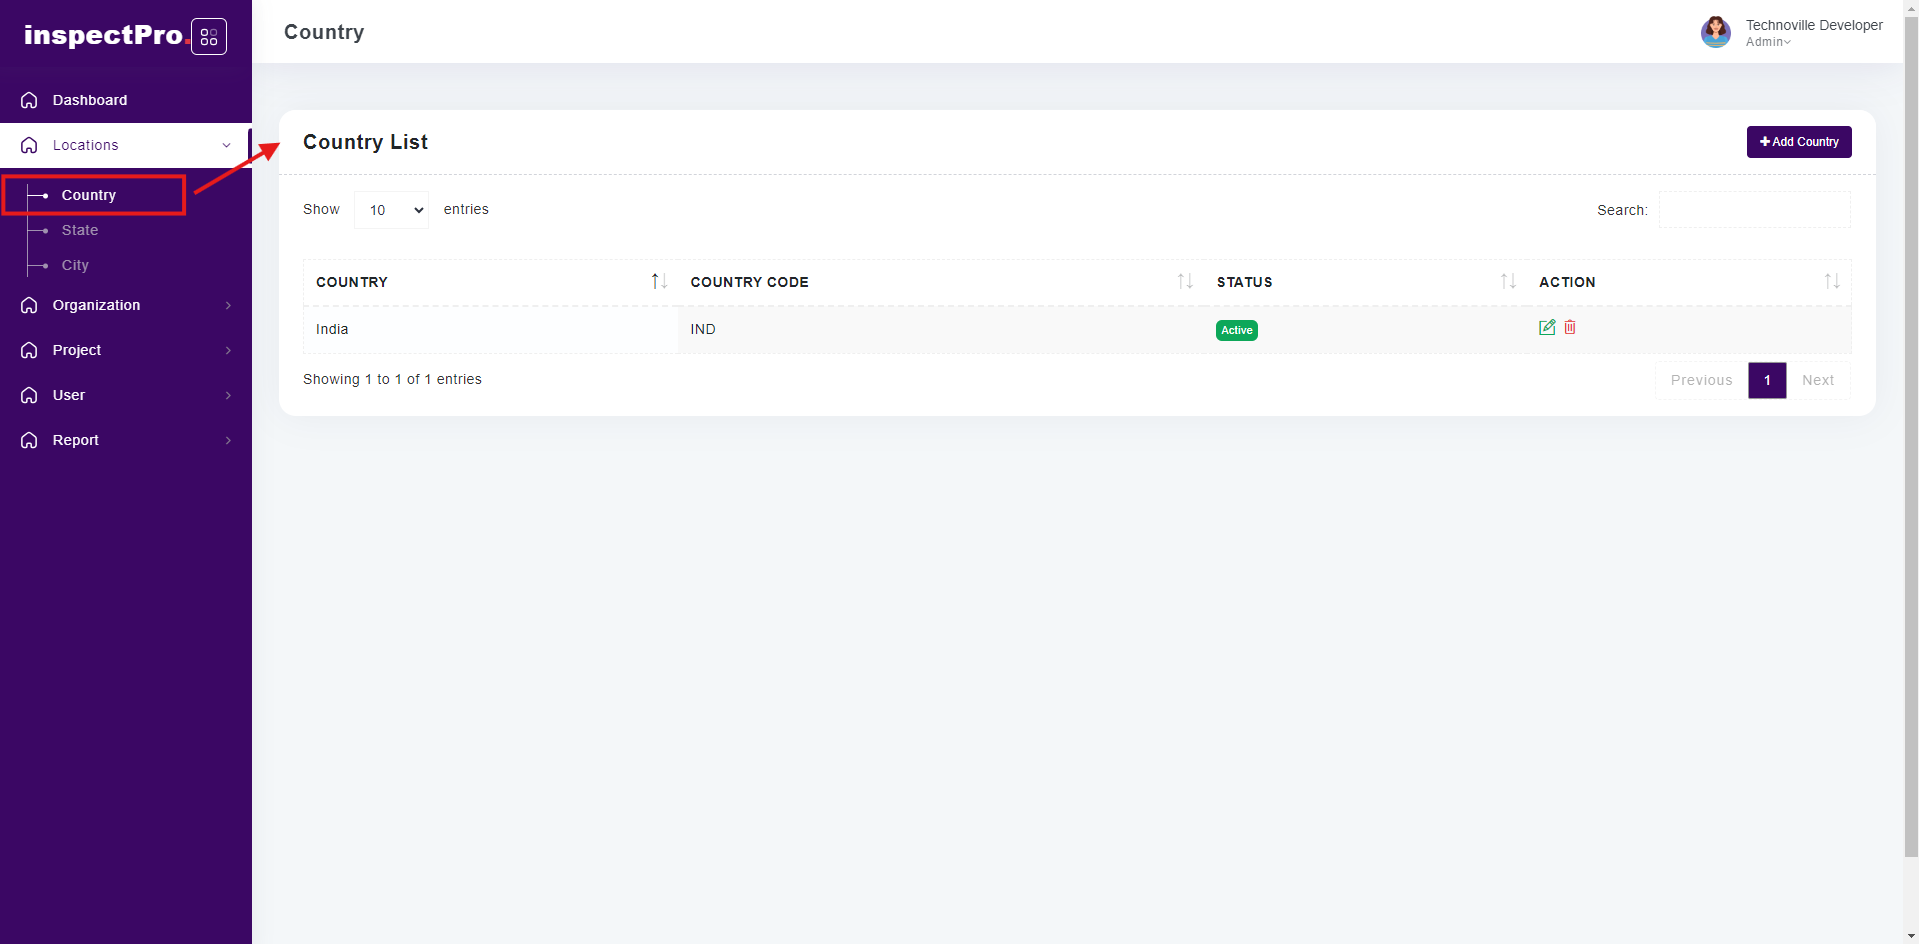
Clicking on "Country" under "Locations" will display the country list.
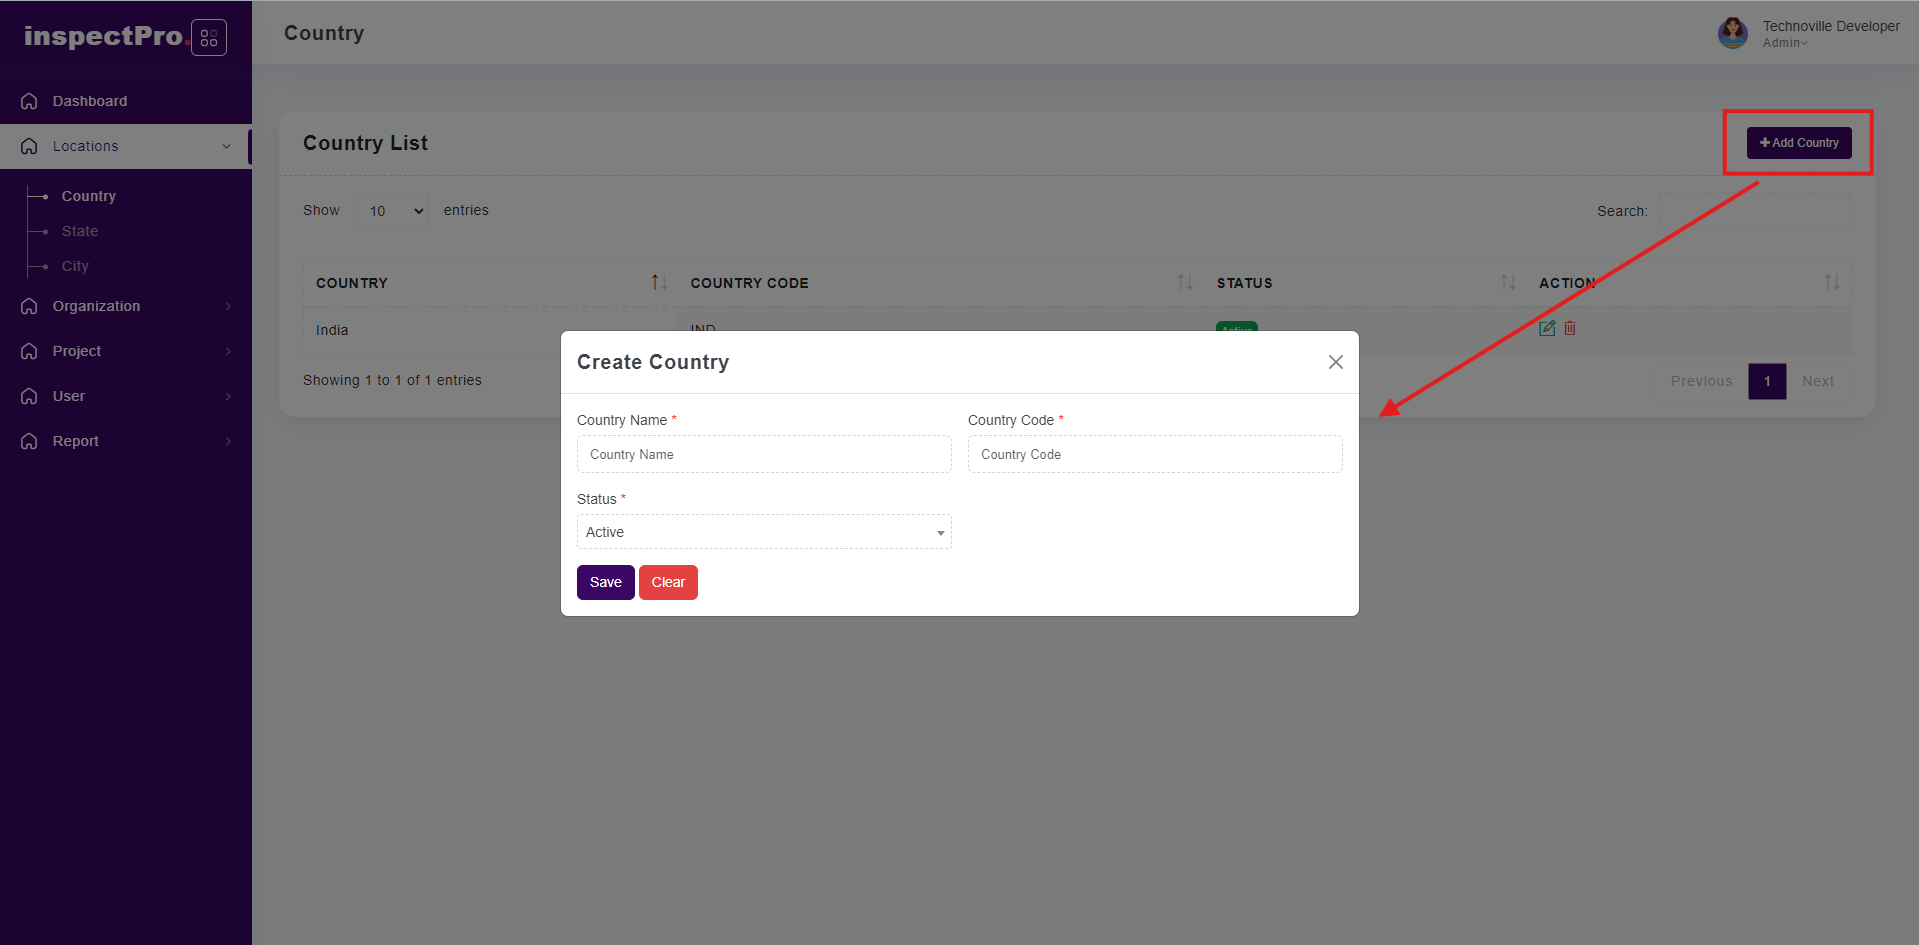
When you click on add button you will be able to add new country.
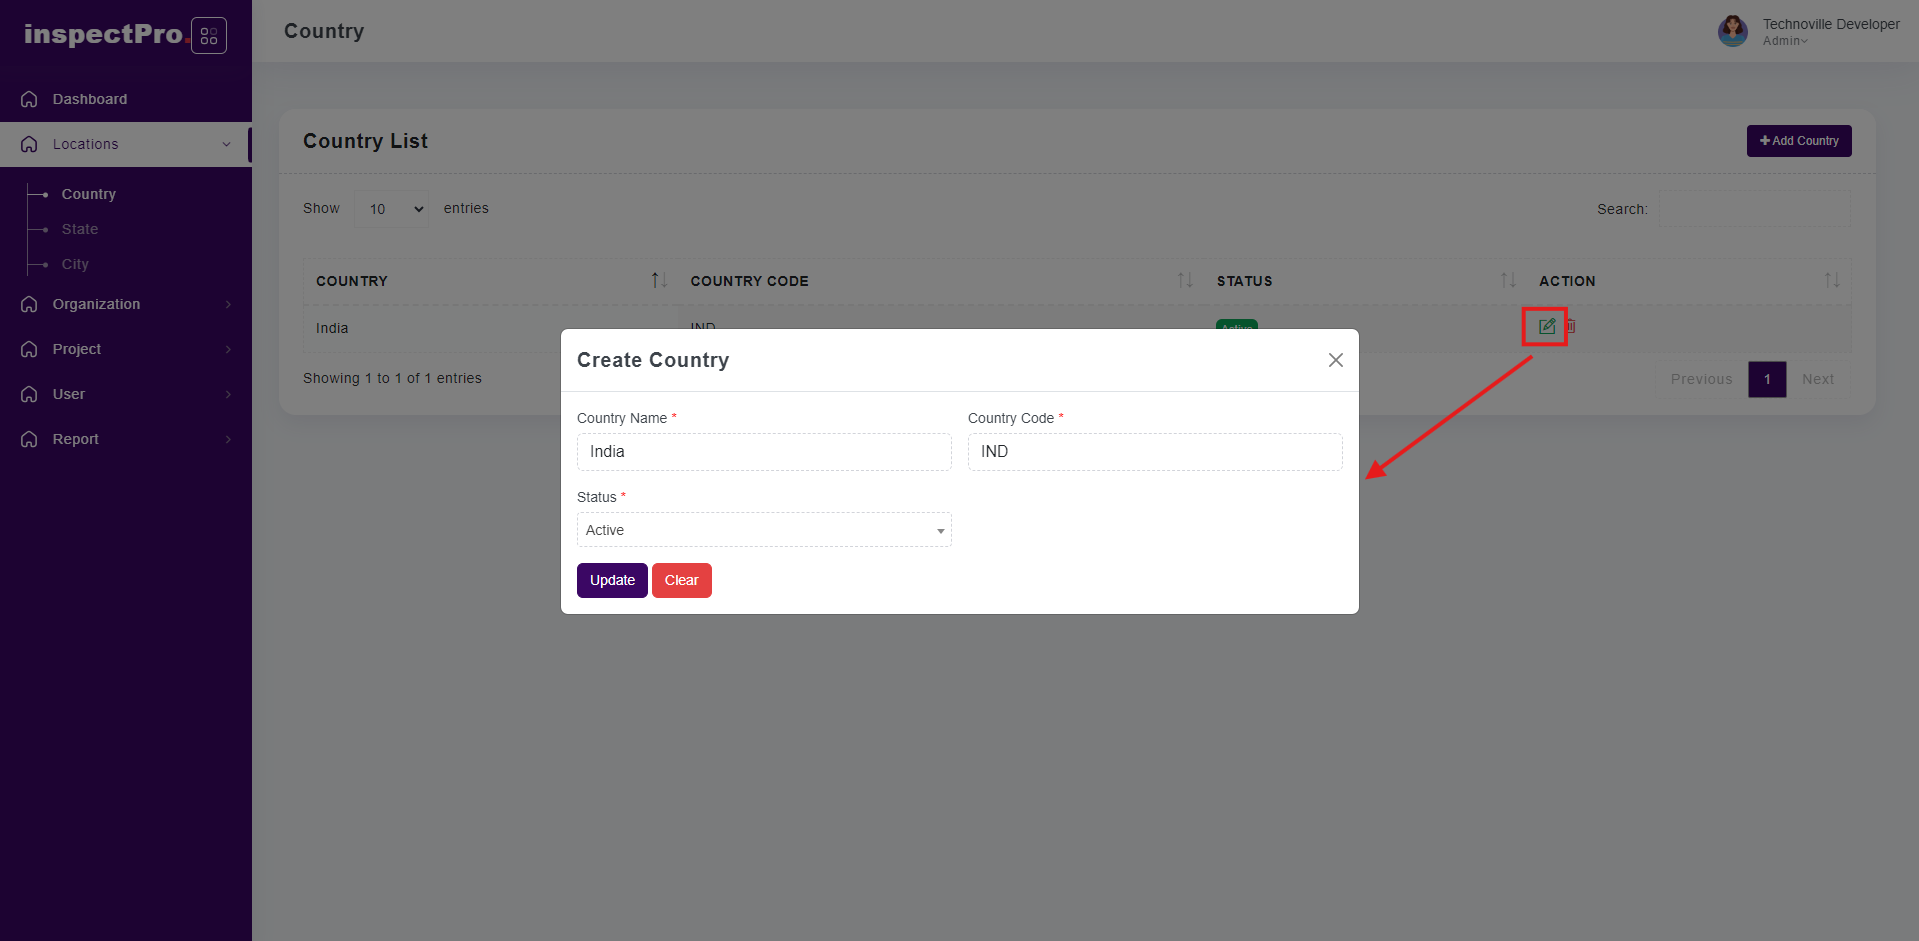
When you click on edit button at that time you will be able to change & update.
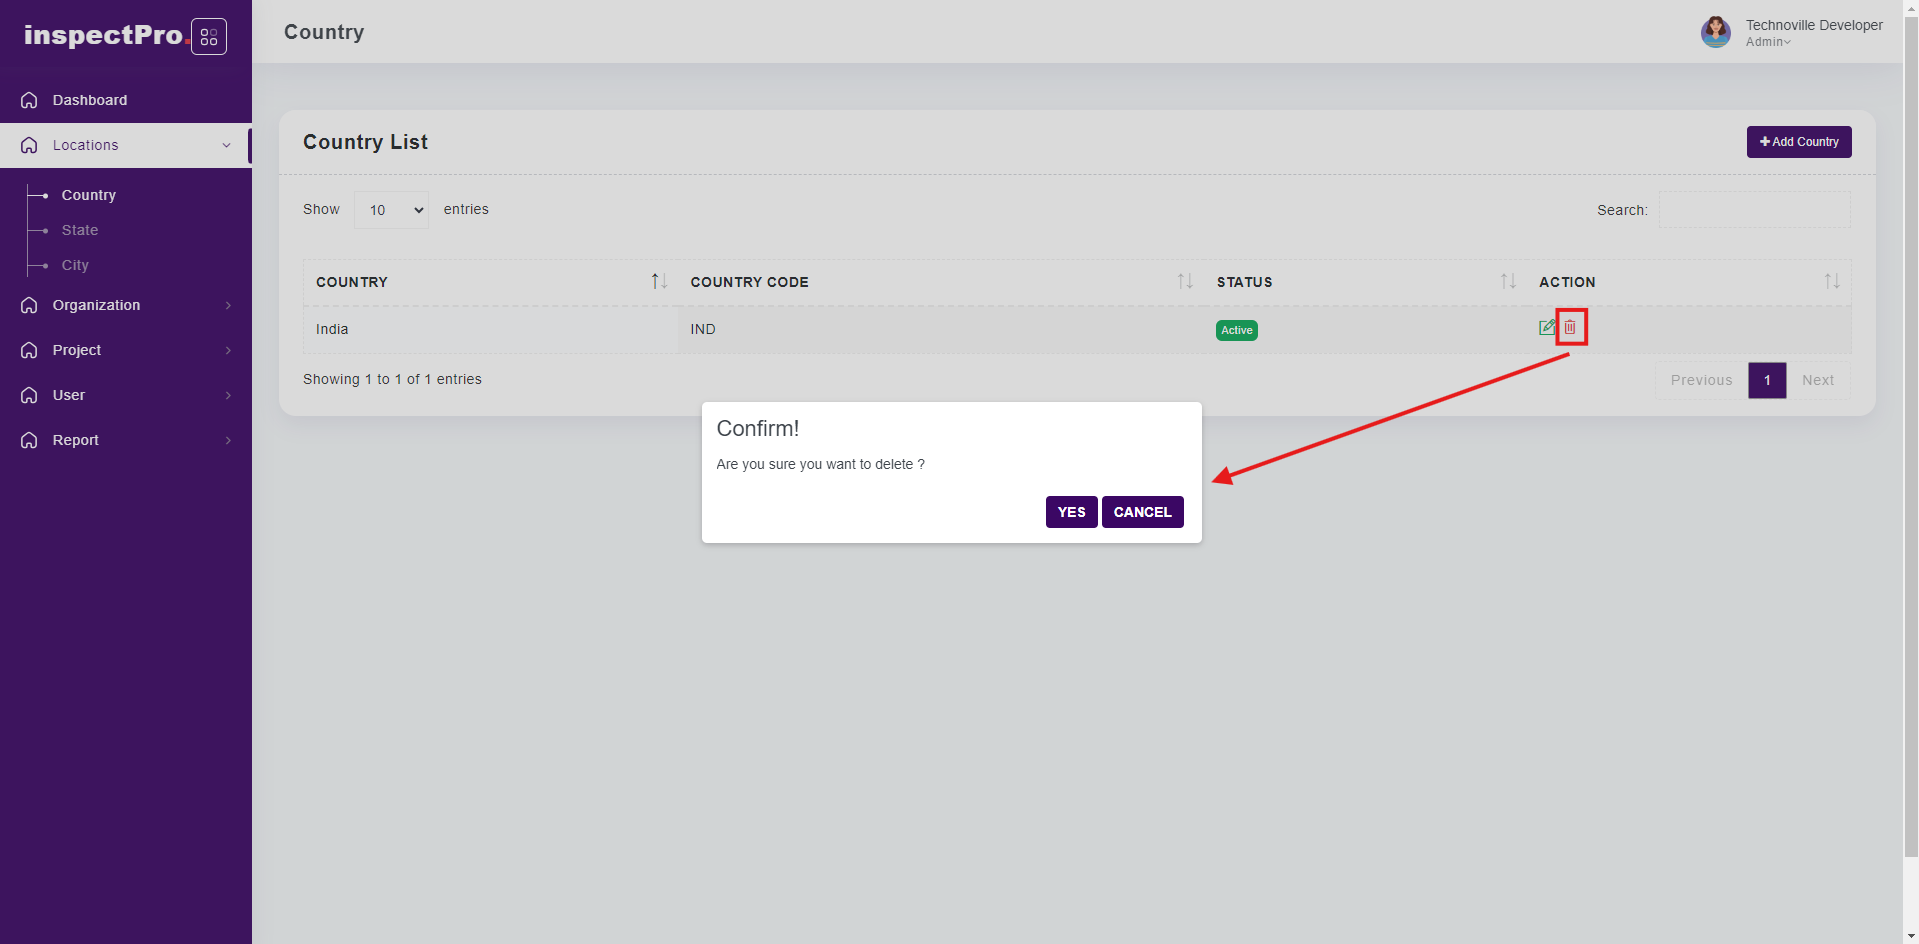
When you click on delete button that particular country is inactive.
If you want to active same country then you need to click on edit button and change status from inactive to active and click on save button then that country would be active.
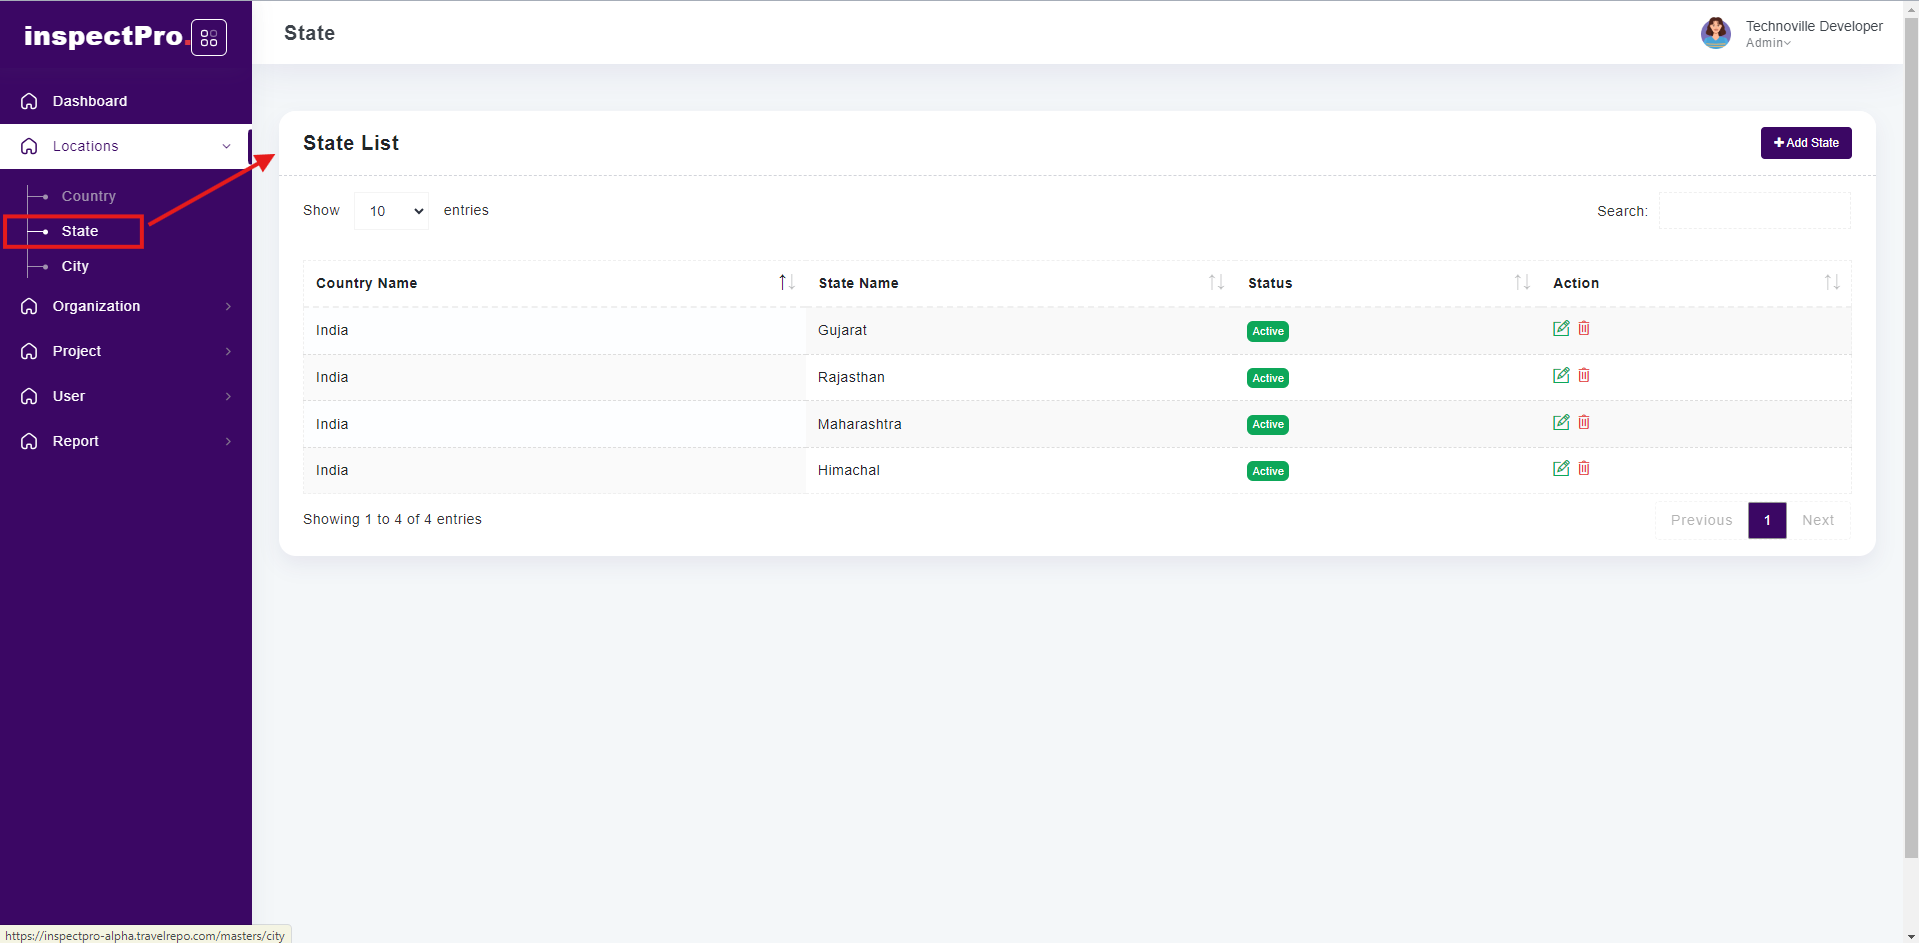
Clicking on "State" under "Locations" will display the state list.
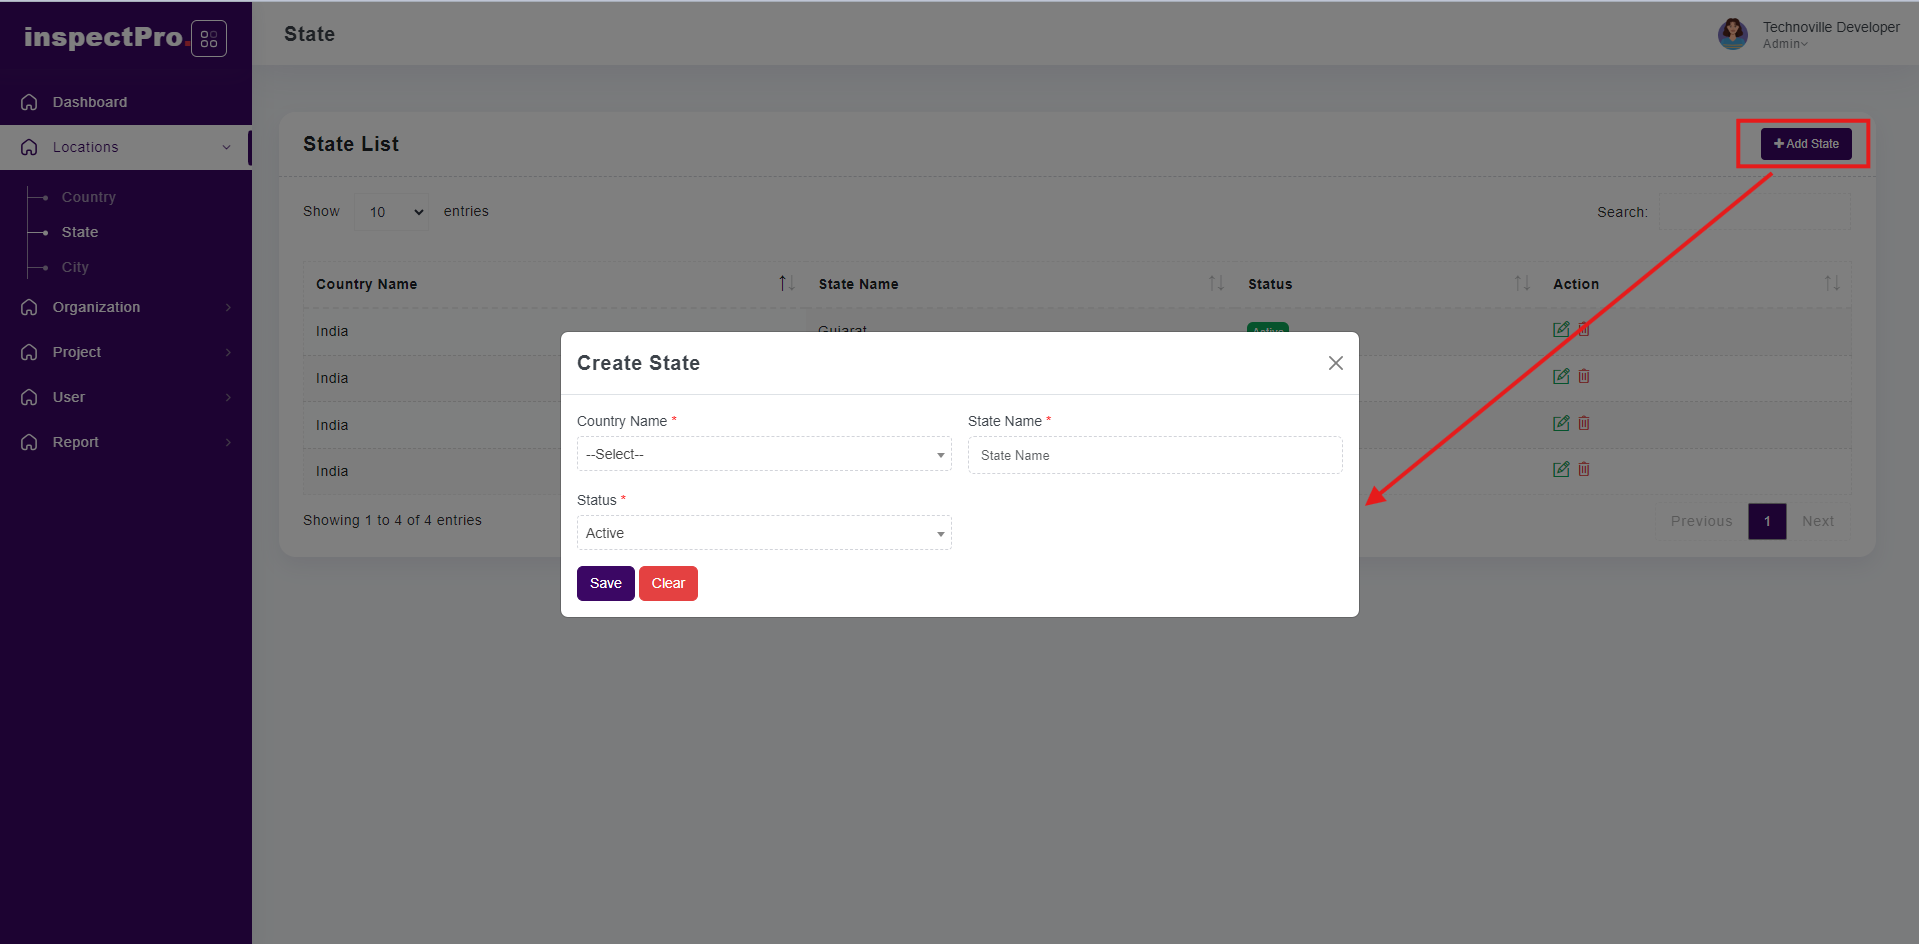
When you click on add button first you need to select country then you will add new state.
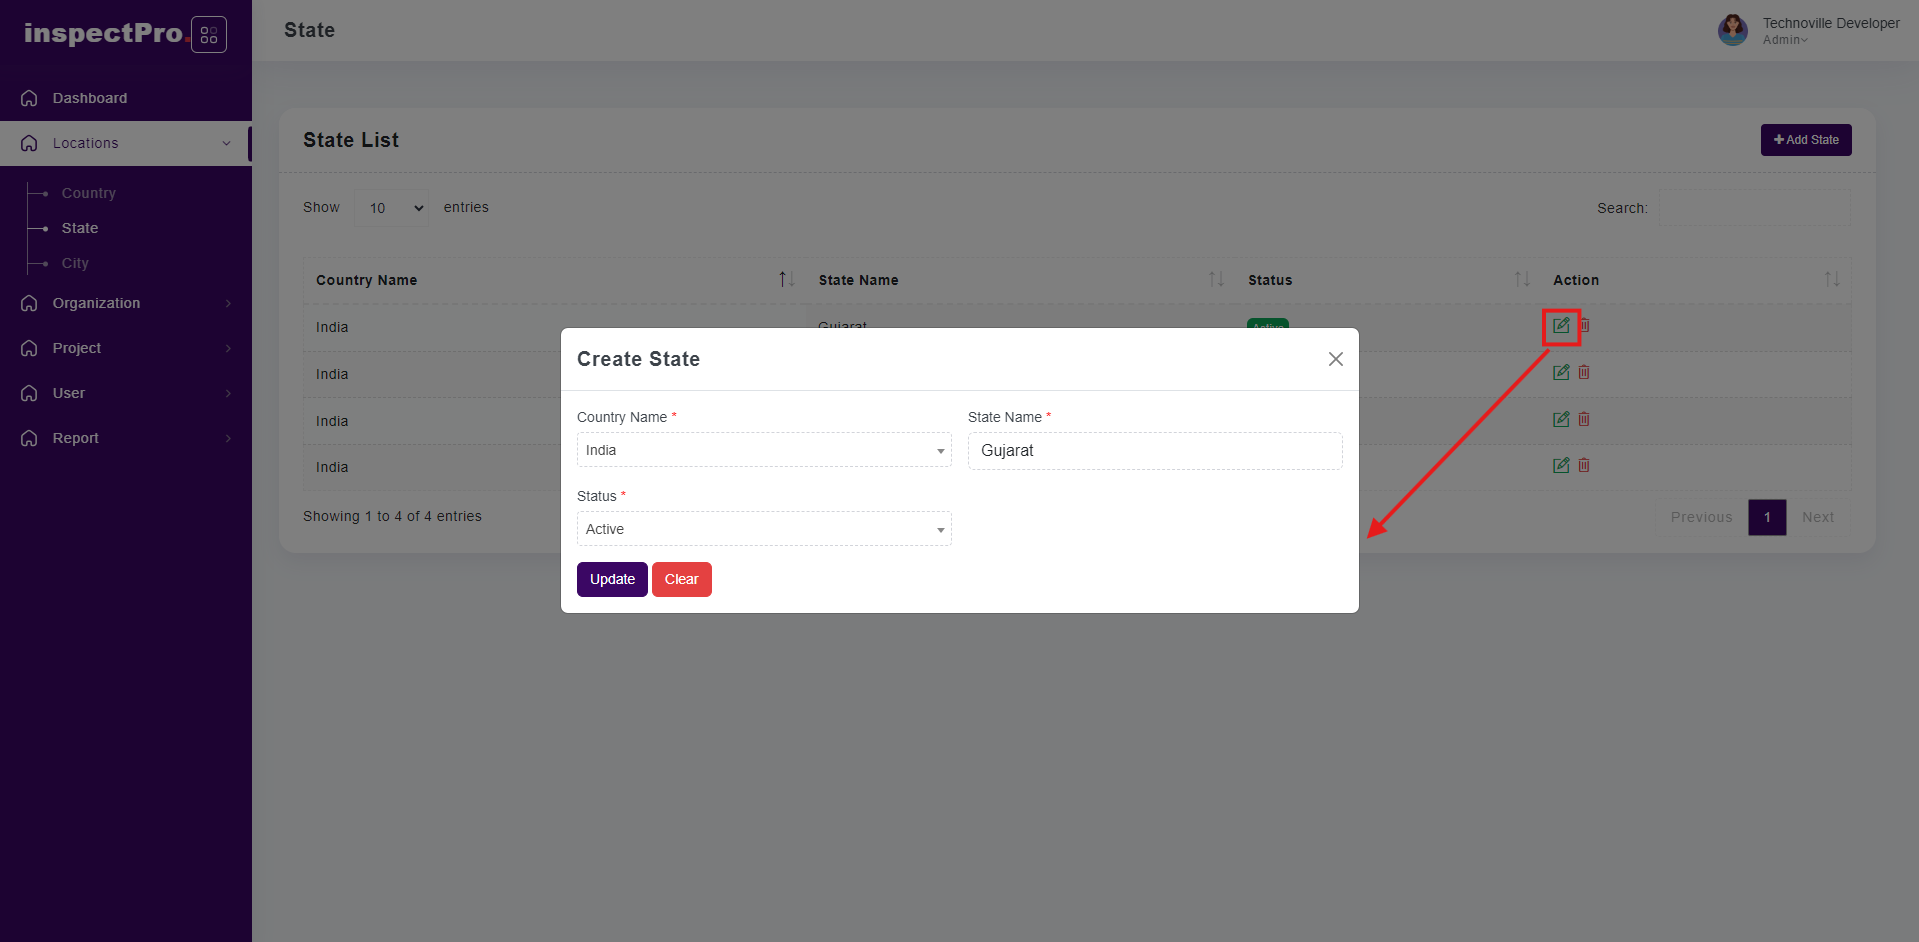
When you click on edit button at that time you will be able to change & update.
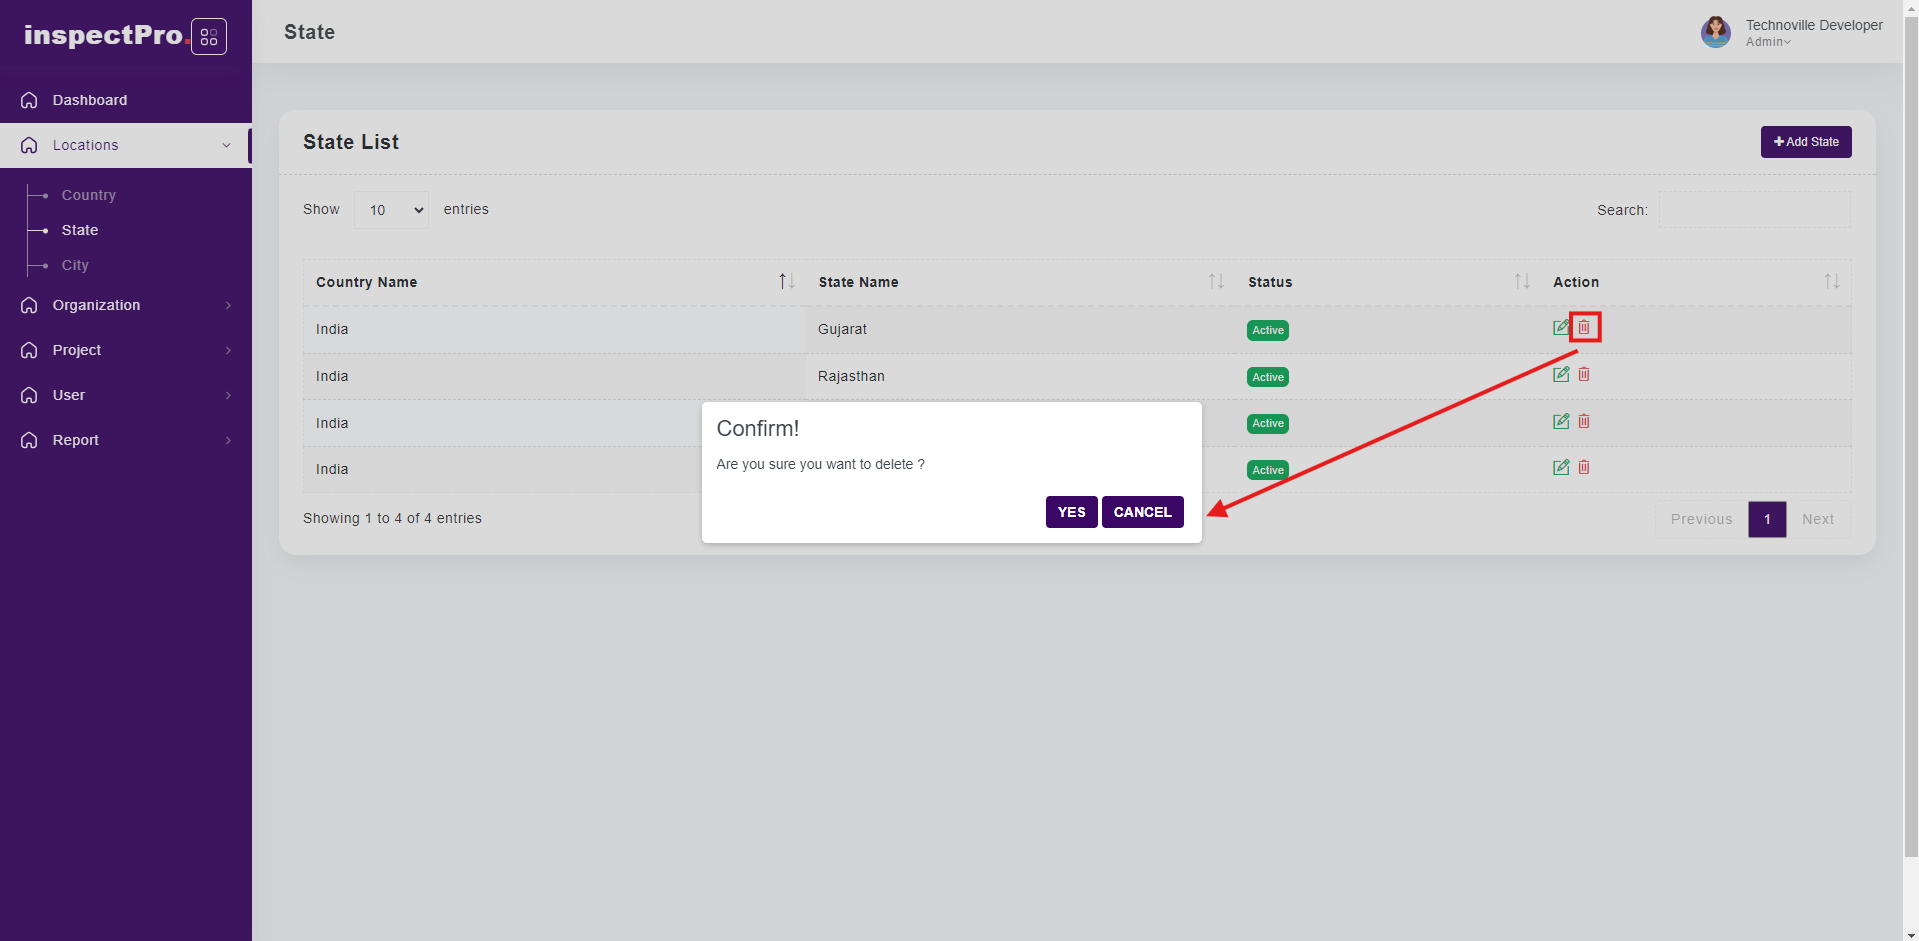
When you click on delete button that particular country is inactive.
If you want to active same state then you need to click on edit button and change status from inactive to active and click on save button then that state would be active.
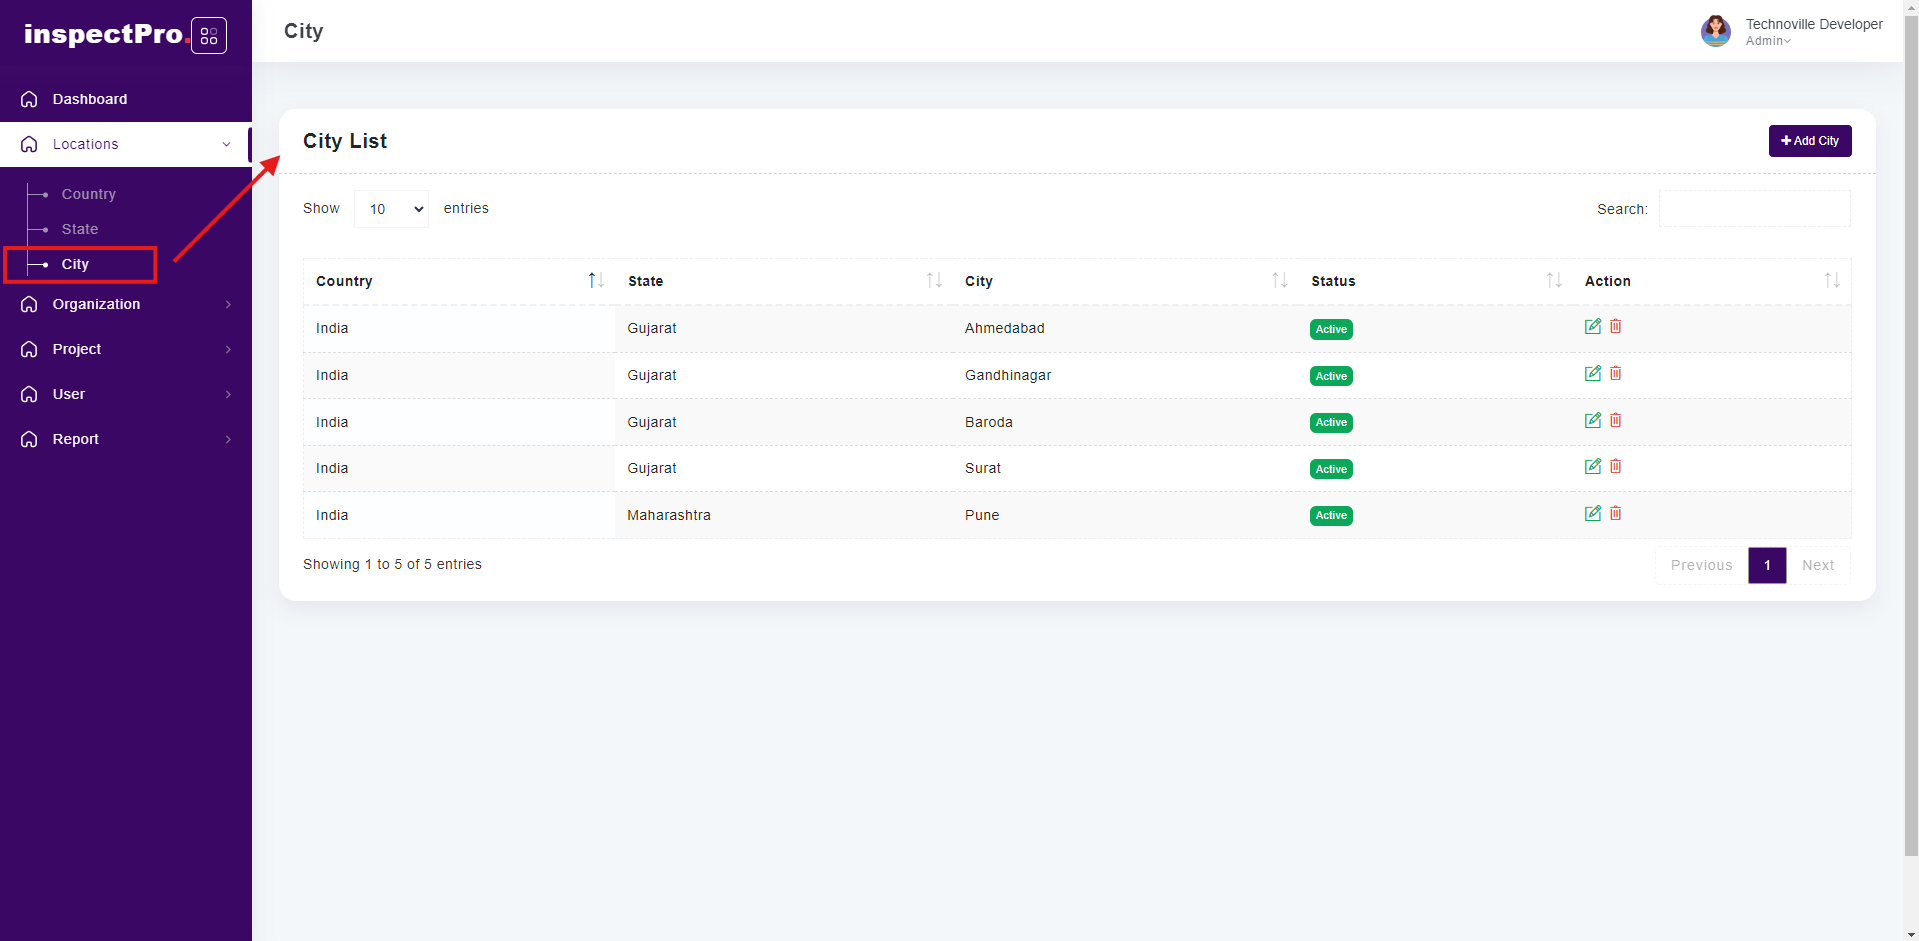
Clicking on "City" under "Locations" will display the city list.
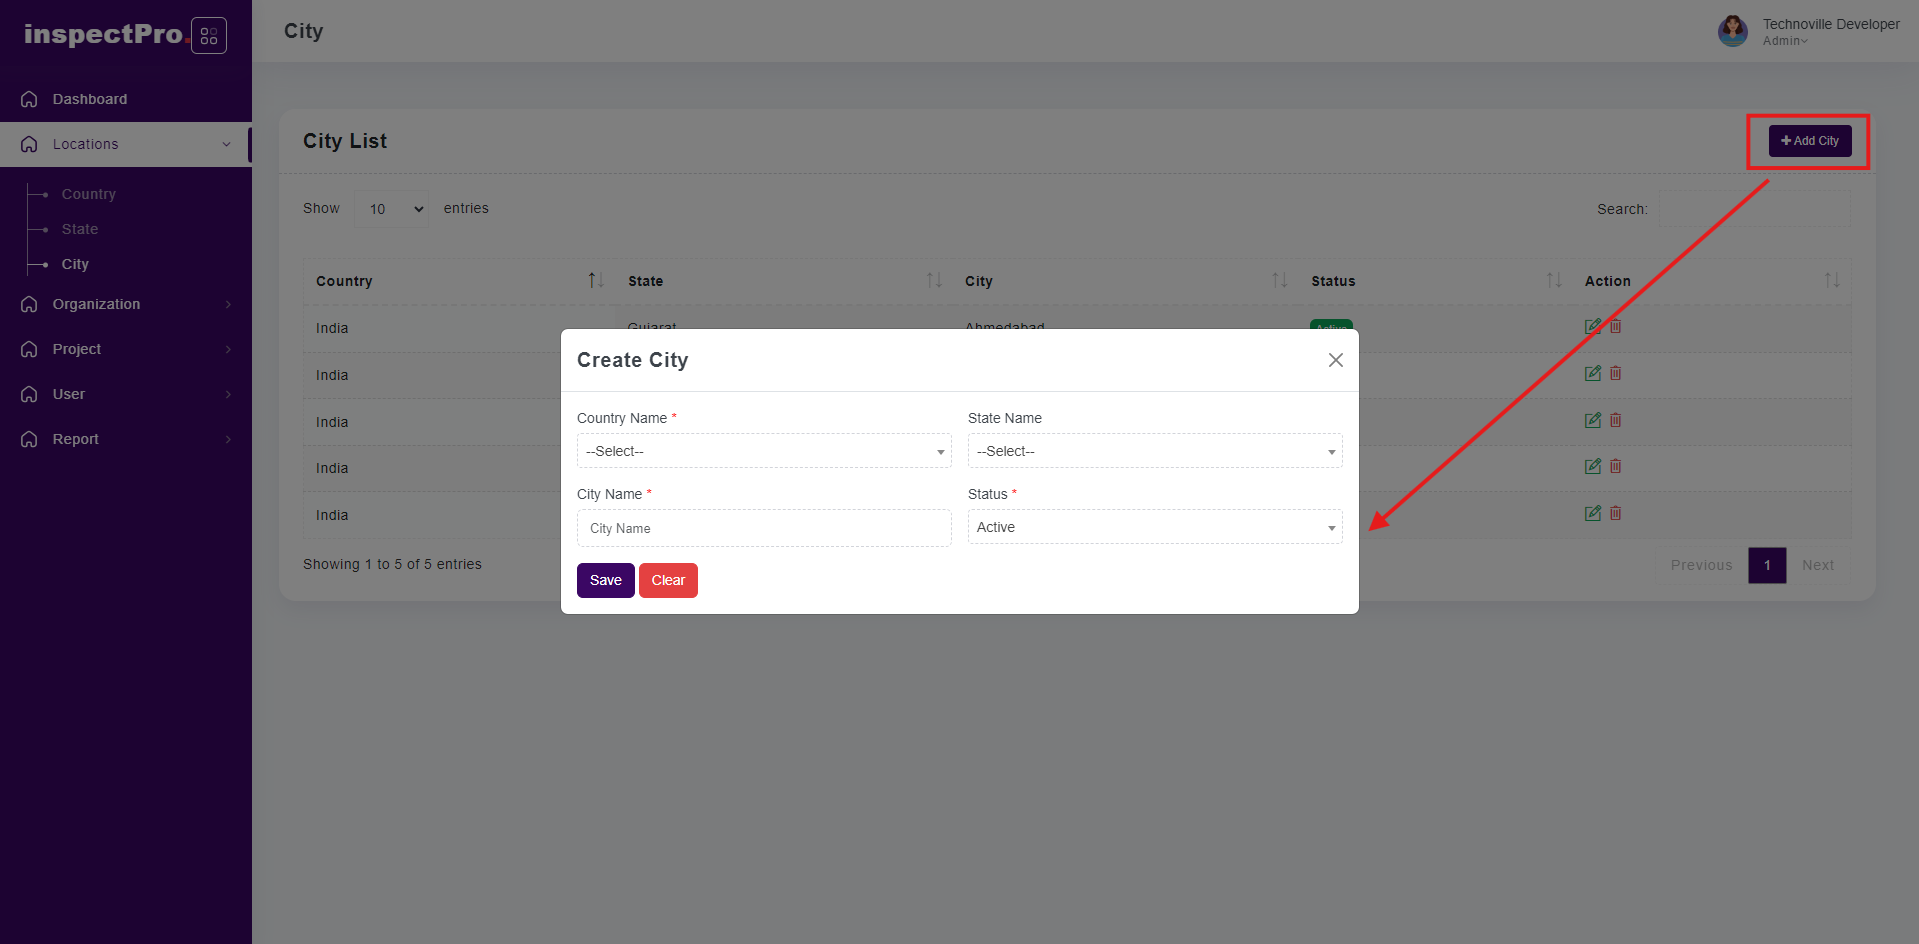
When you click on add button first you need to select country then you need to select state & then you will be able to add city
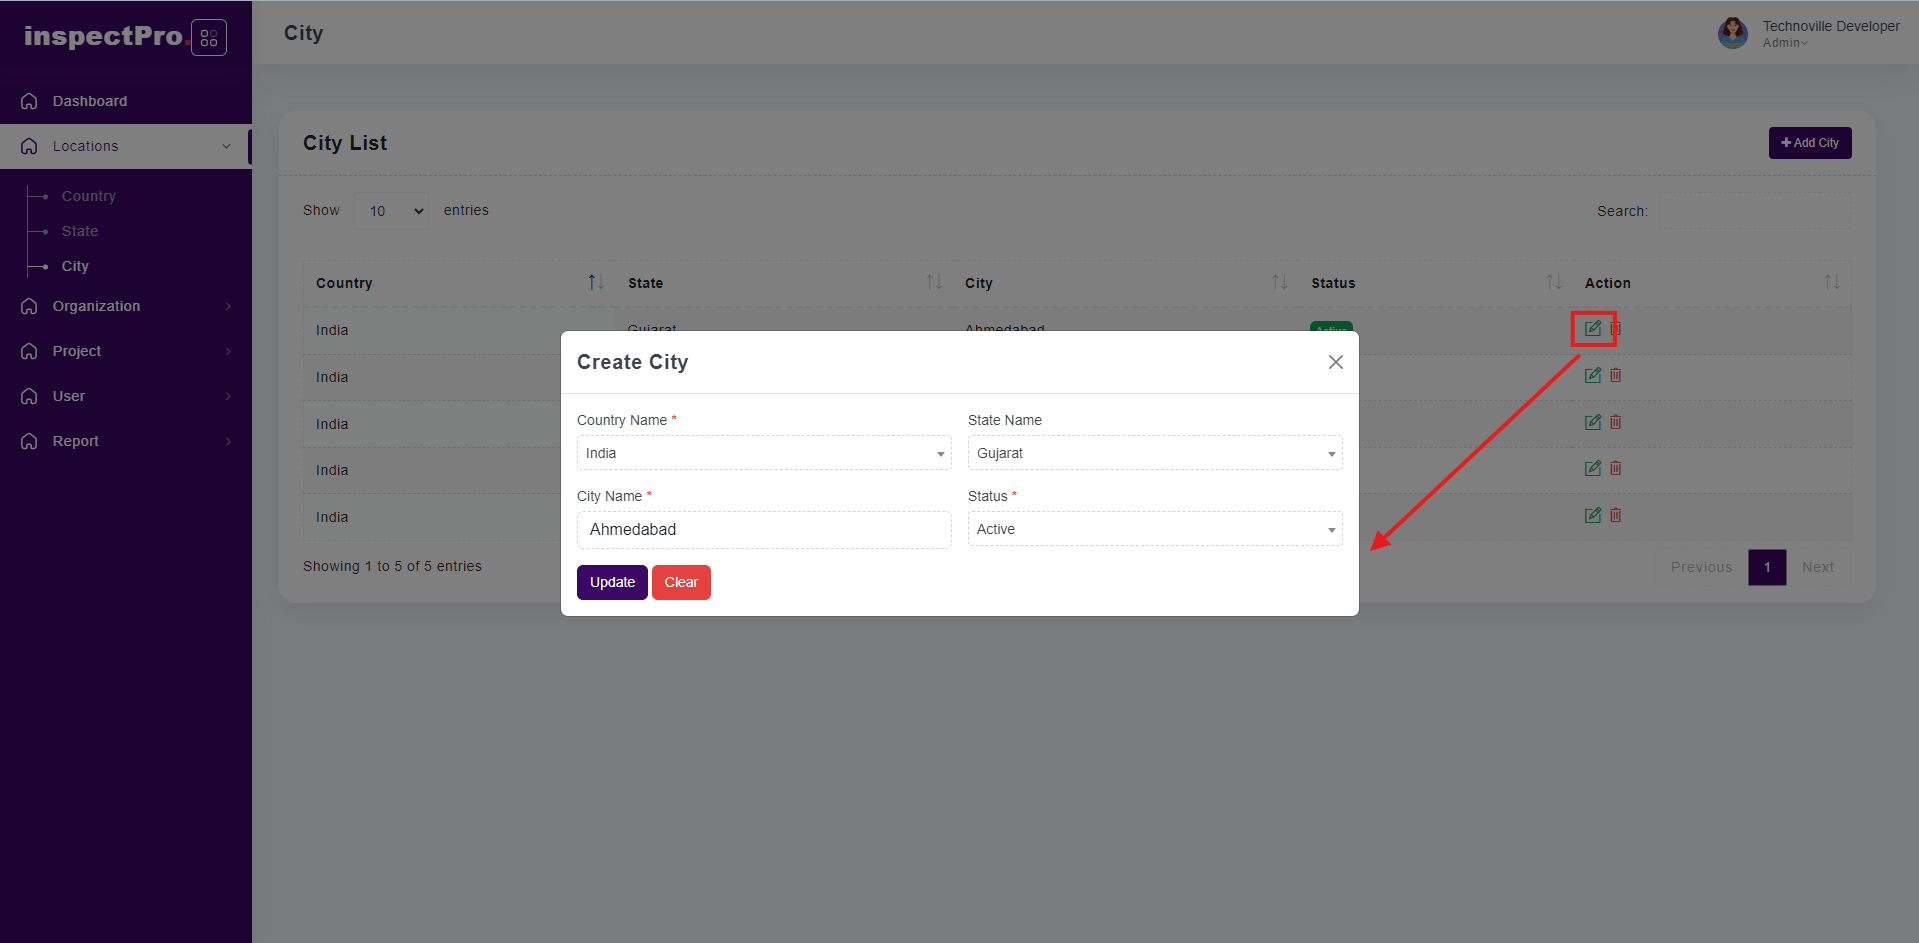
When you click on edit button at that time you will be able to change & update
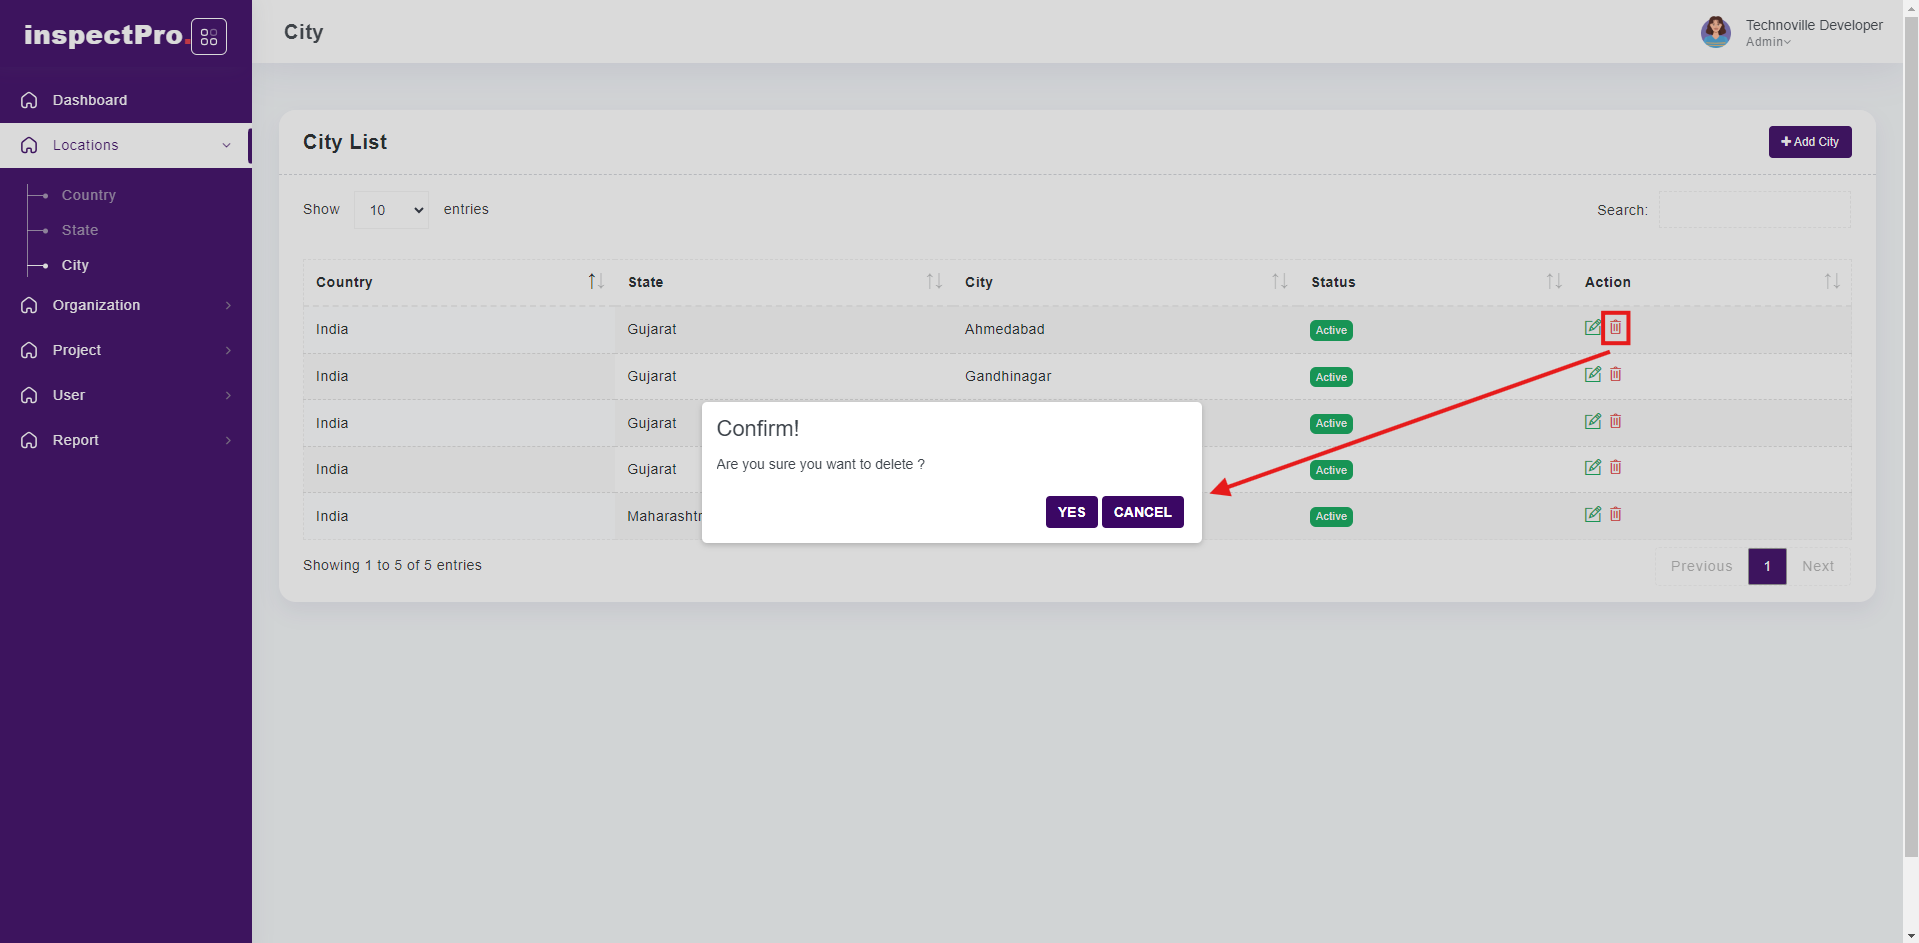
When you click on delete button that particular country is inactive
If you want to active same city then you need to click on edit button and change status from inactive to active and click on save button then that city would be active.
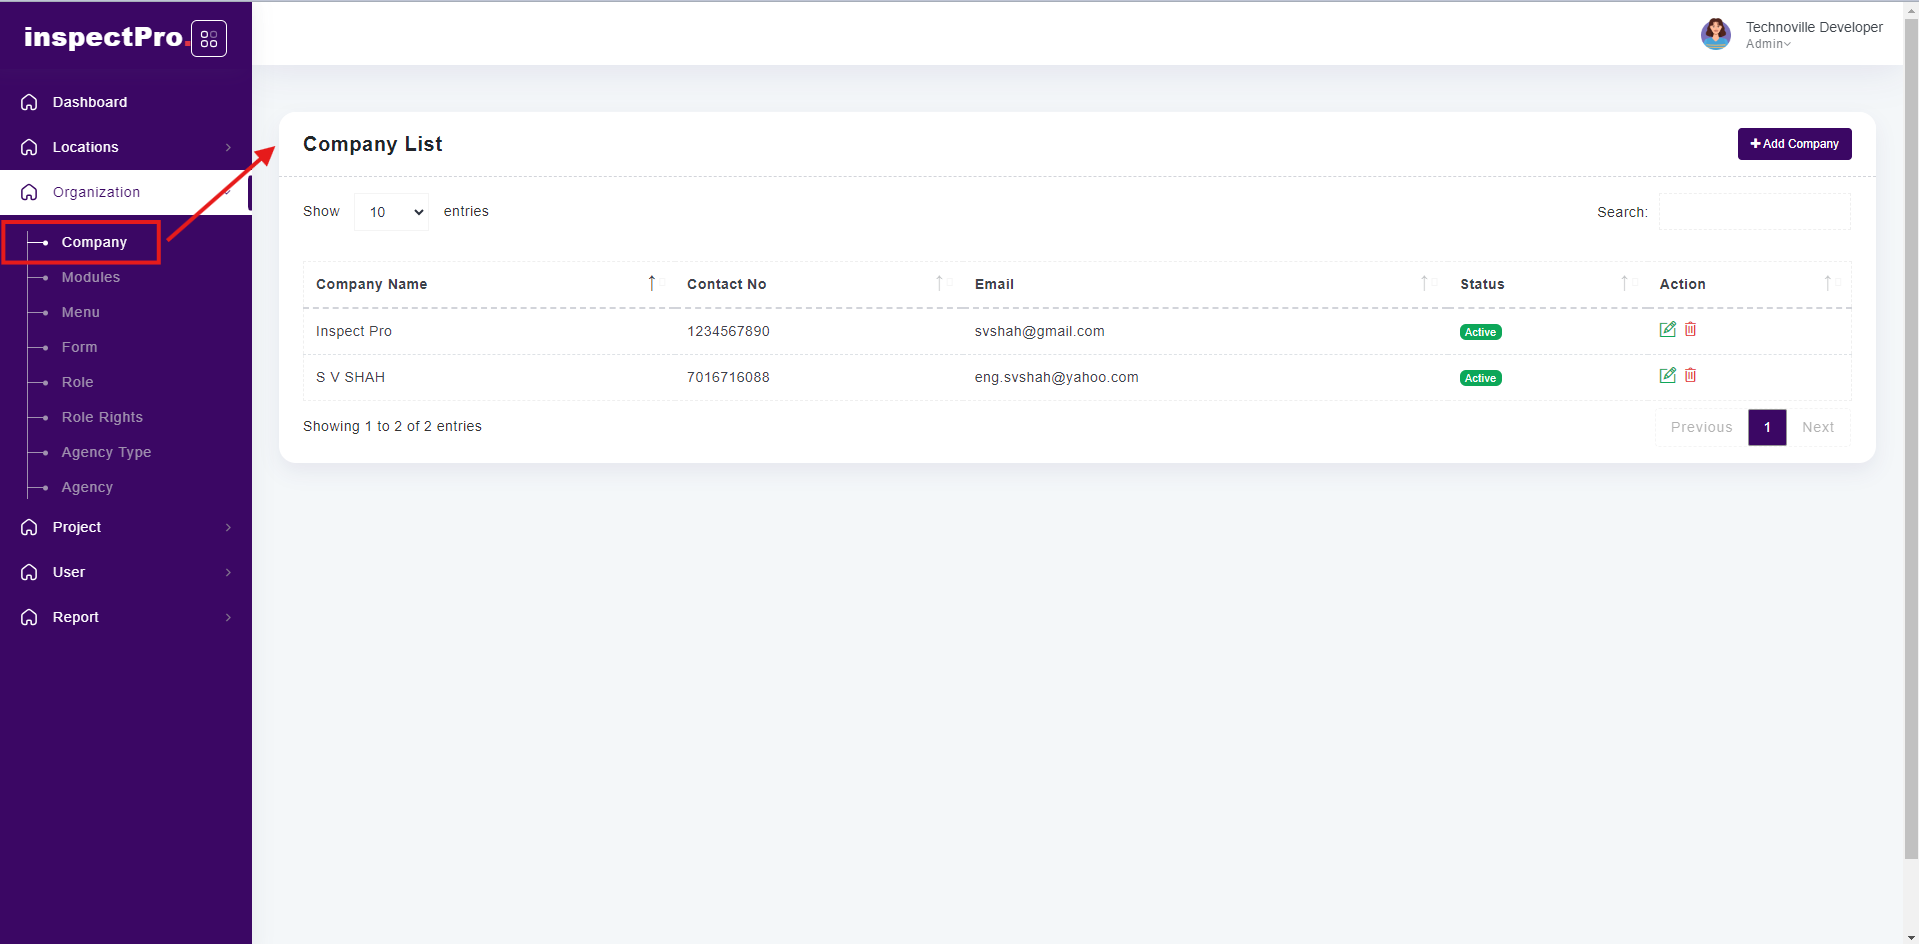
Clicking on "Company" under "Organization" will display the company list.
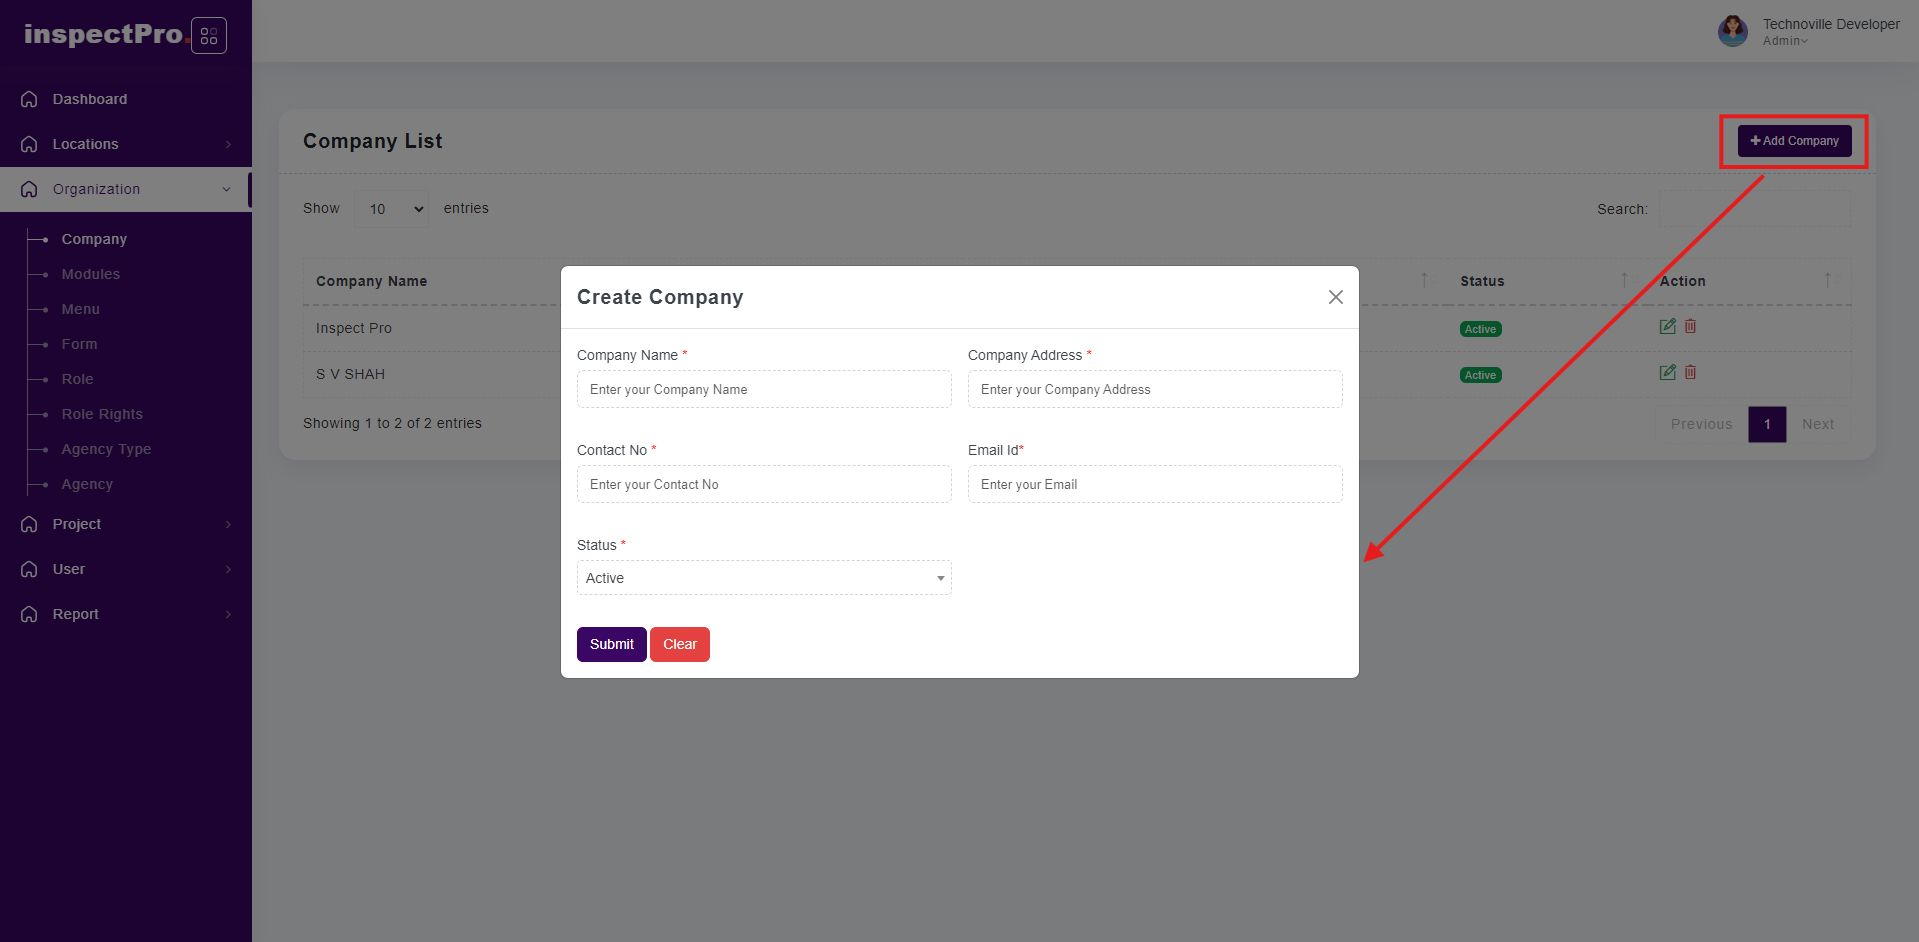
If you want to create new company, click on this button and those fields marked as a red its a compulsory click on submit button company created successfully.
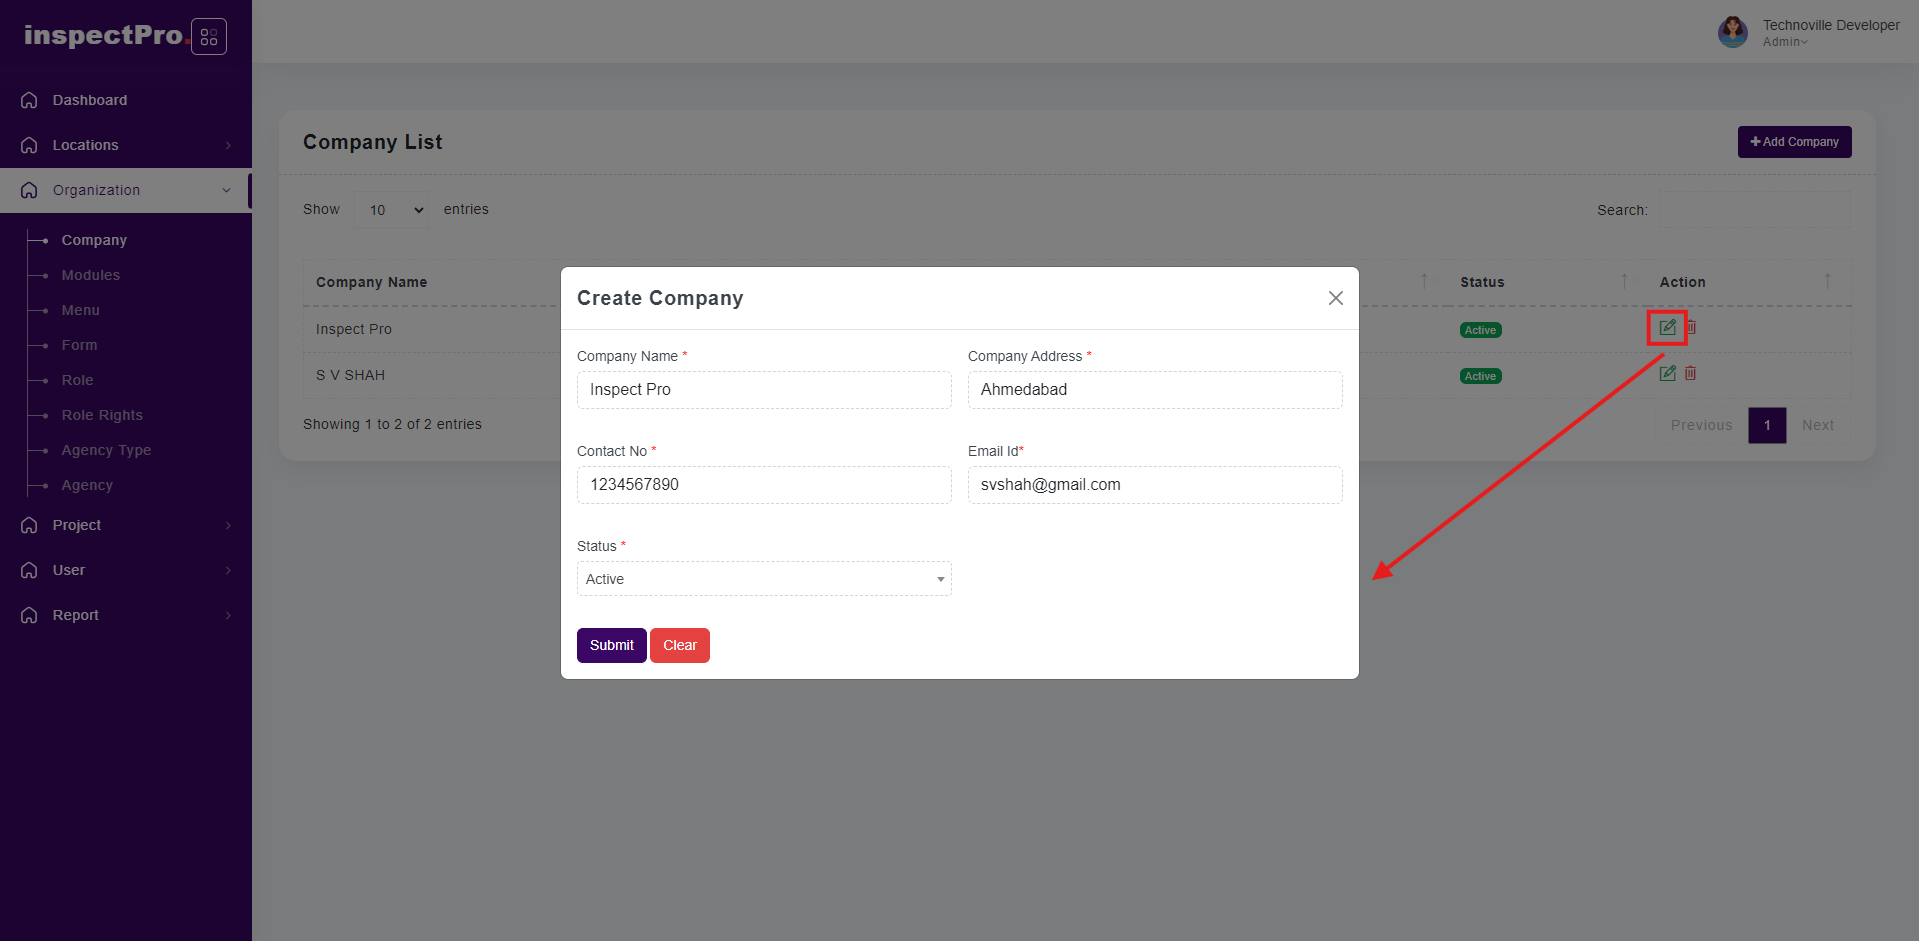
Click on edit button you will be able to change or edit whatever you want and click on update that change will be updated.
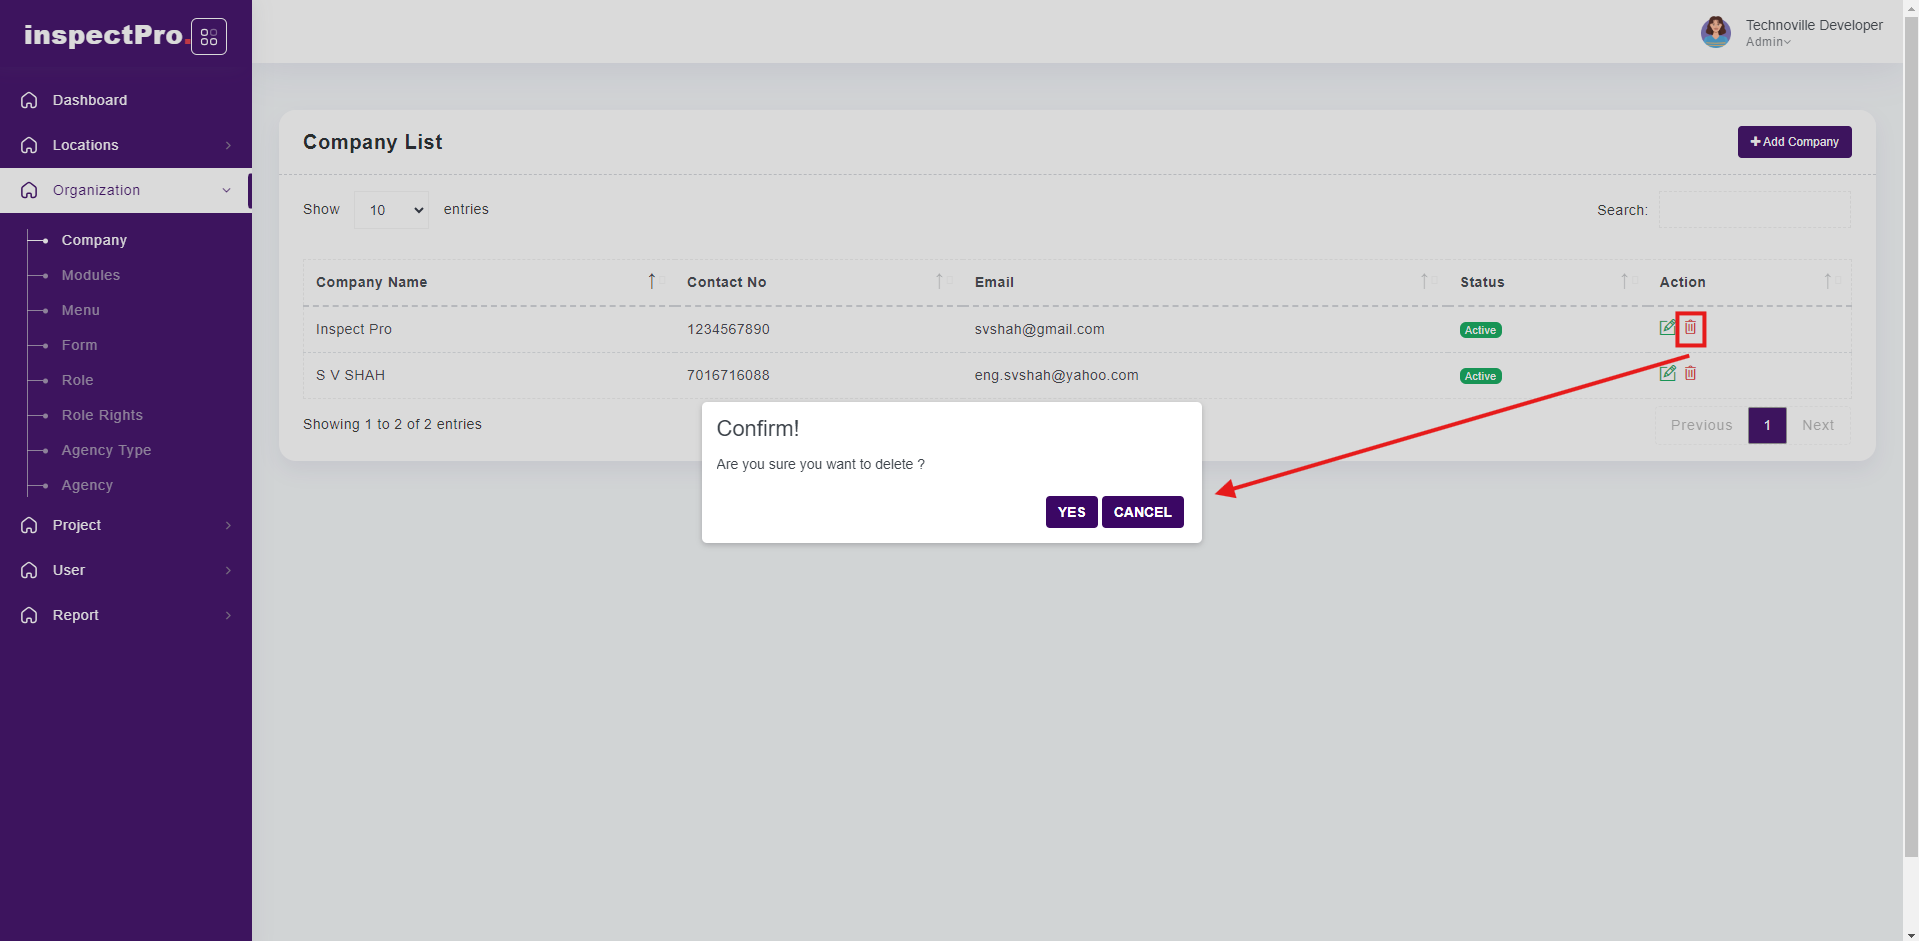
When you click on delete button that particular company is inactive you will be not able to login or any other activities.

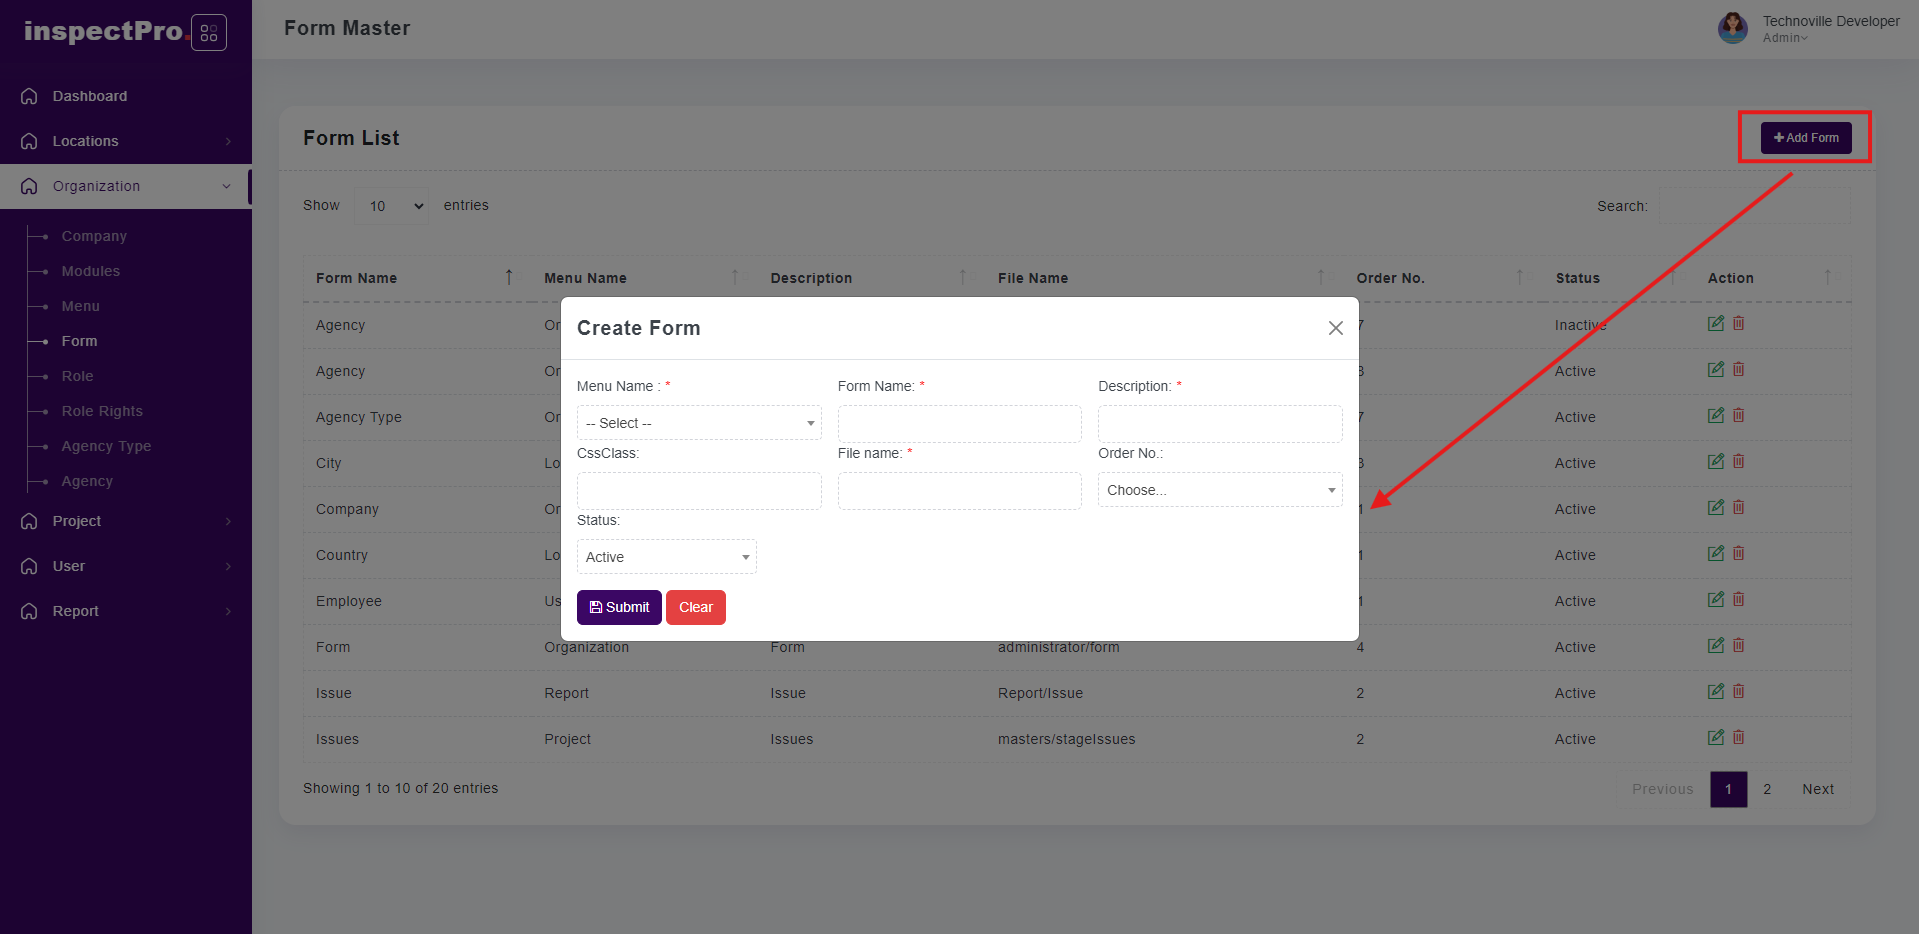
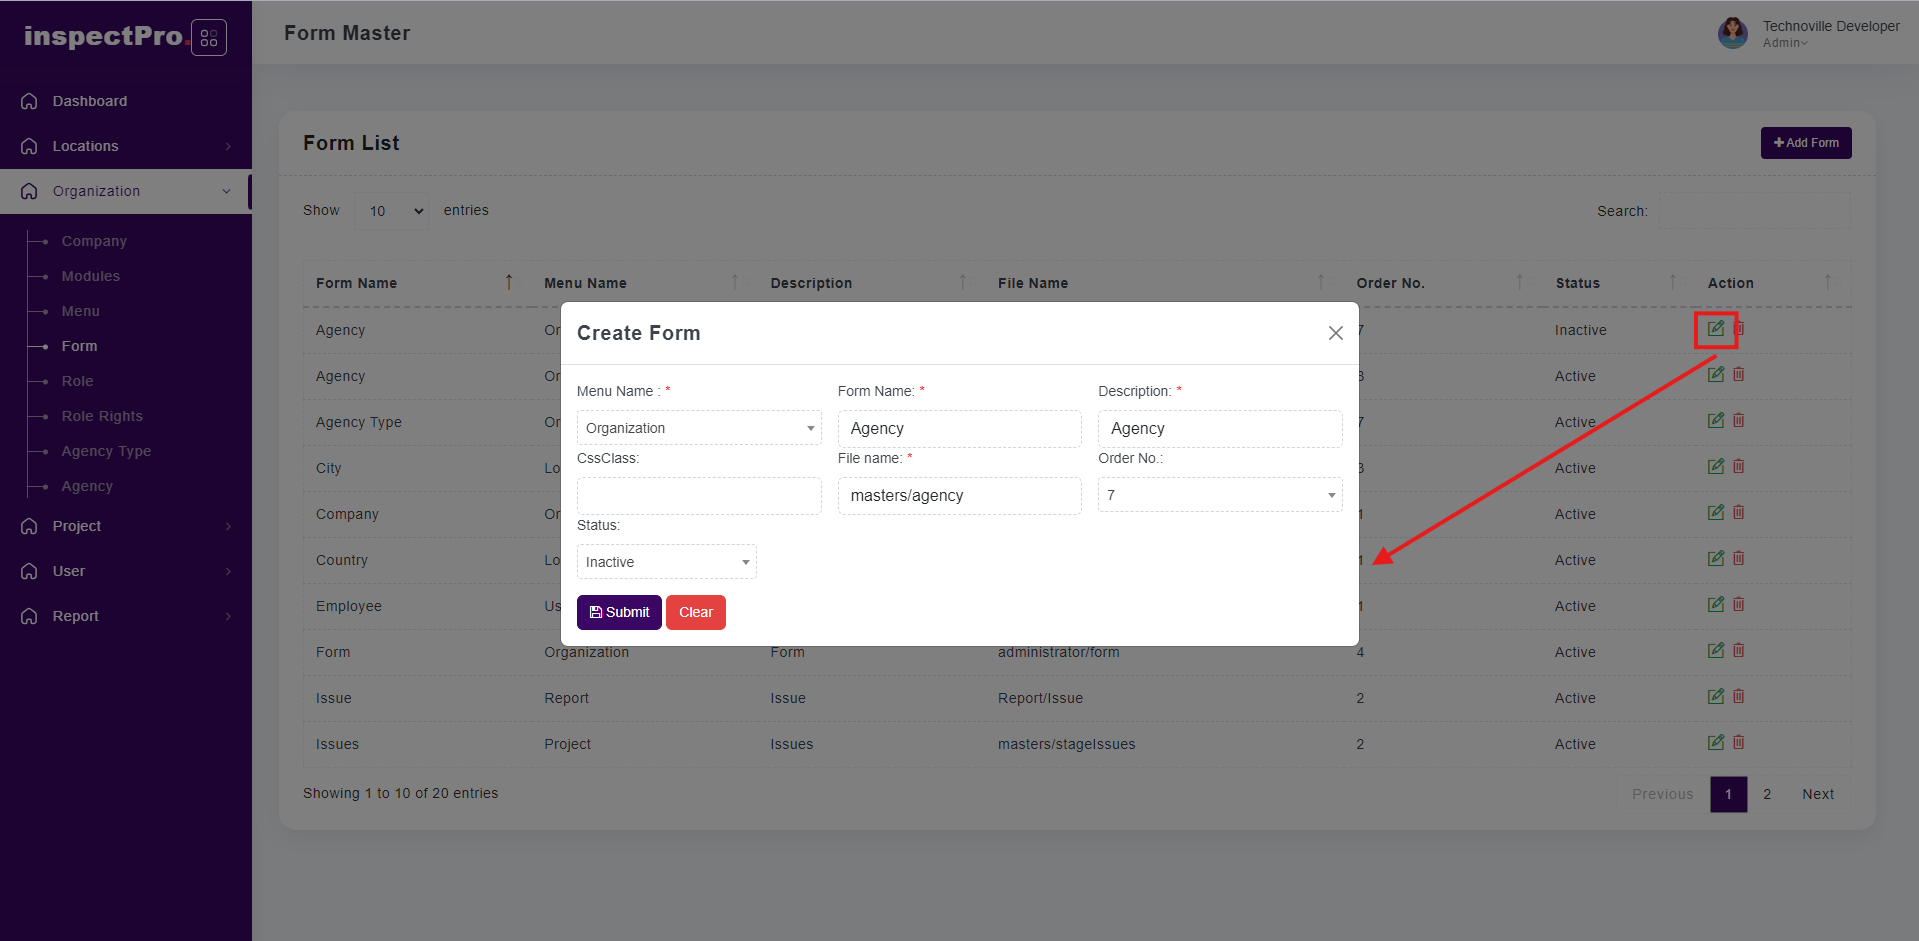
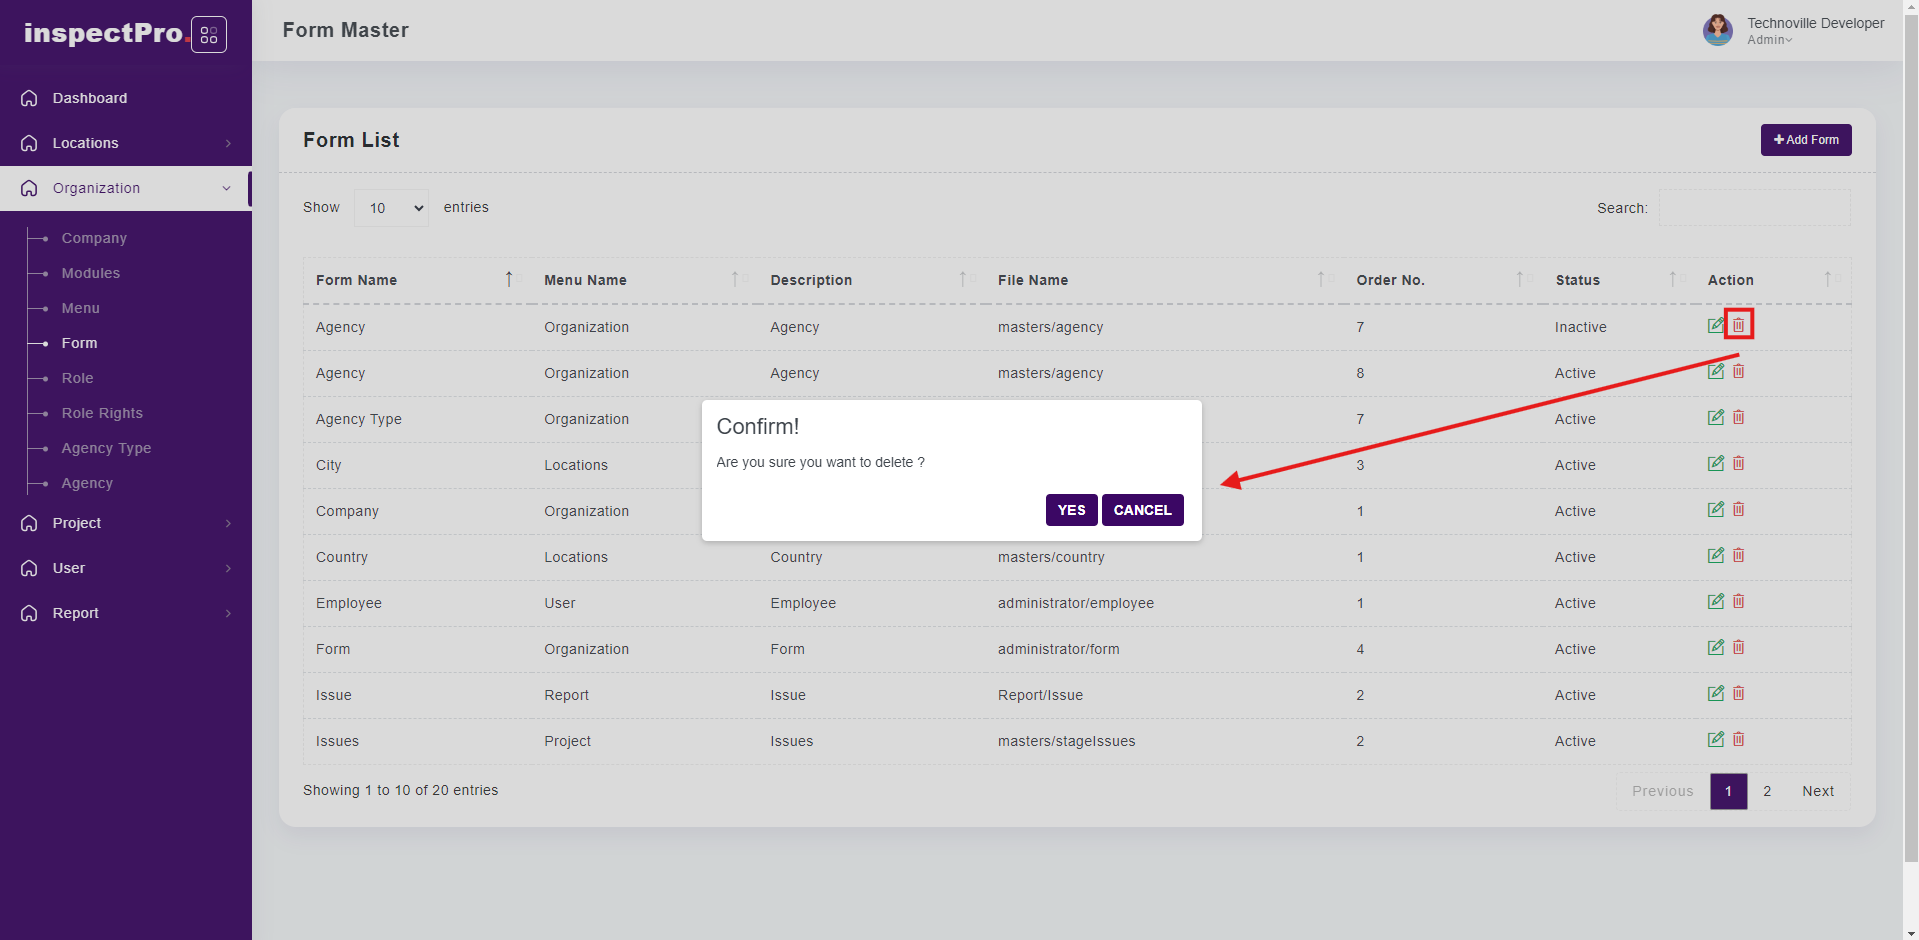
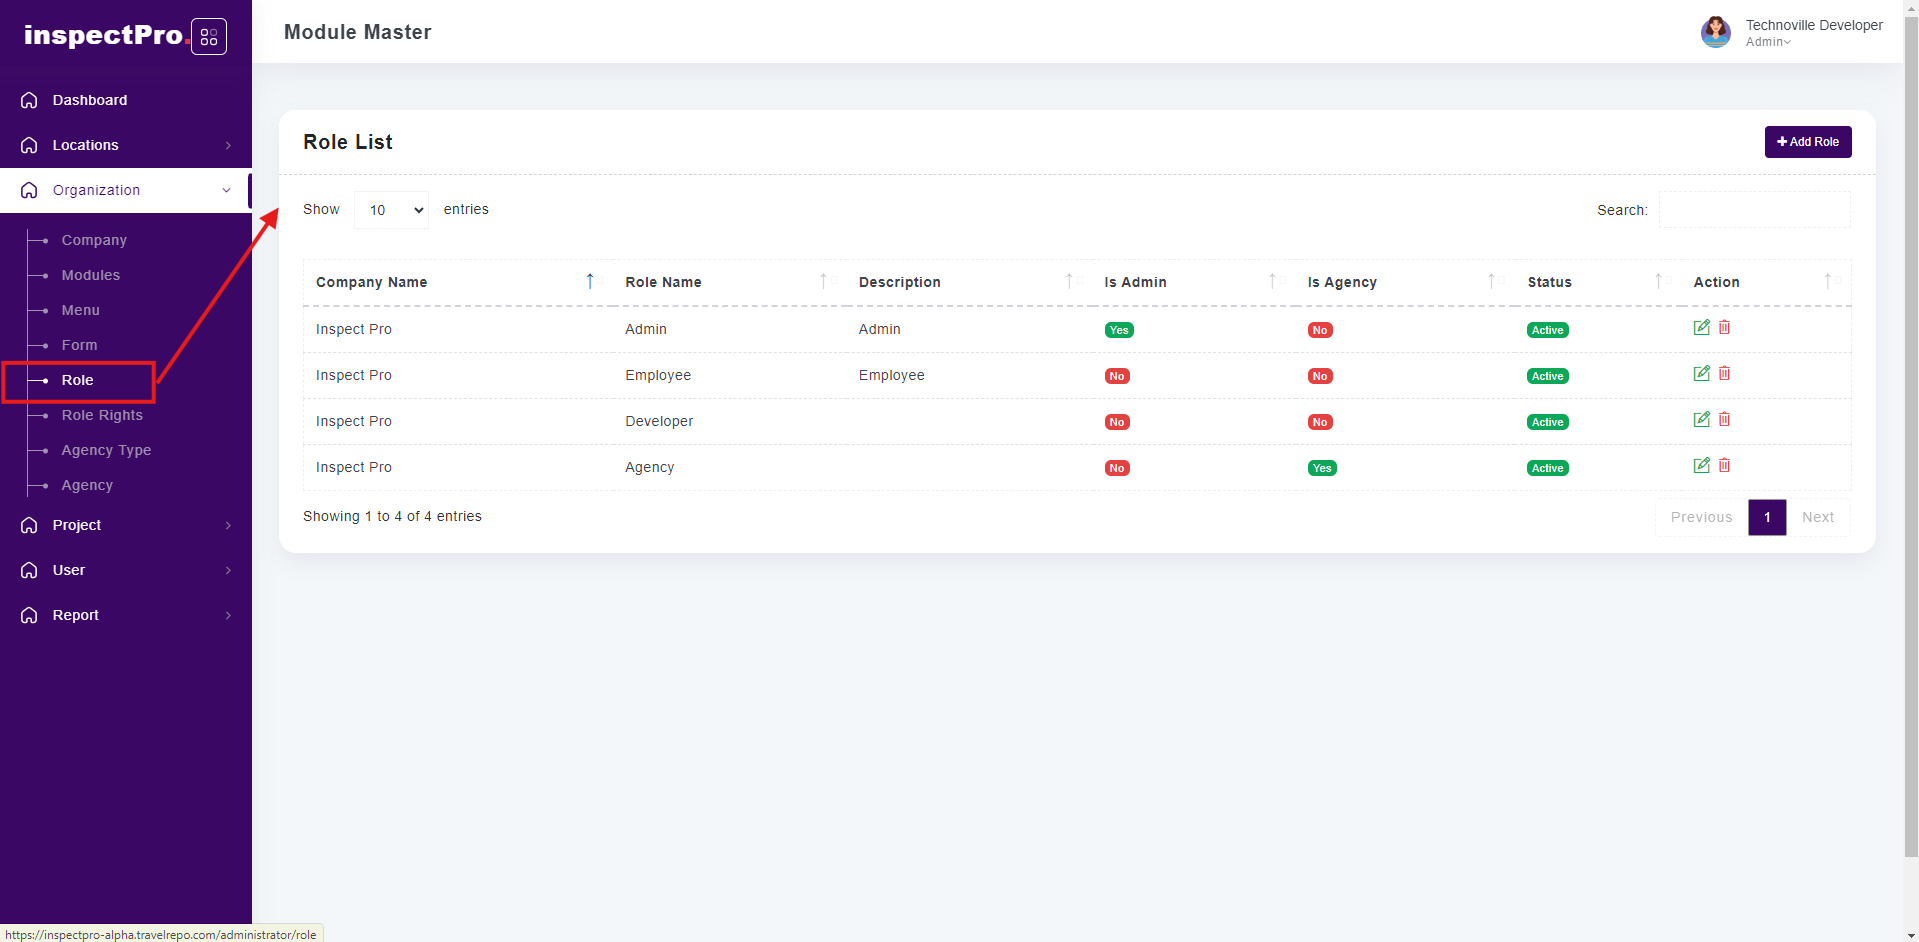
Clicking on "Role" under "Organization" will display the role list.
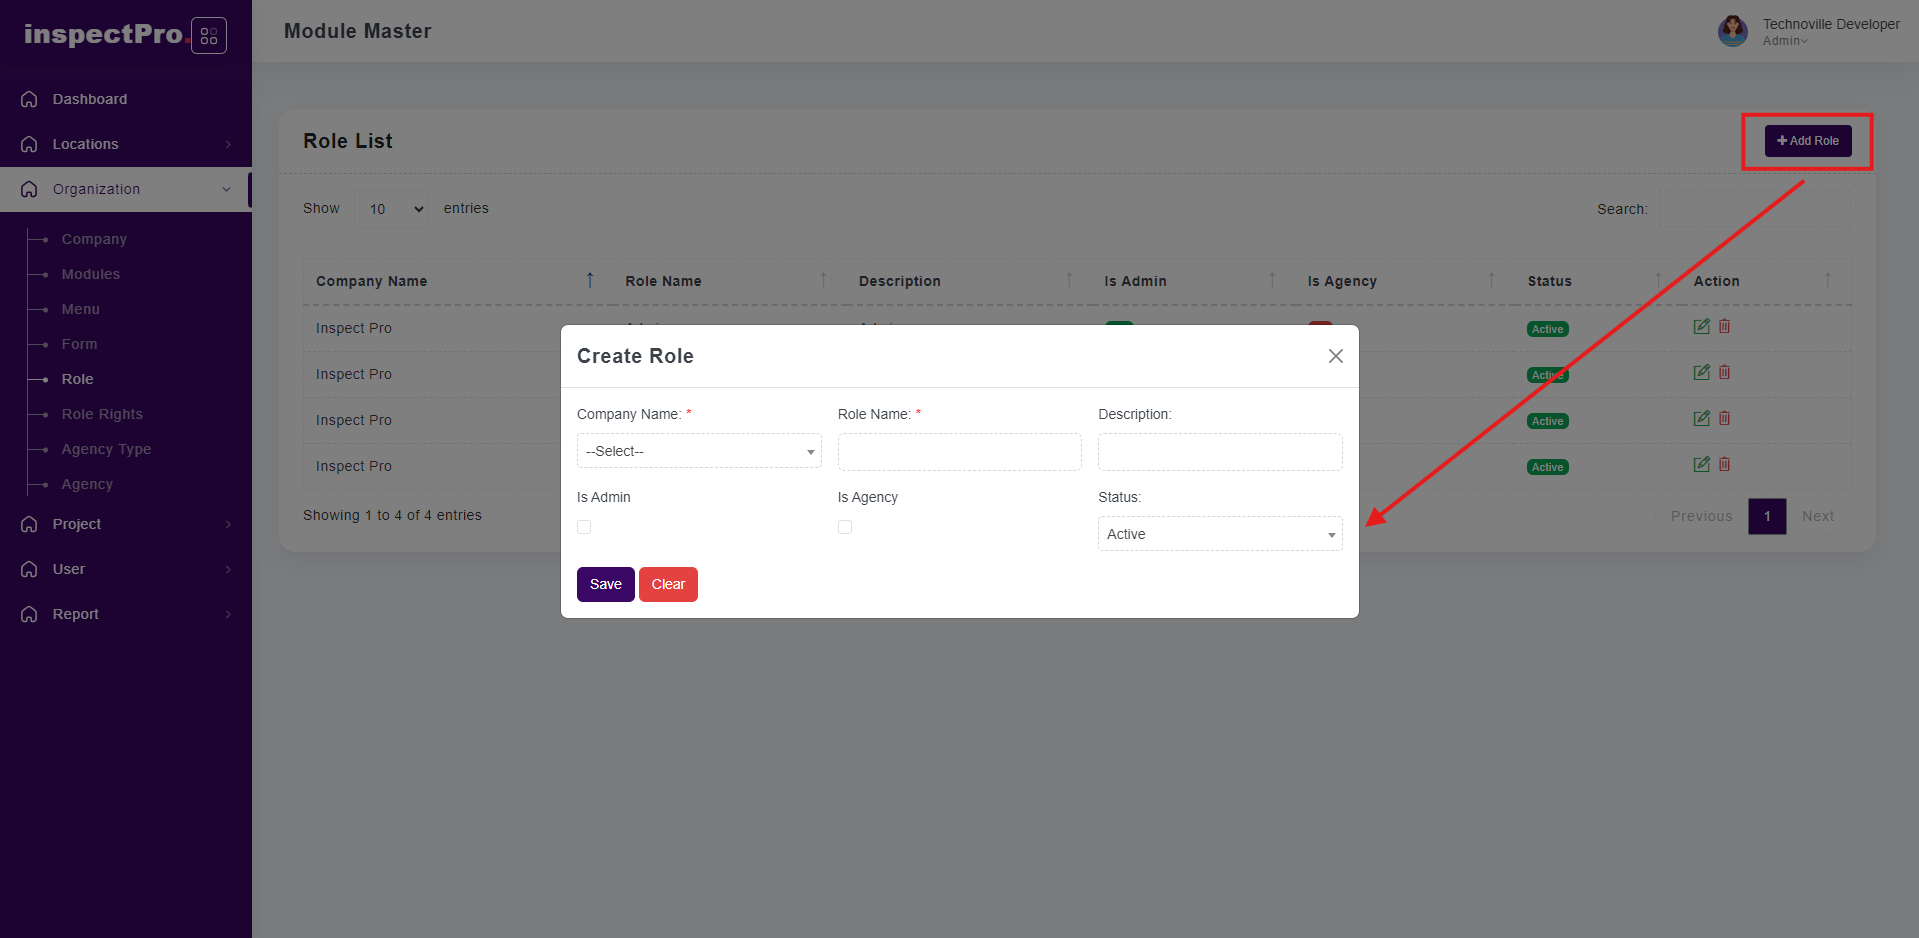
You can add new role when you click on add role button.

Click on edit button you will be able to change or edit on that particular role.
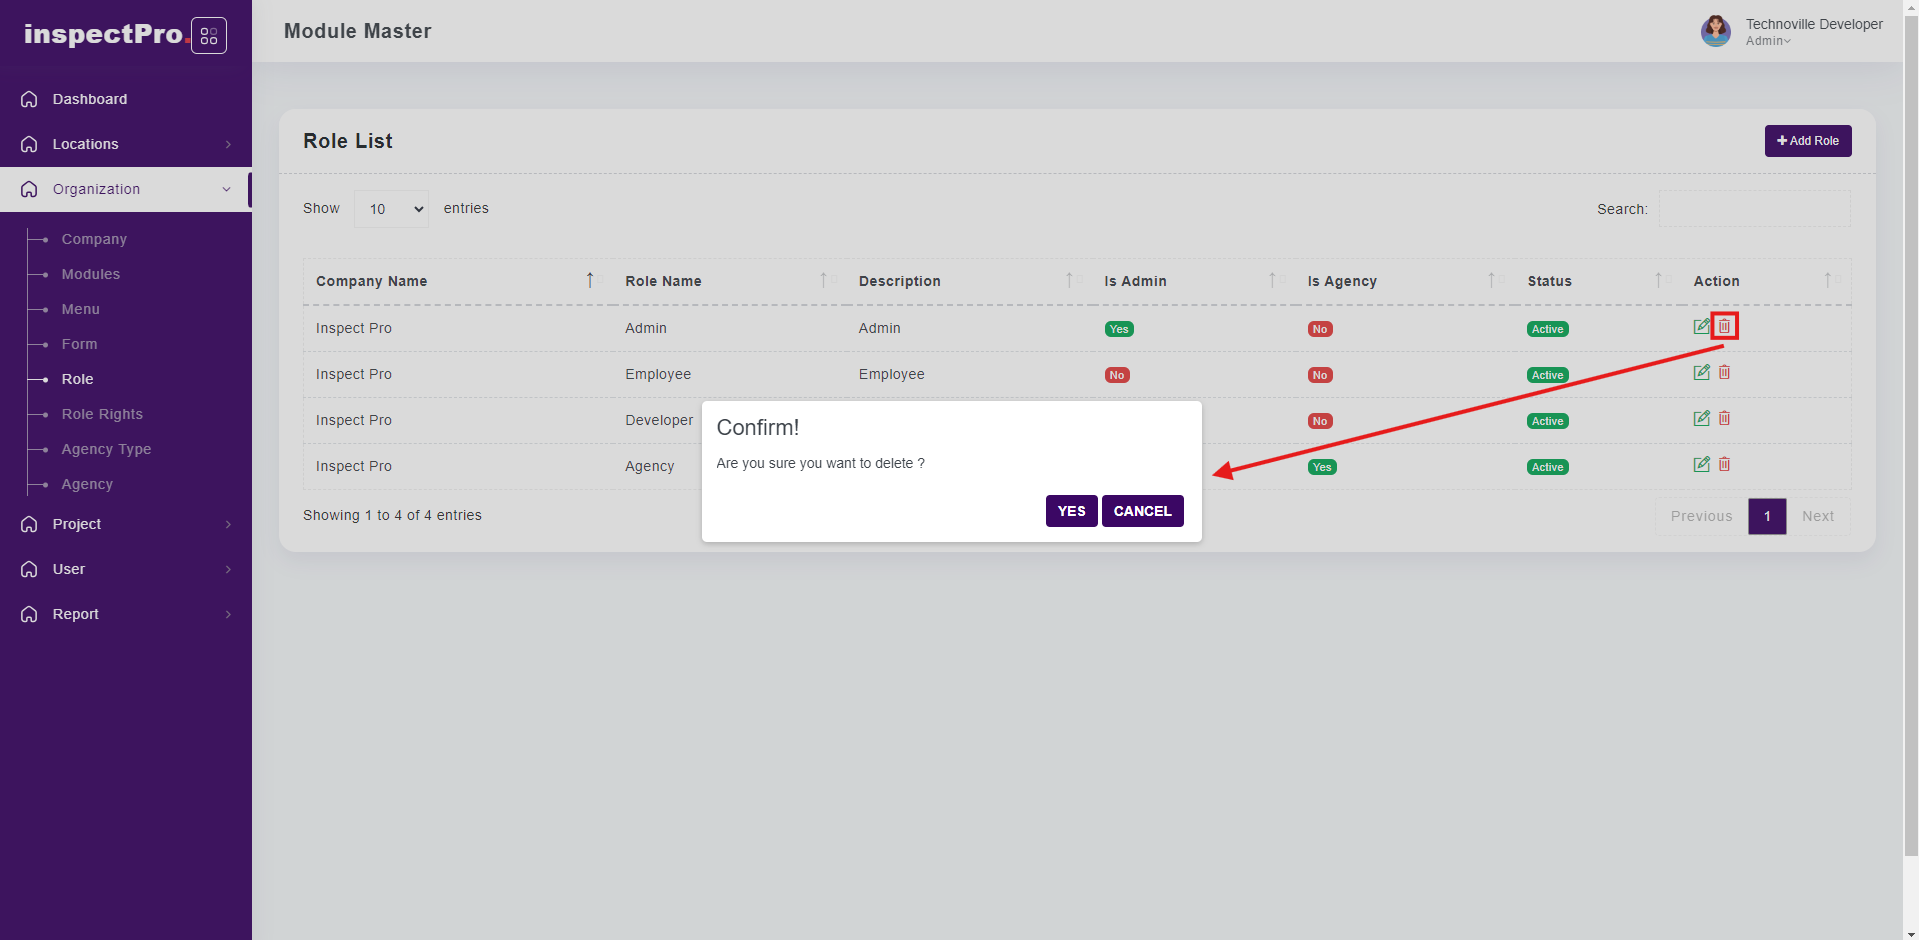
Click on delete button that role status should be inactive.
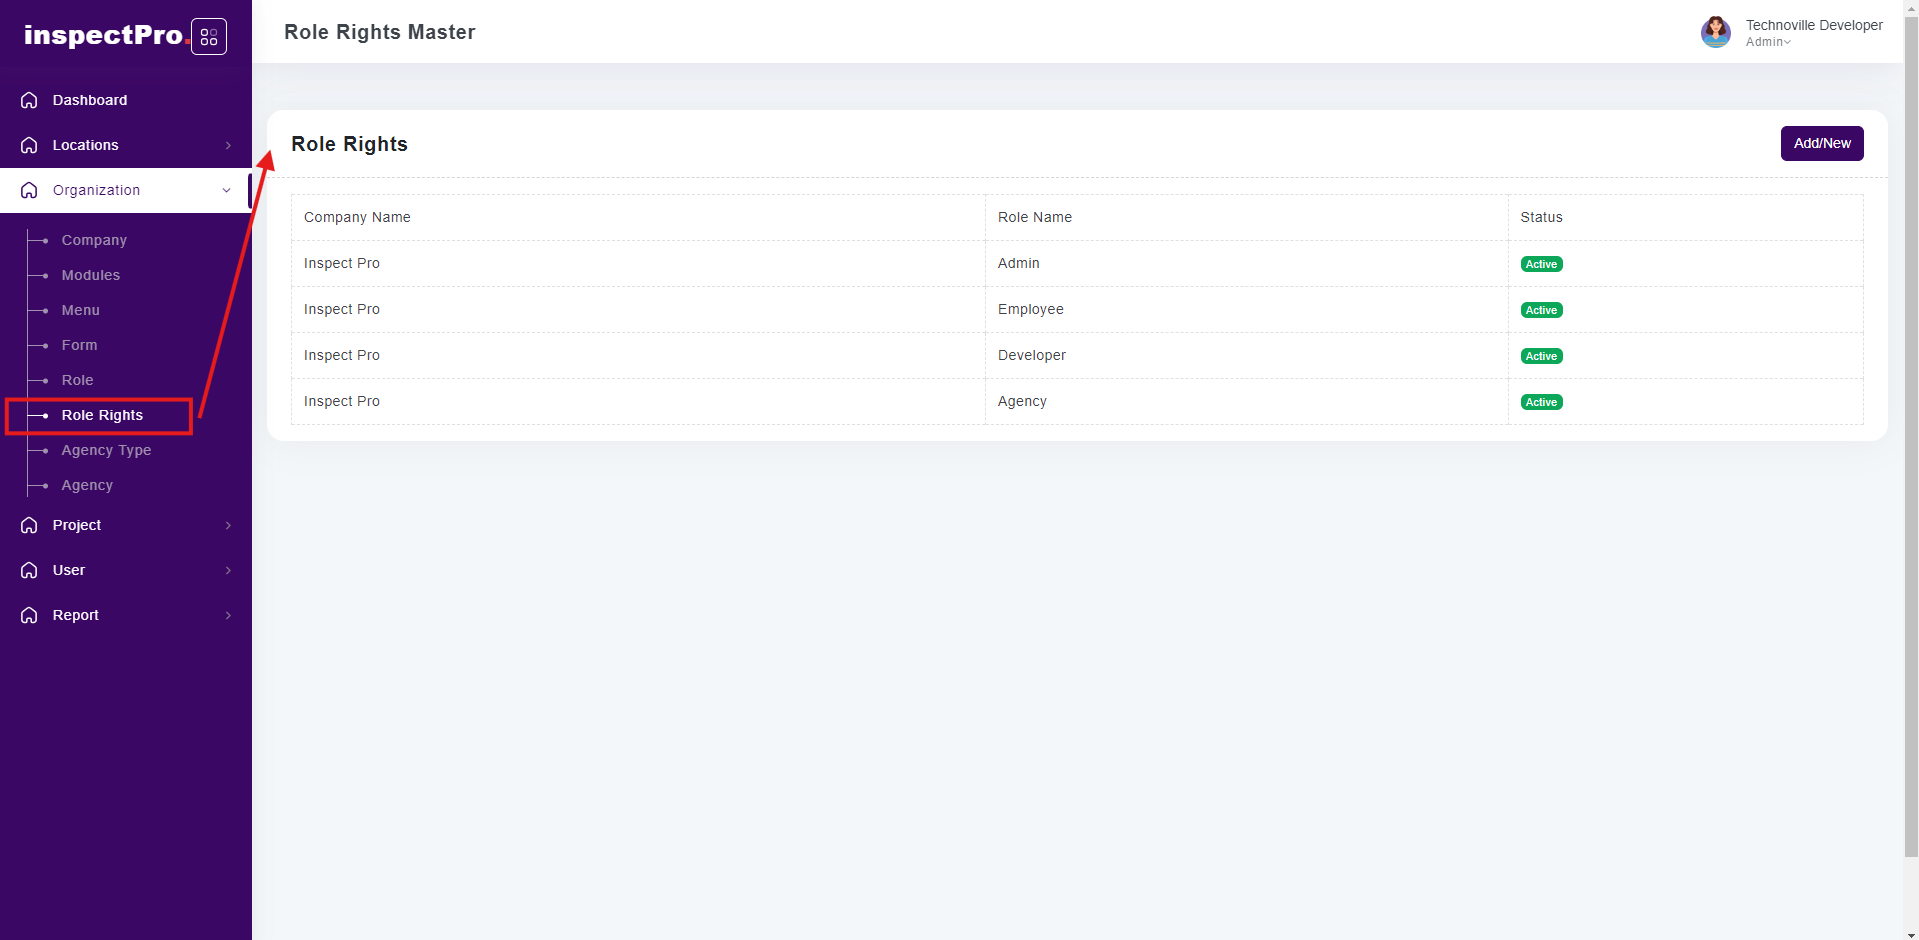
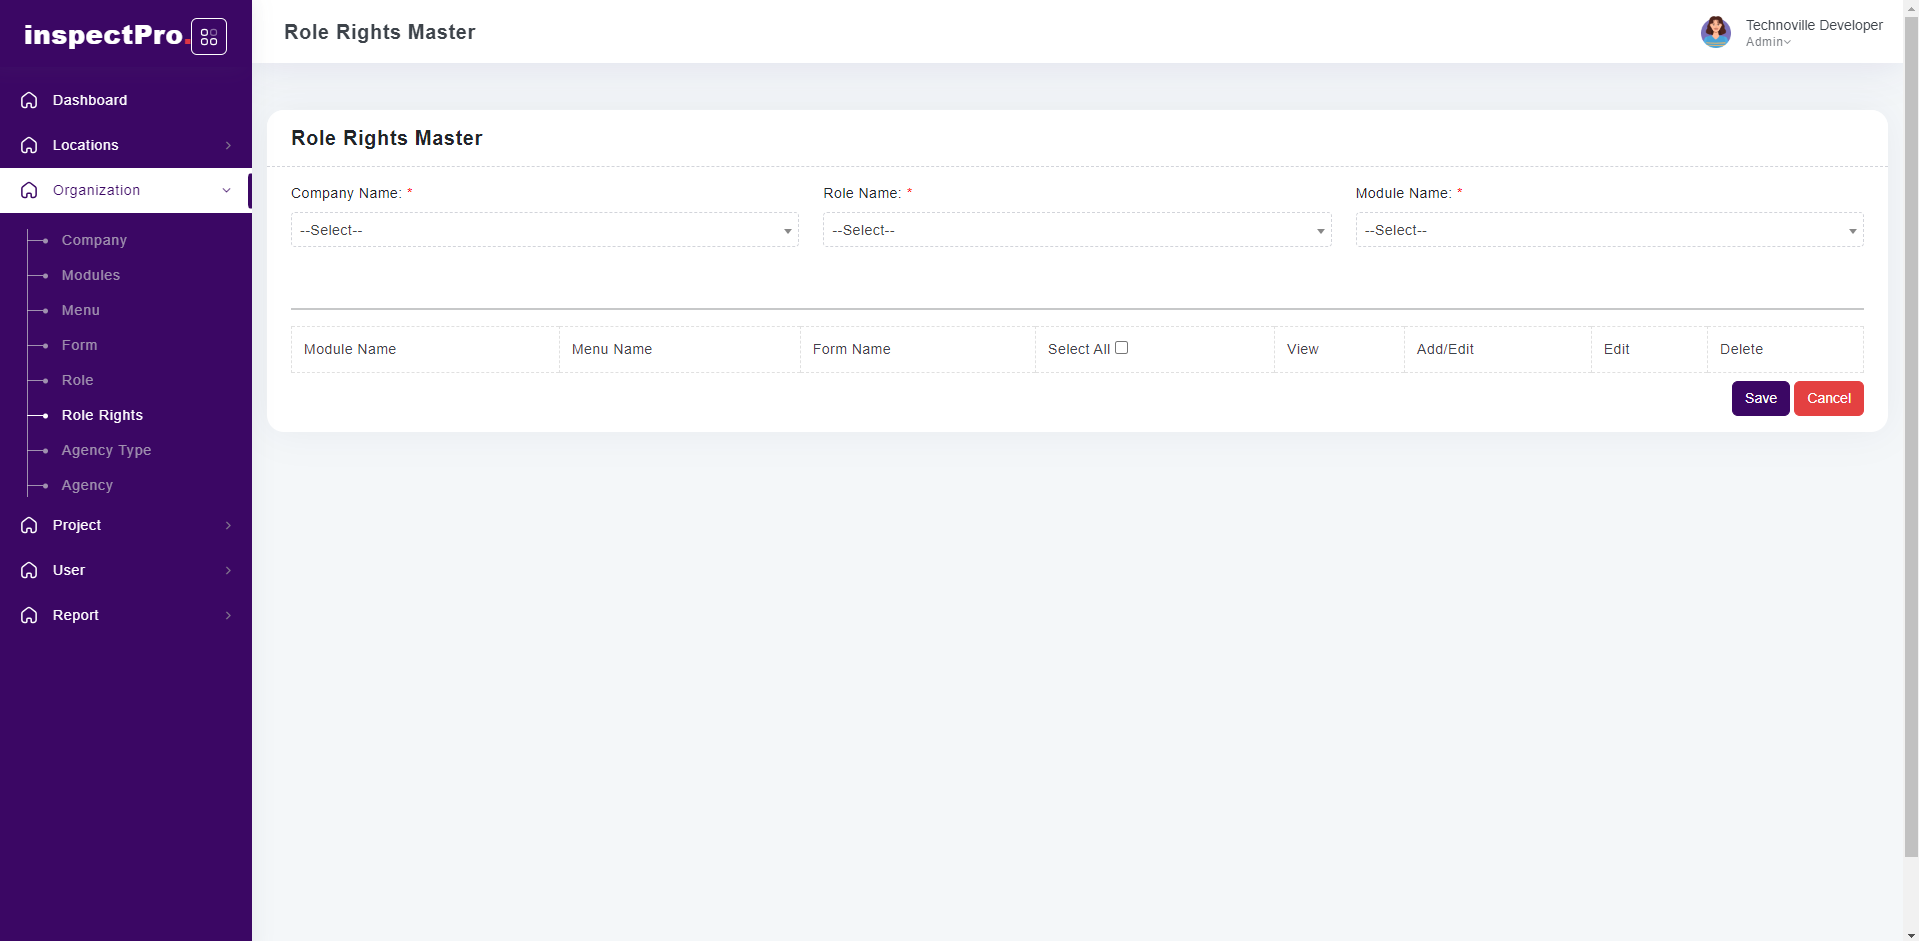
Clicking on "Role Rights" under "Organization" will display the role rights list.
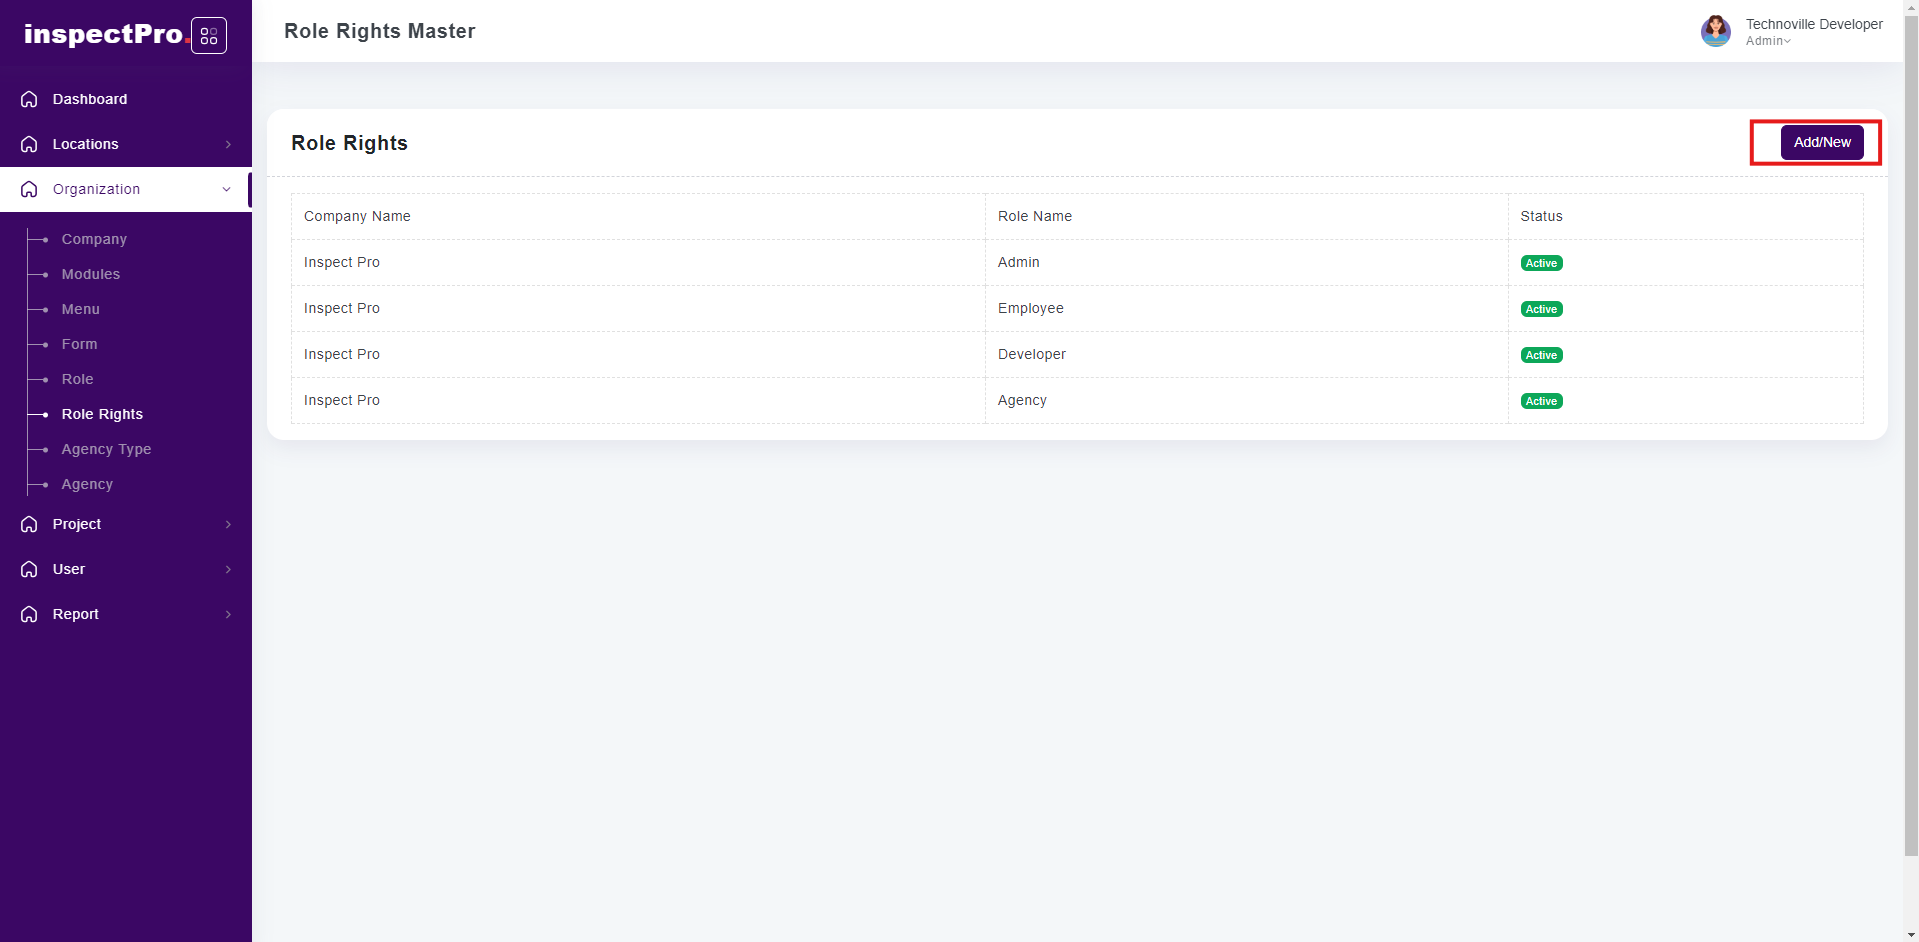
When you click on add new button at that time first you need to select company then select role name & then select module name according to module which menu you want to shown to that particular employee that will be working from here only.
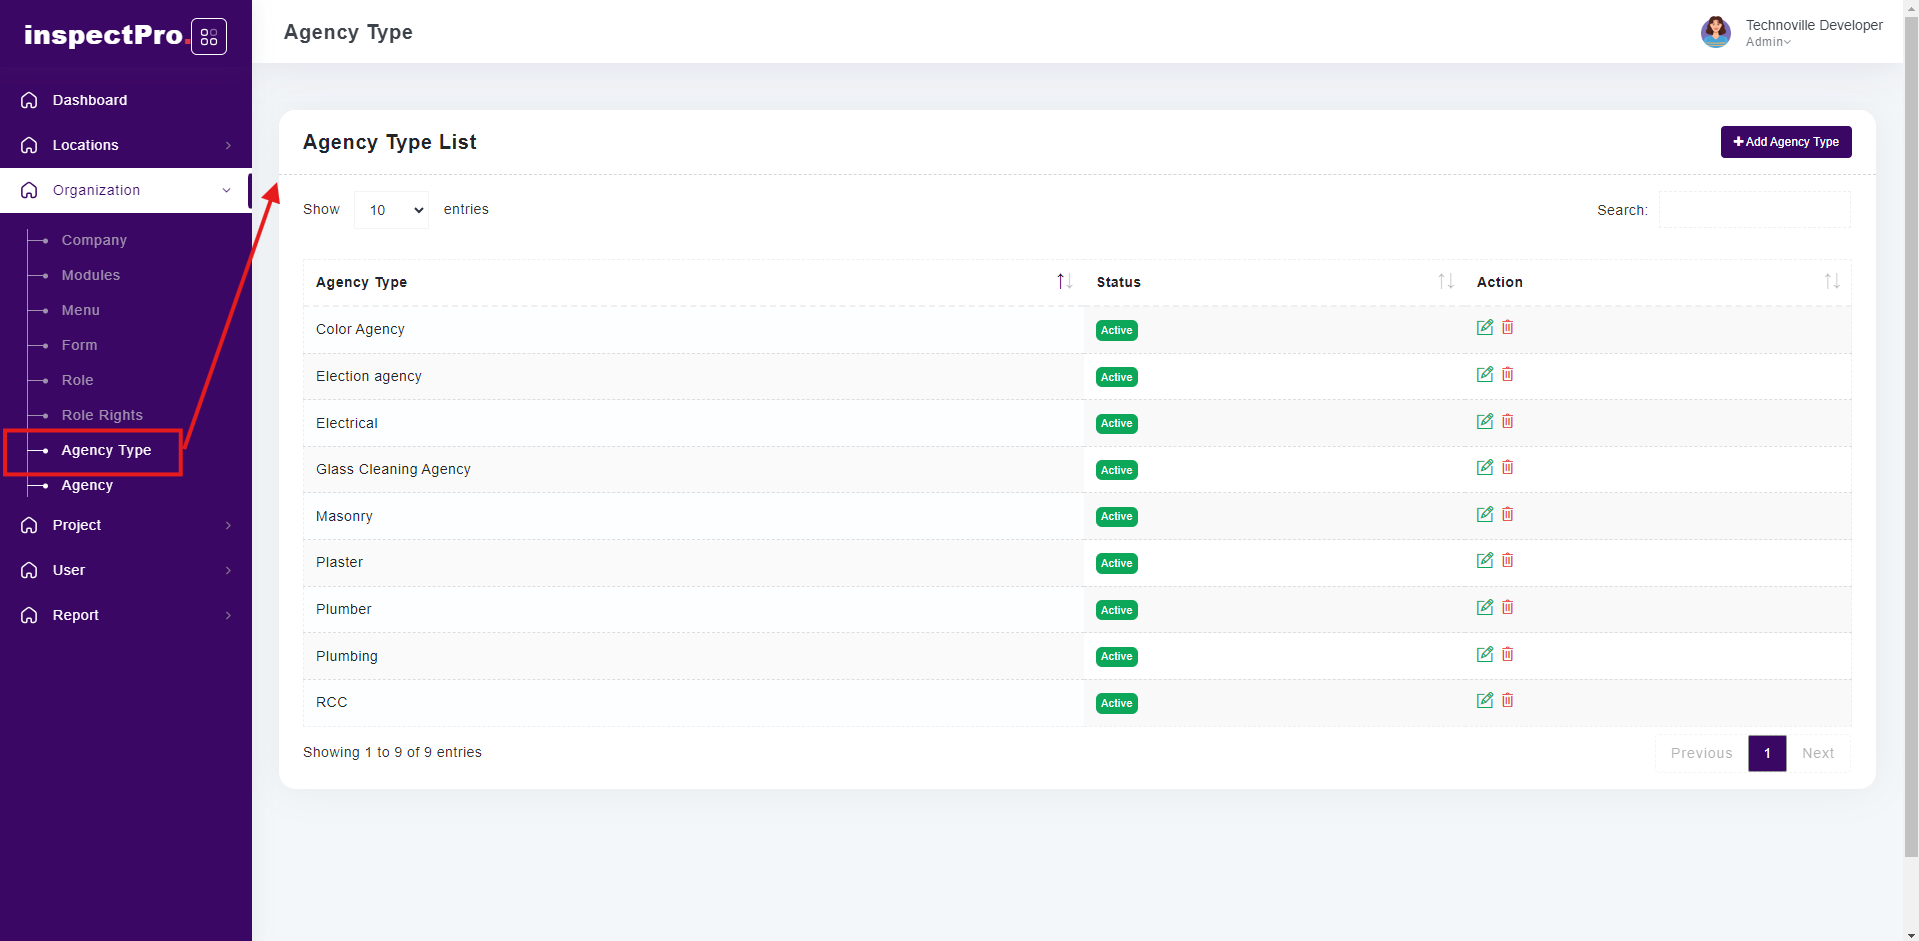
Clicking on "Agency Type" under "Organization" will display the agency type list.
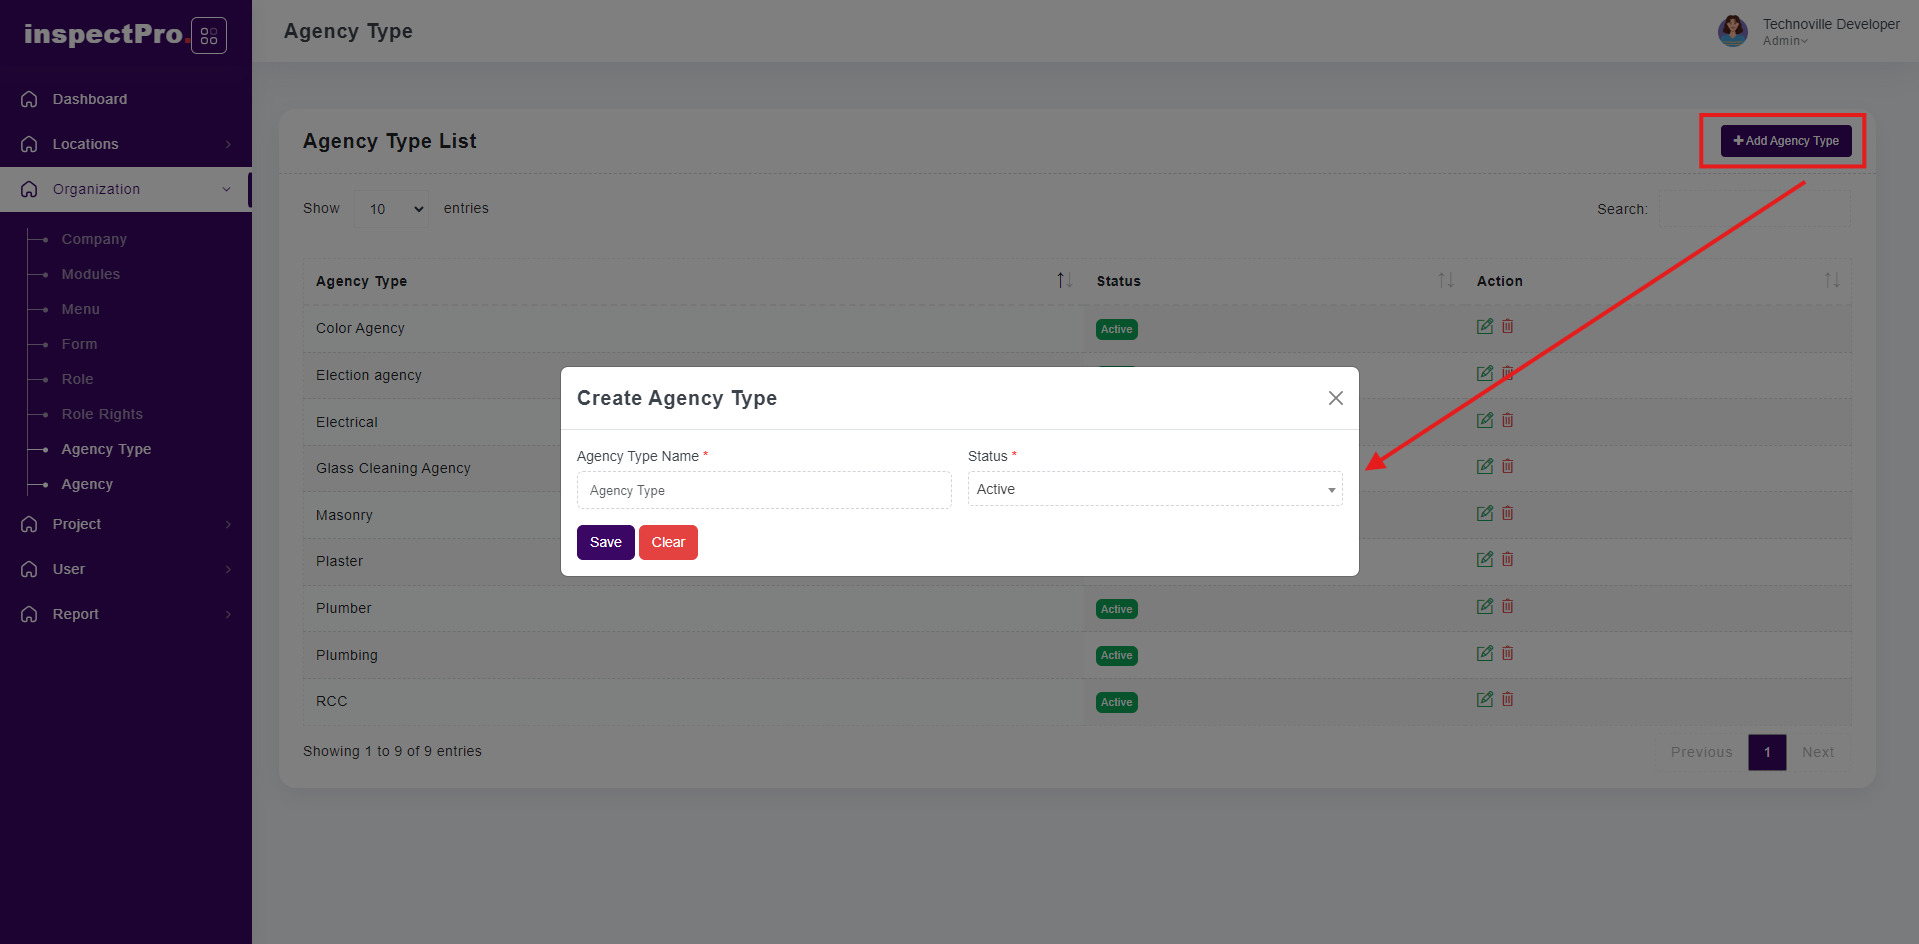
When you click on add button at that time you just need to add only agency type name and click on save button then agency type created successfully
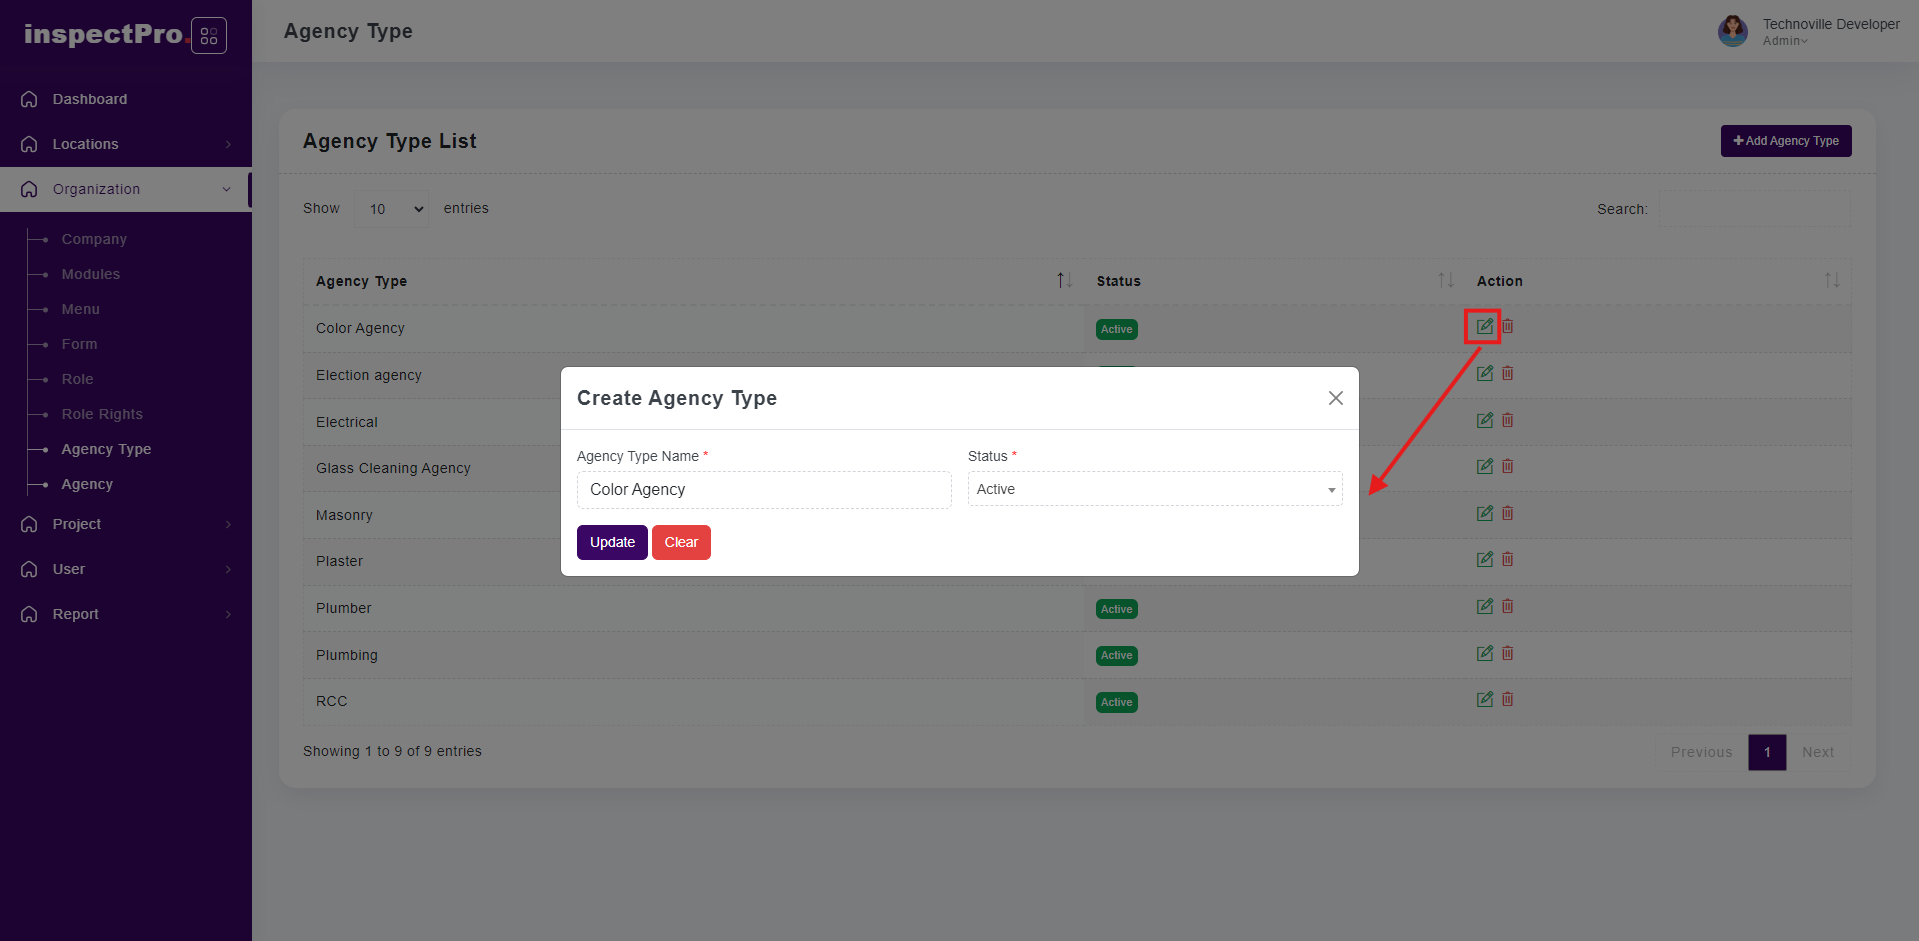
When you click on edit button at that time you will be able to change the name & update the same
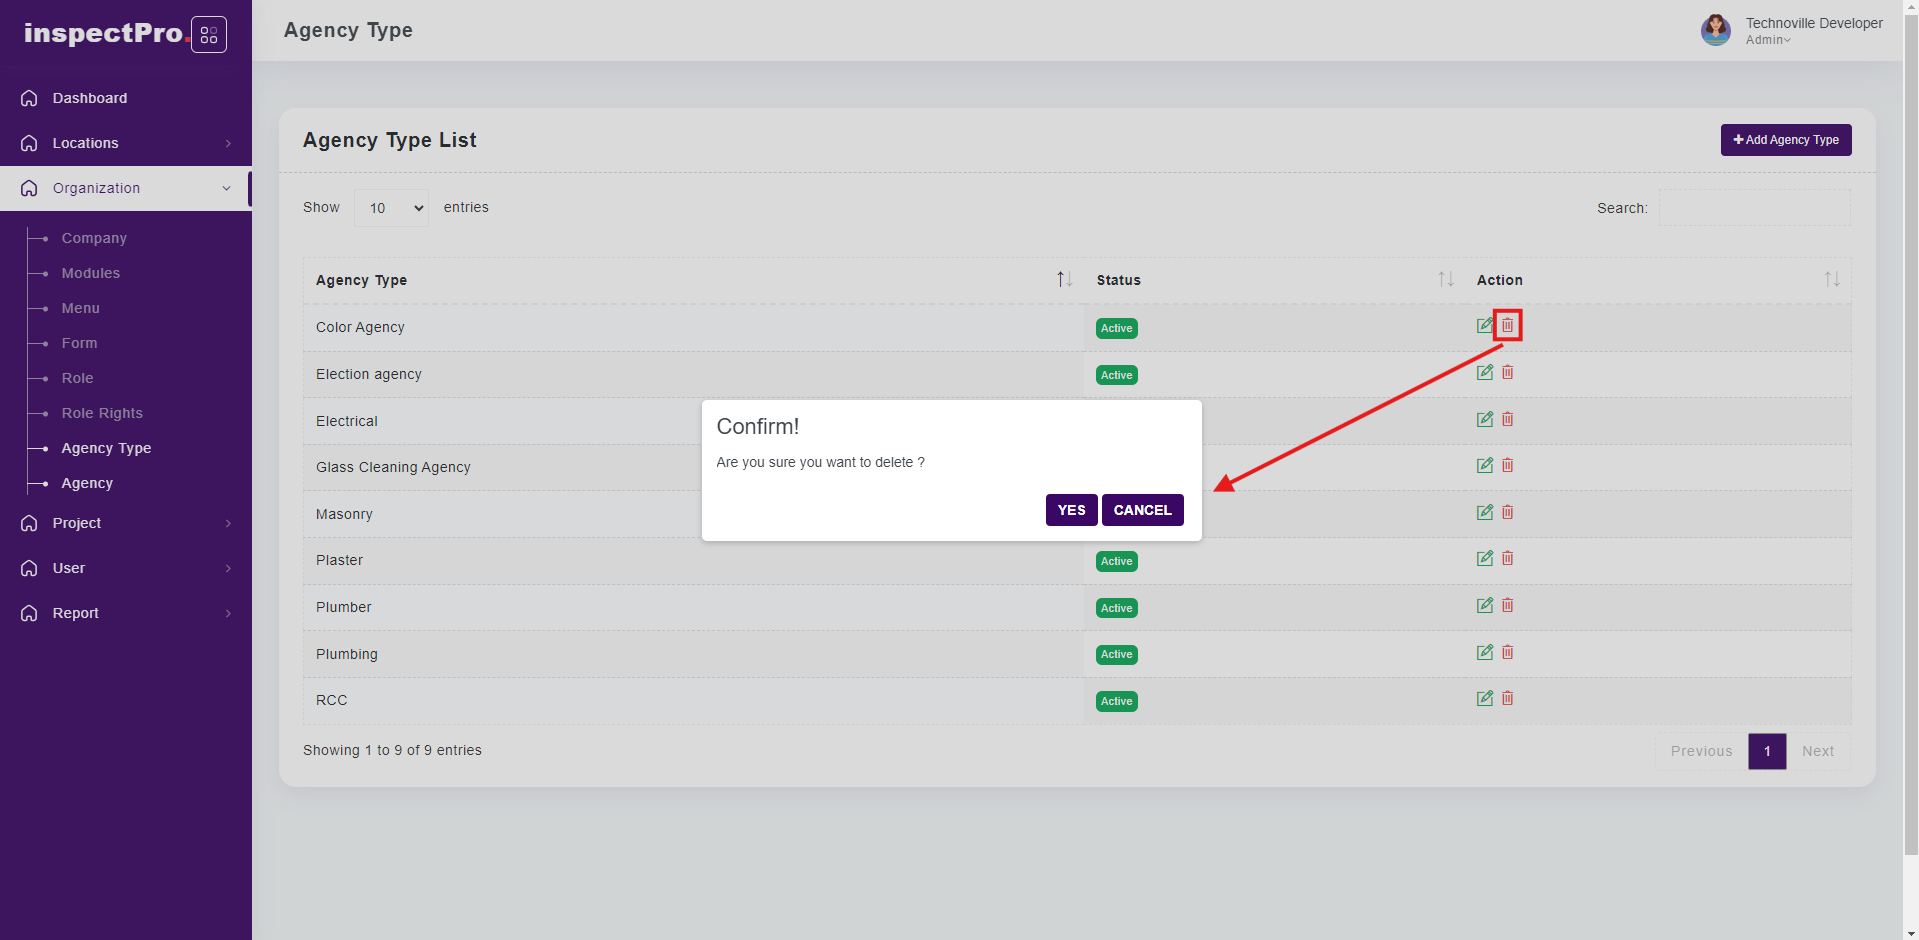
When you click on delete button at that time that particular agency inactive
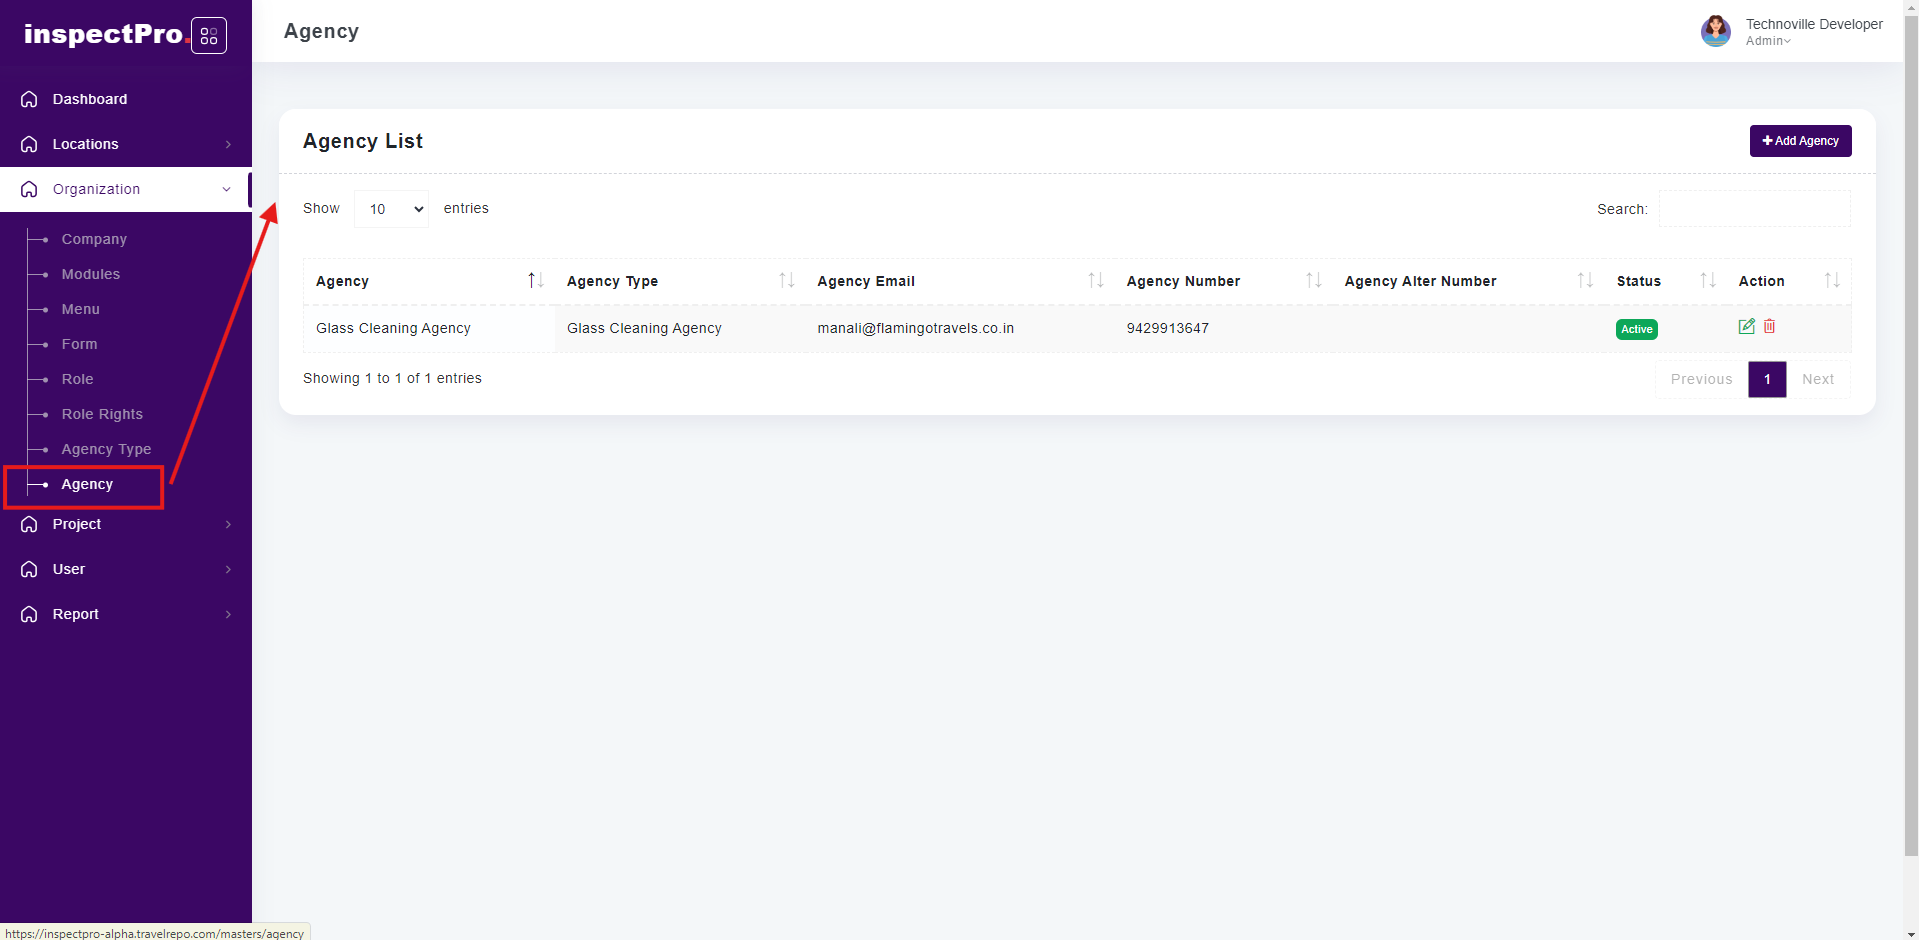
Clicking on "Agency" under "Organization" will display the agency list.
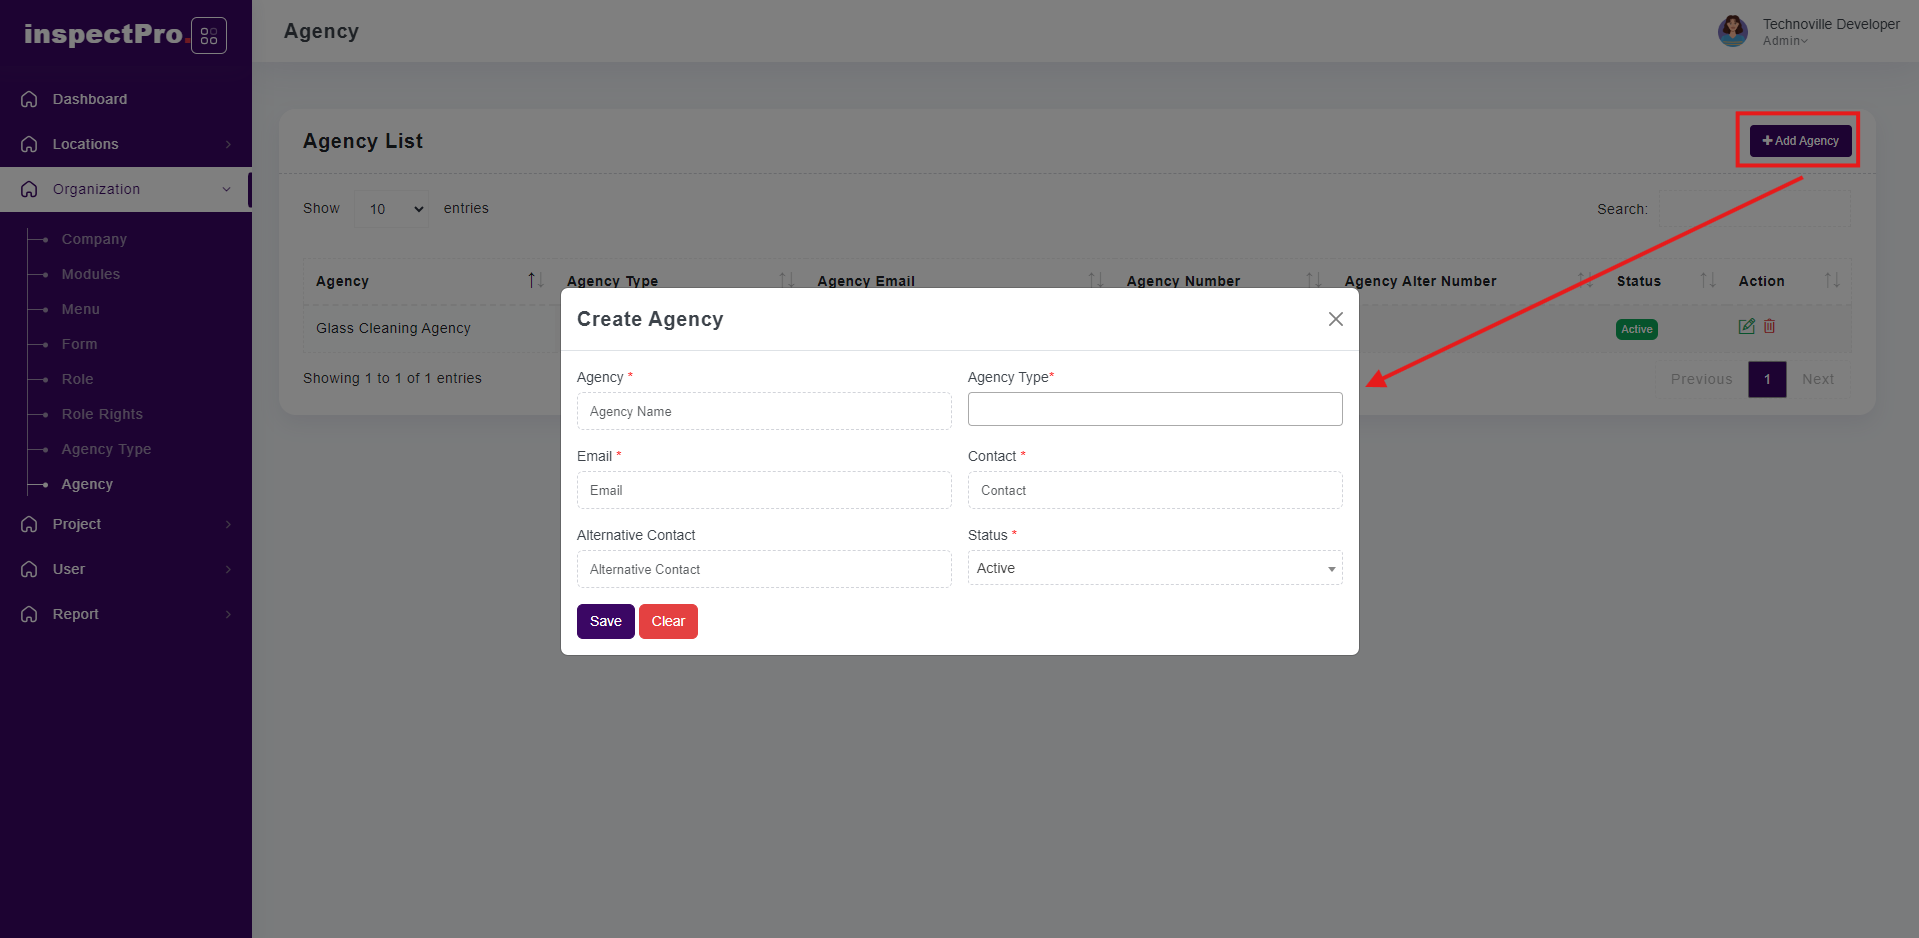
When you click on add agency button you will be able to add new agency all fields marked with stars are compulsory then click on save button at that time agency will created successfully.
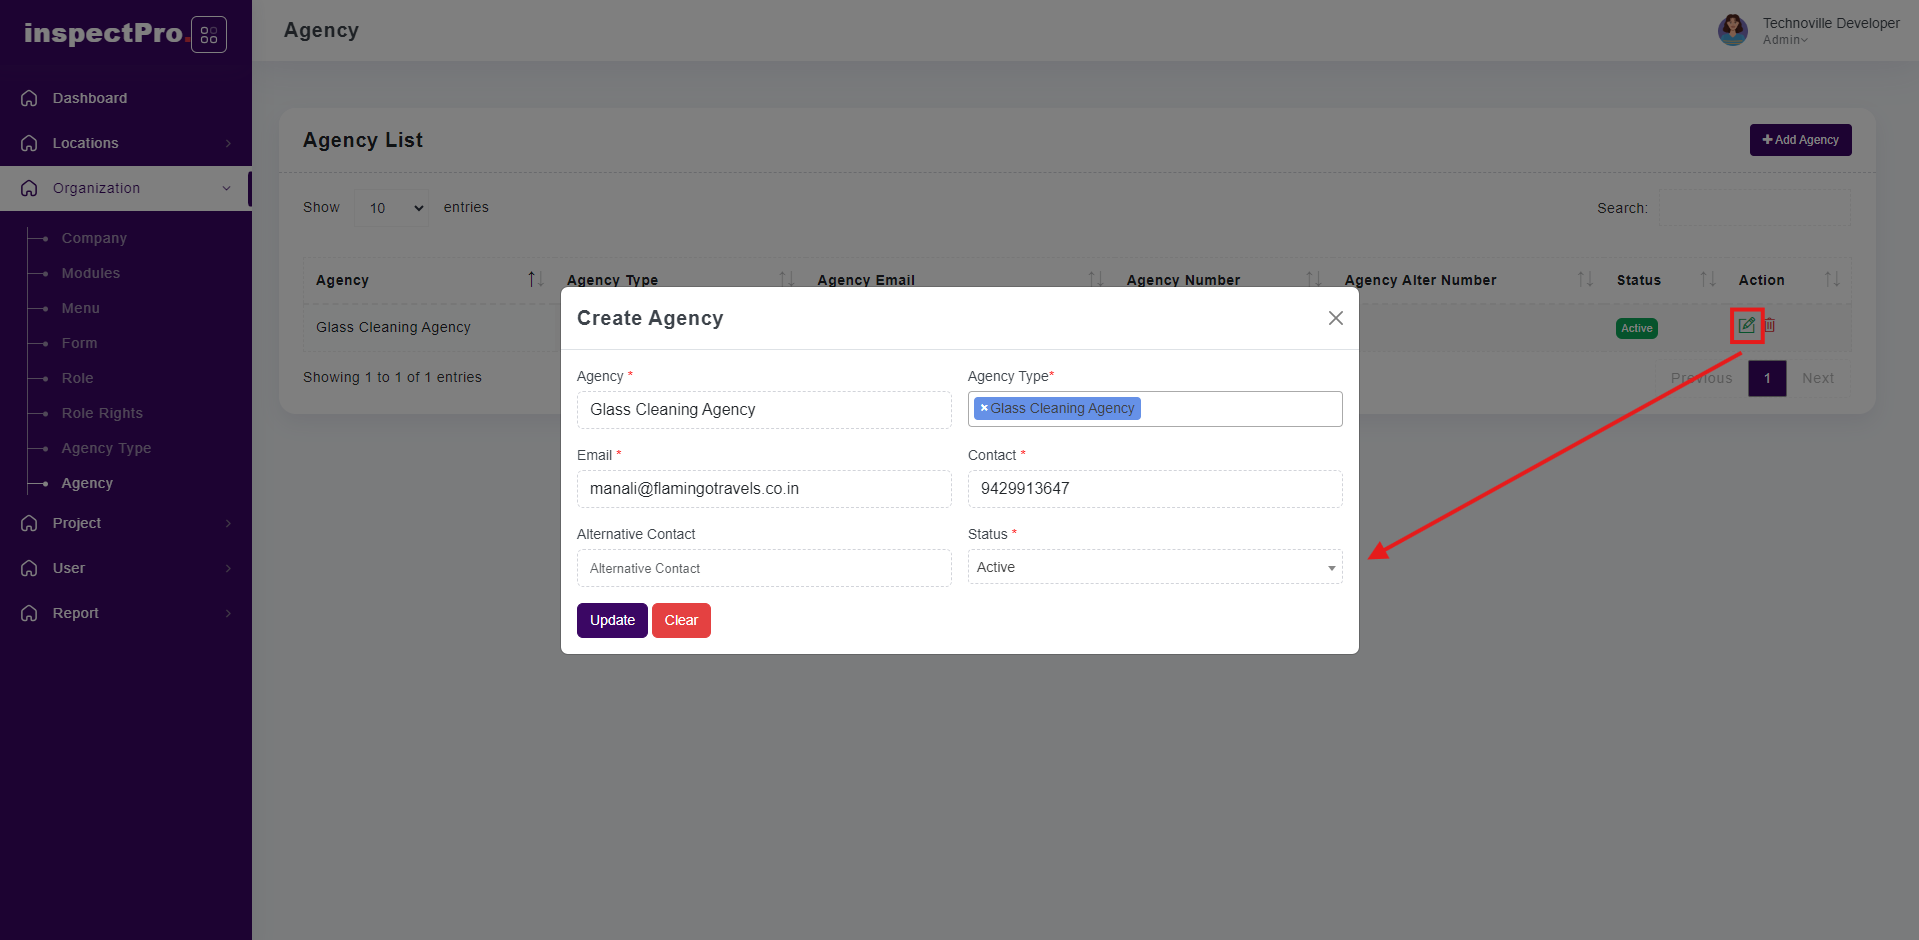
When you click on edit button you will be able to change anything you want then click on update button that record update successfully
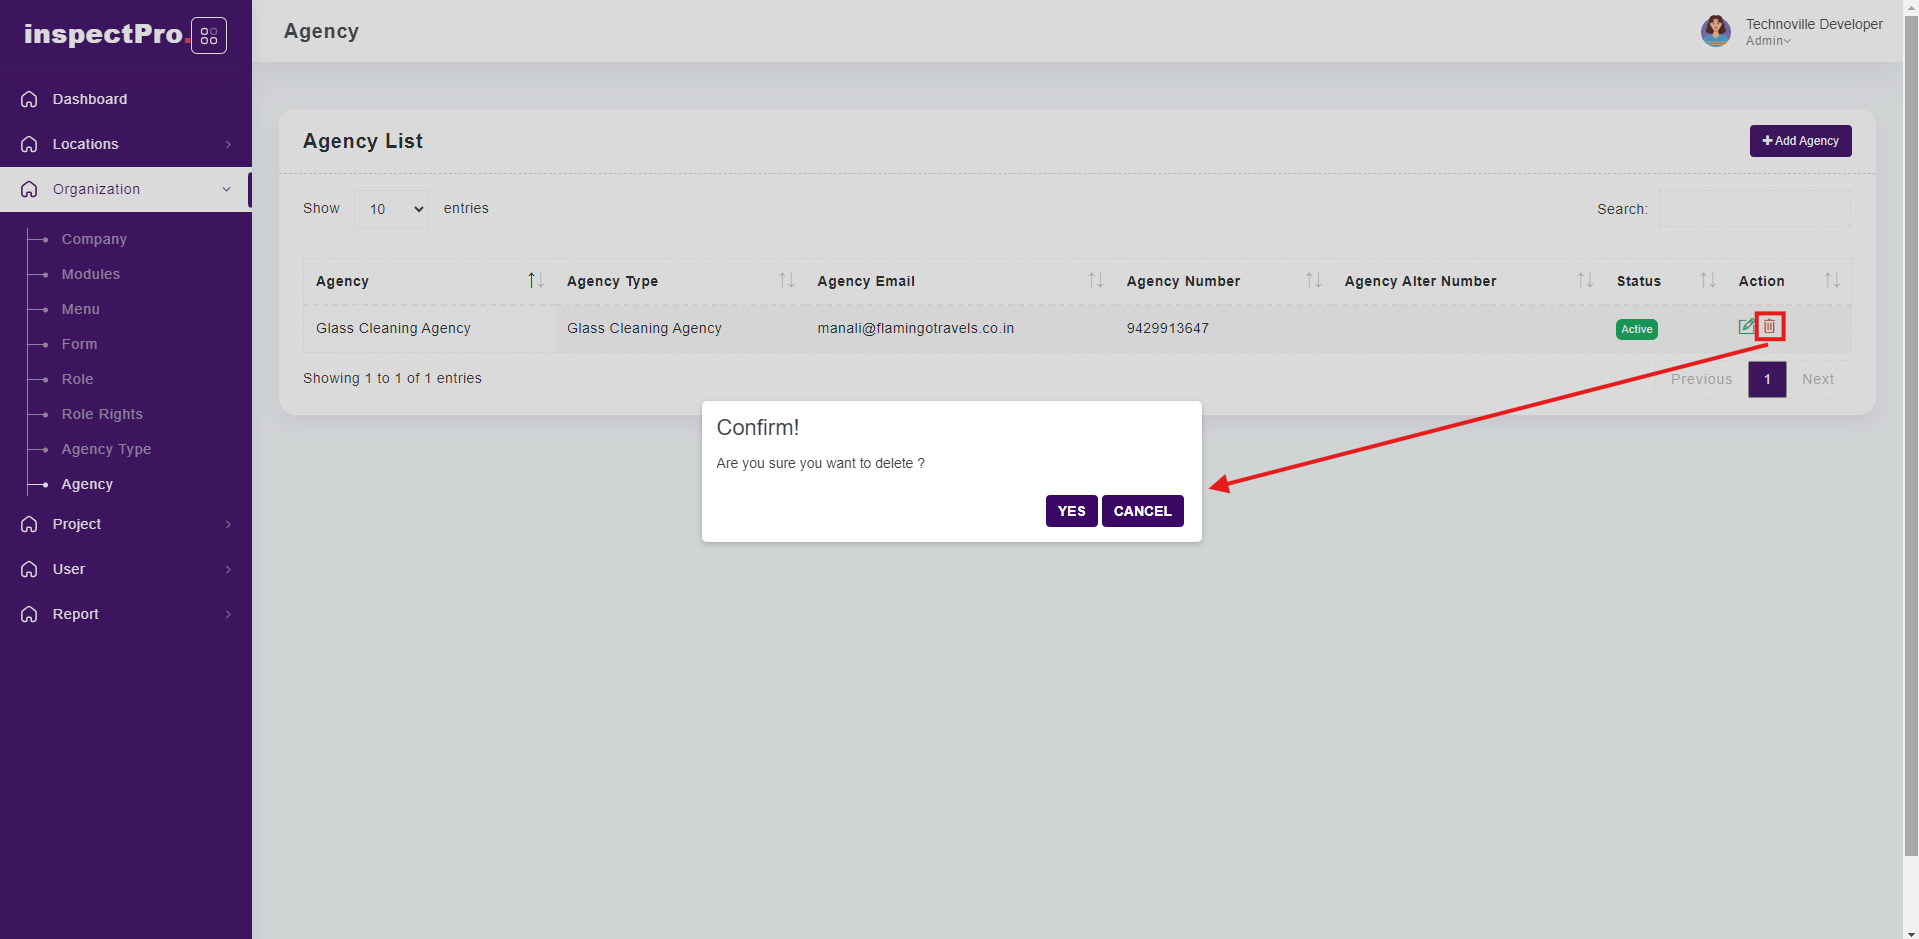
When you click on delete button that particular agency inactive you are not able to select that agency when you add issue.
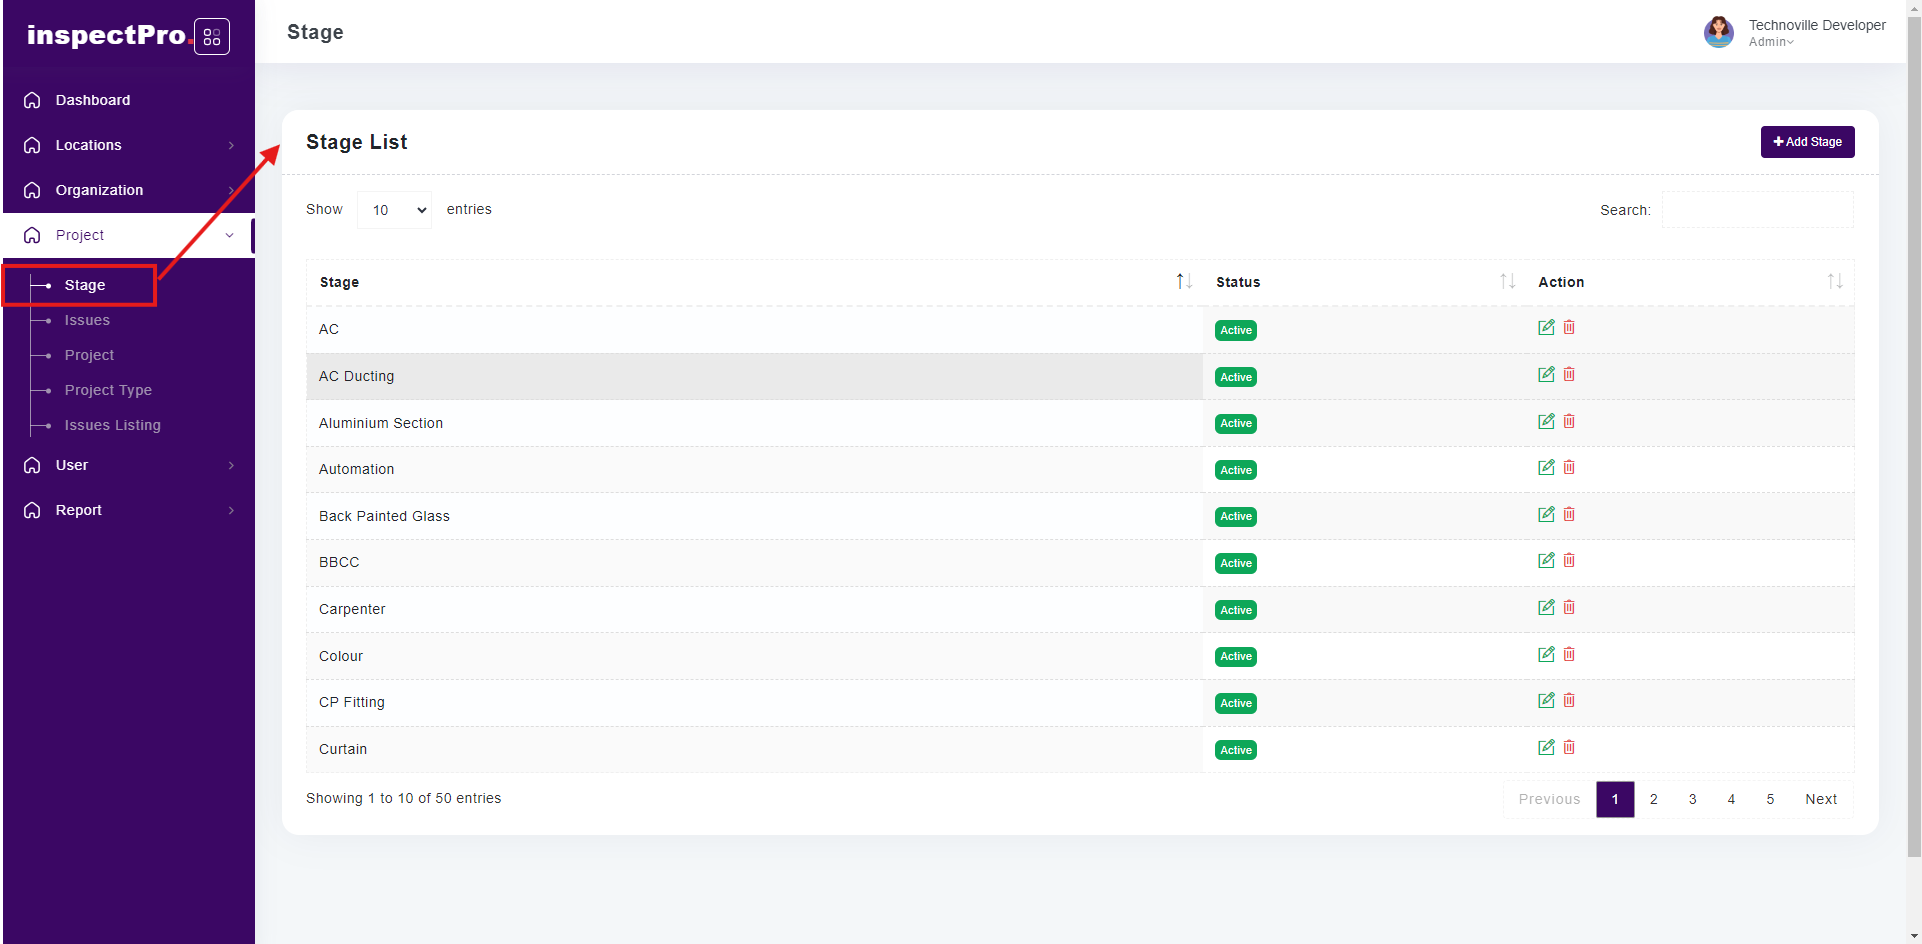
Clicking on "Stage" under "Project" will display the stage list.
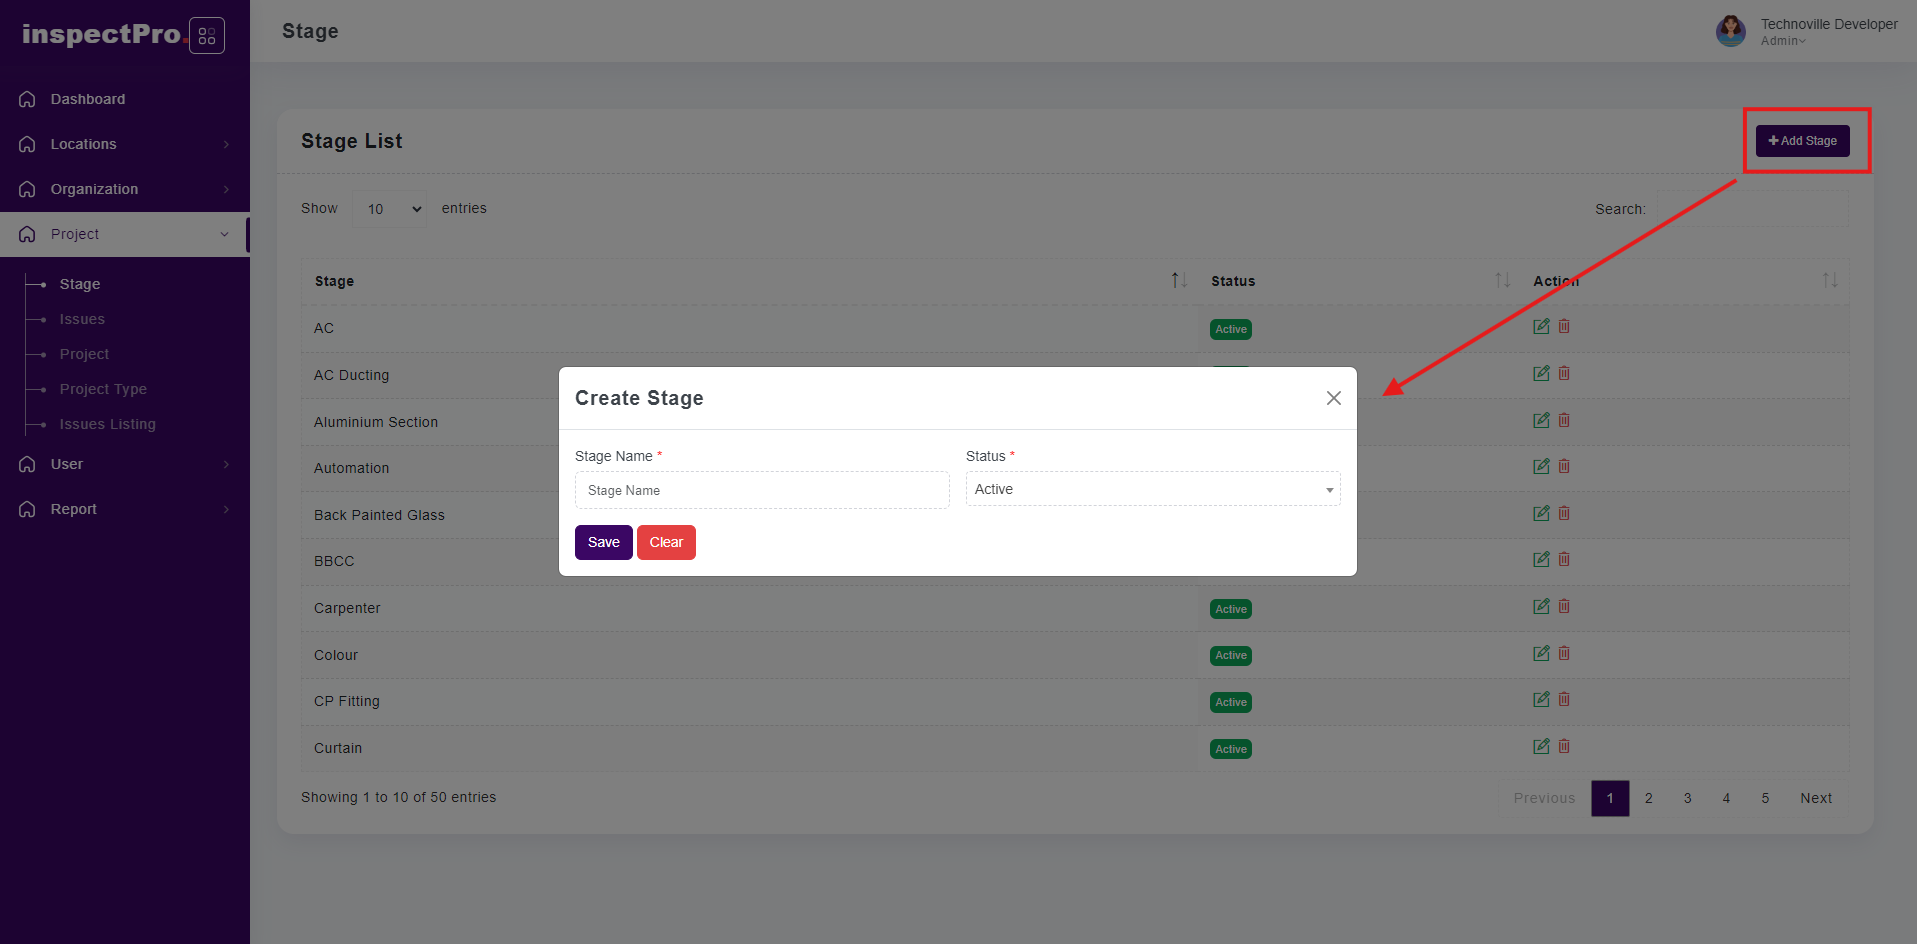
When you click on add stage button you will be able to add new stages
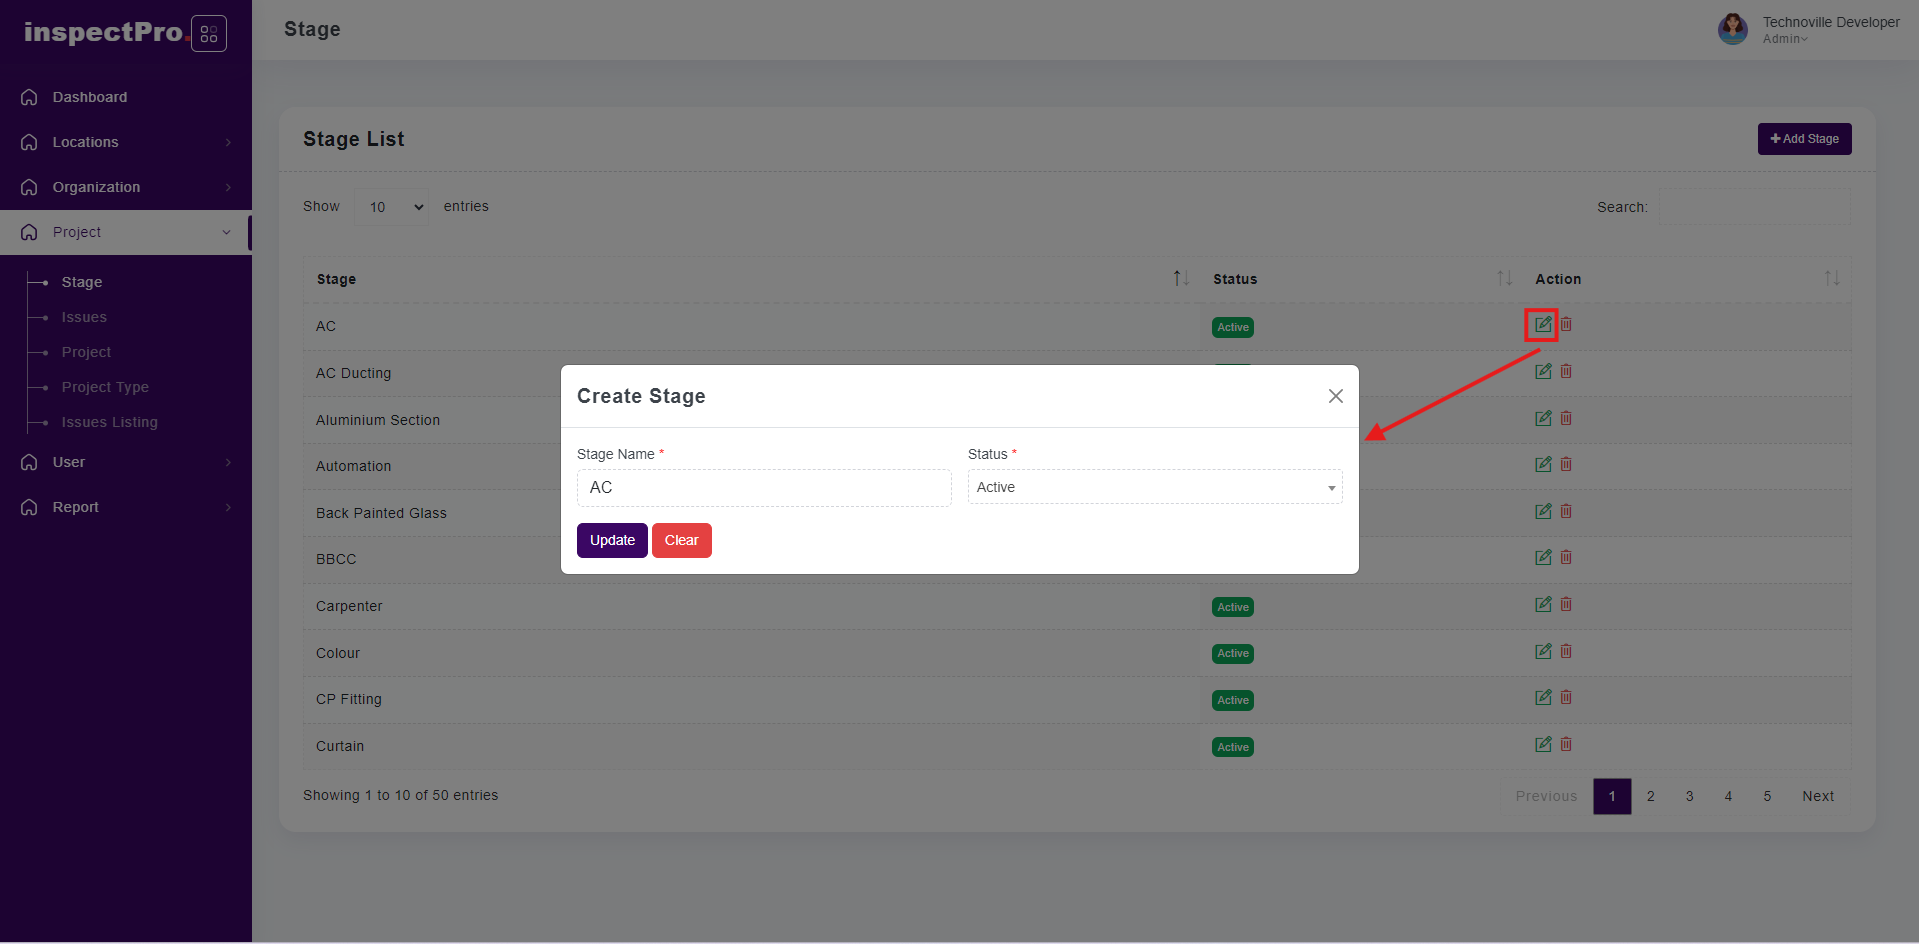
When you click on edit button you will able to change anything and click on update that changes should be updated
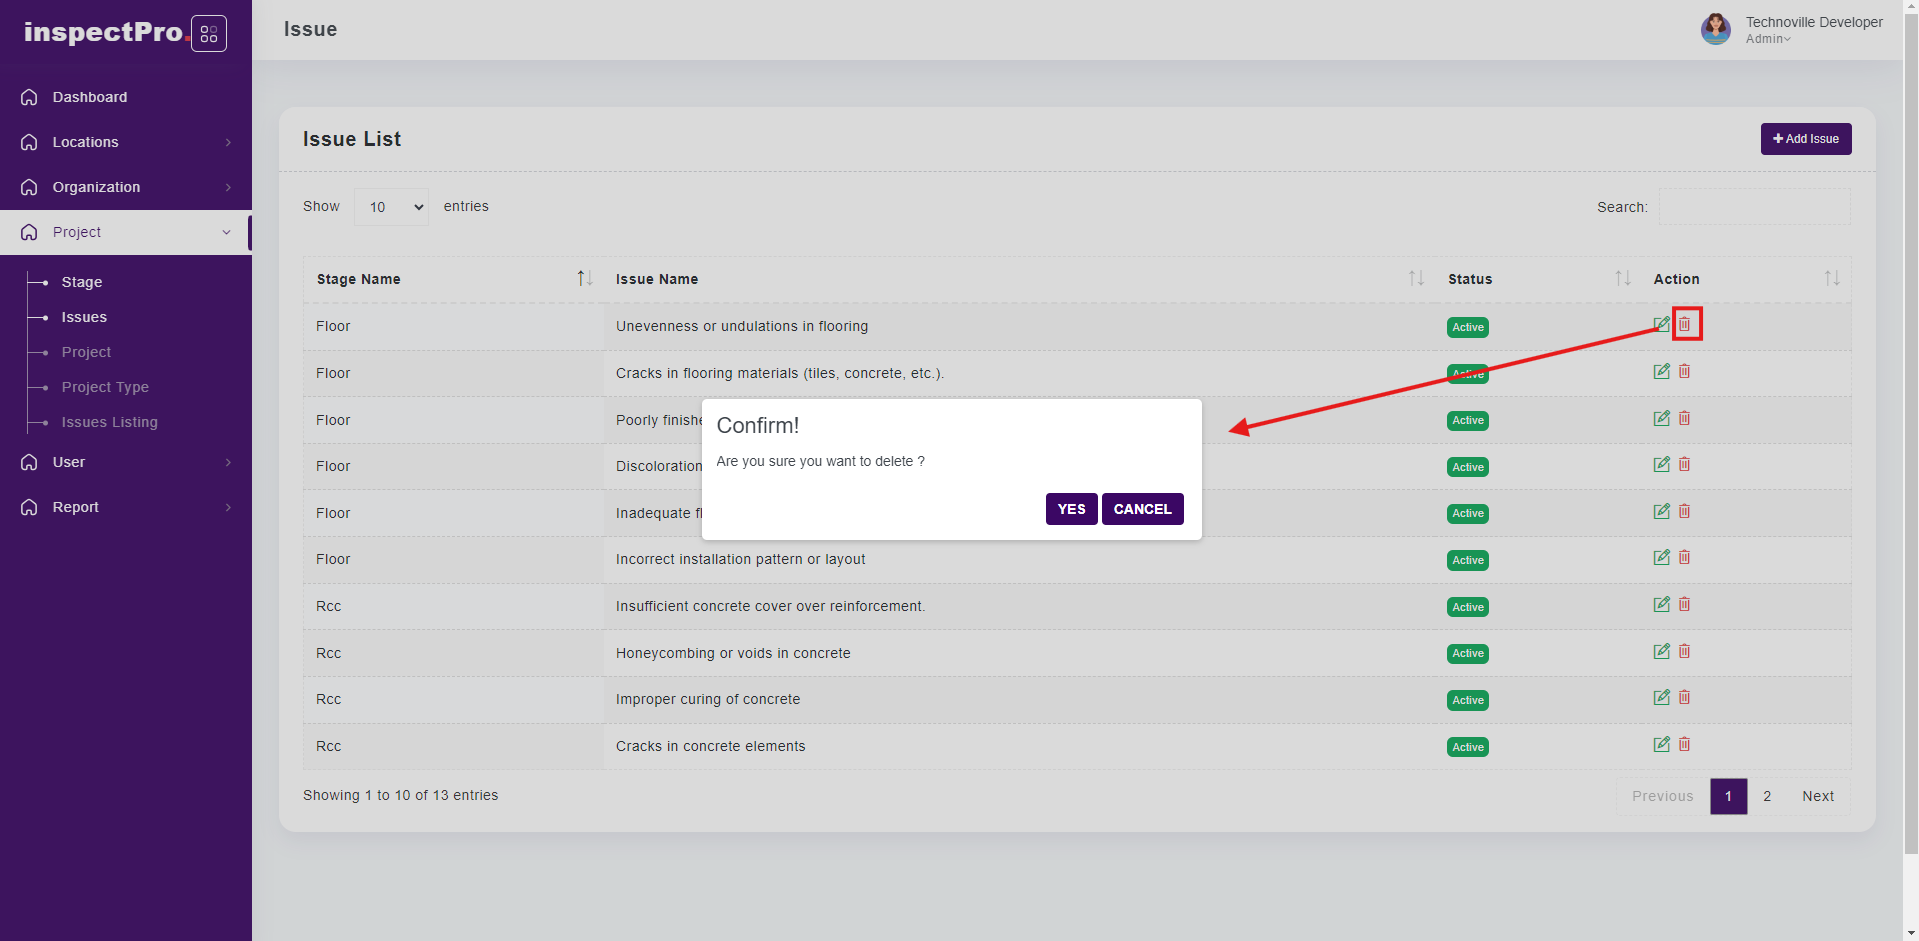
When you click on delete button that stage will be inactive
If you want to active that particular stage at that time you need to click on edit button and change status from inactive to active and click on update or save button then that stage would be active.
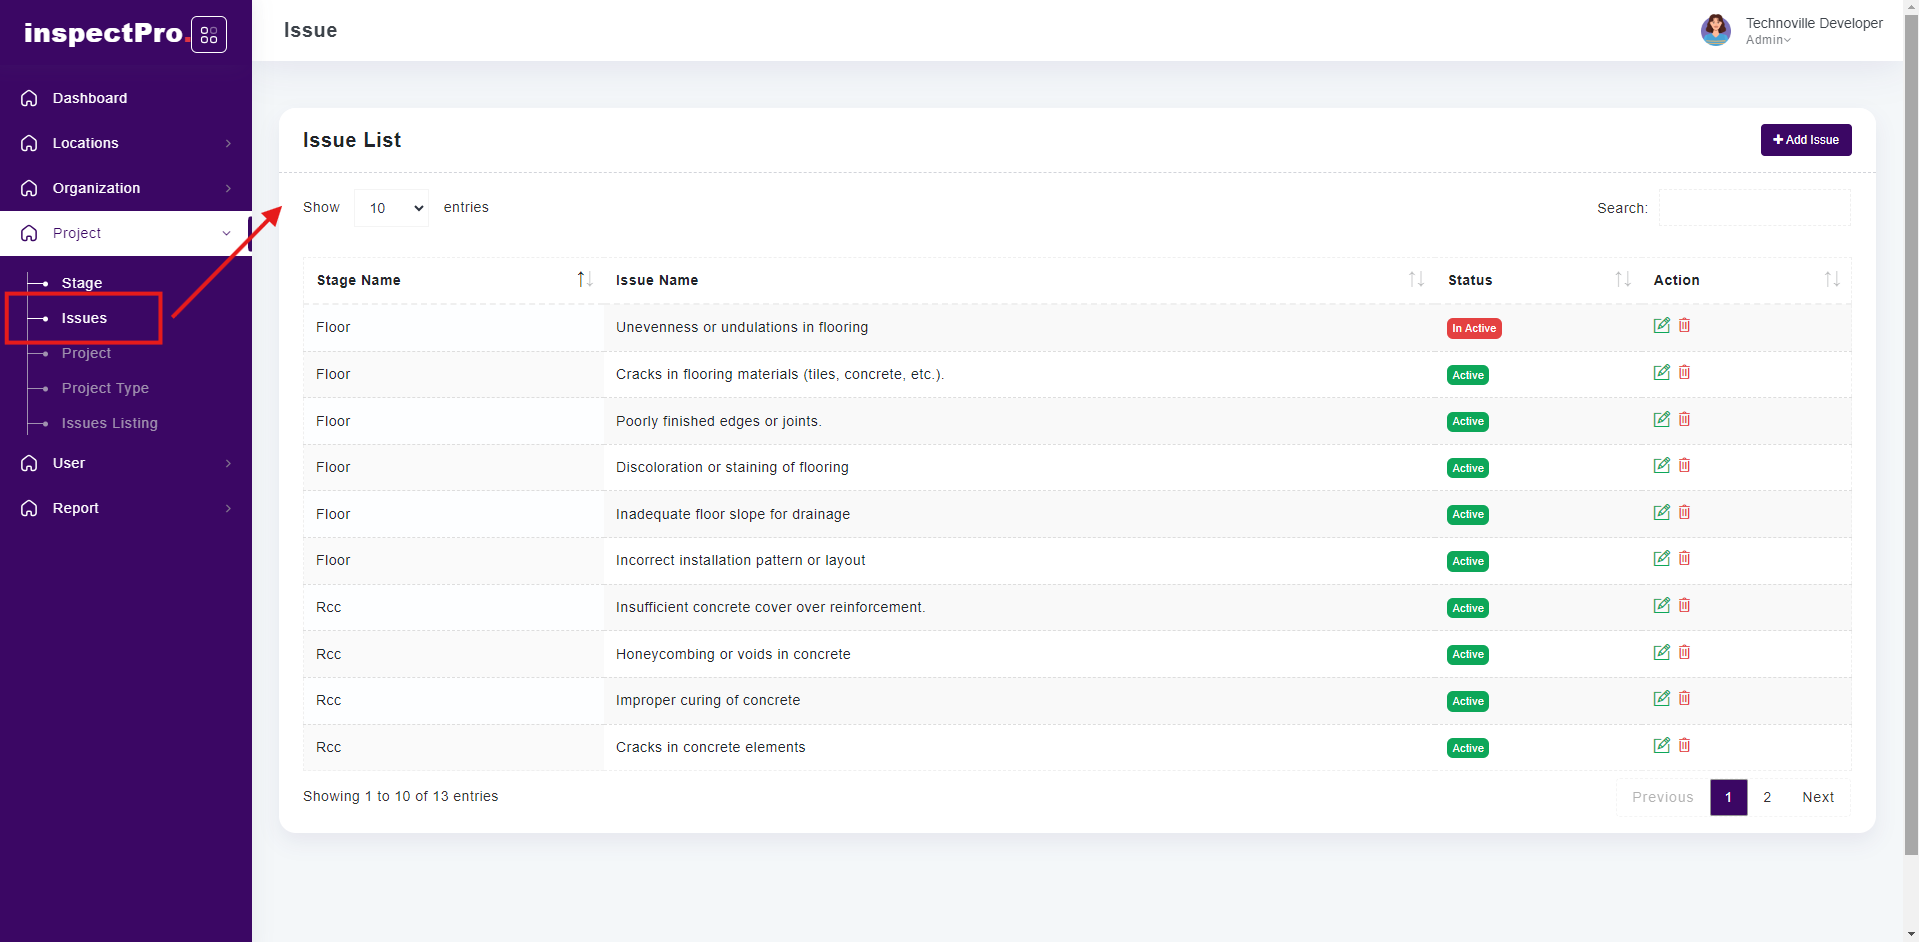
Clicking on "Issues" under "Project" will display the issues list.
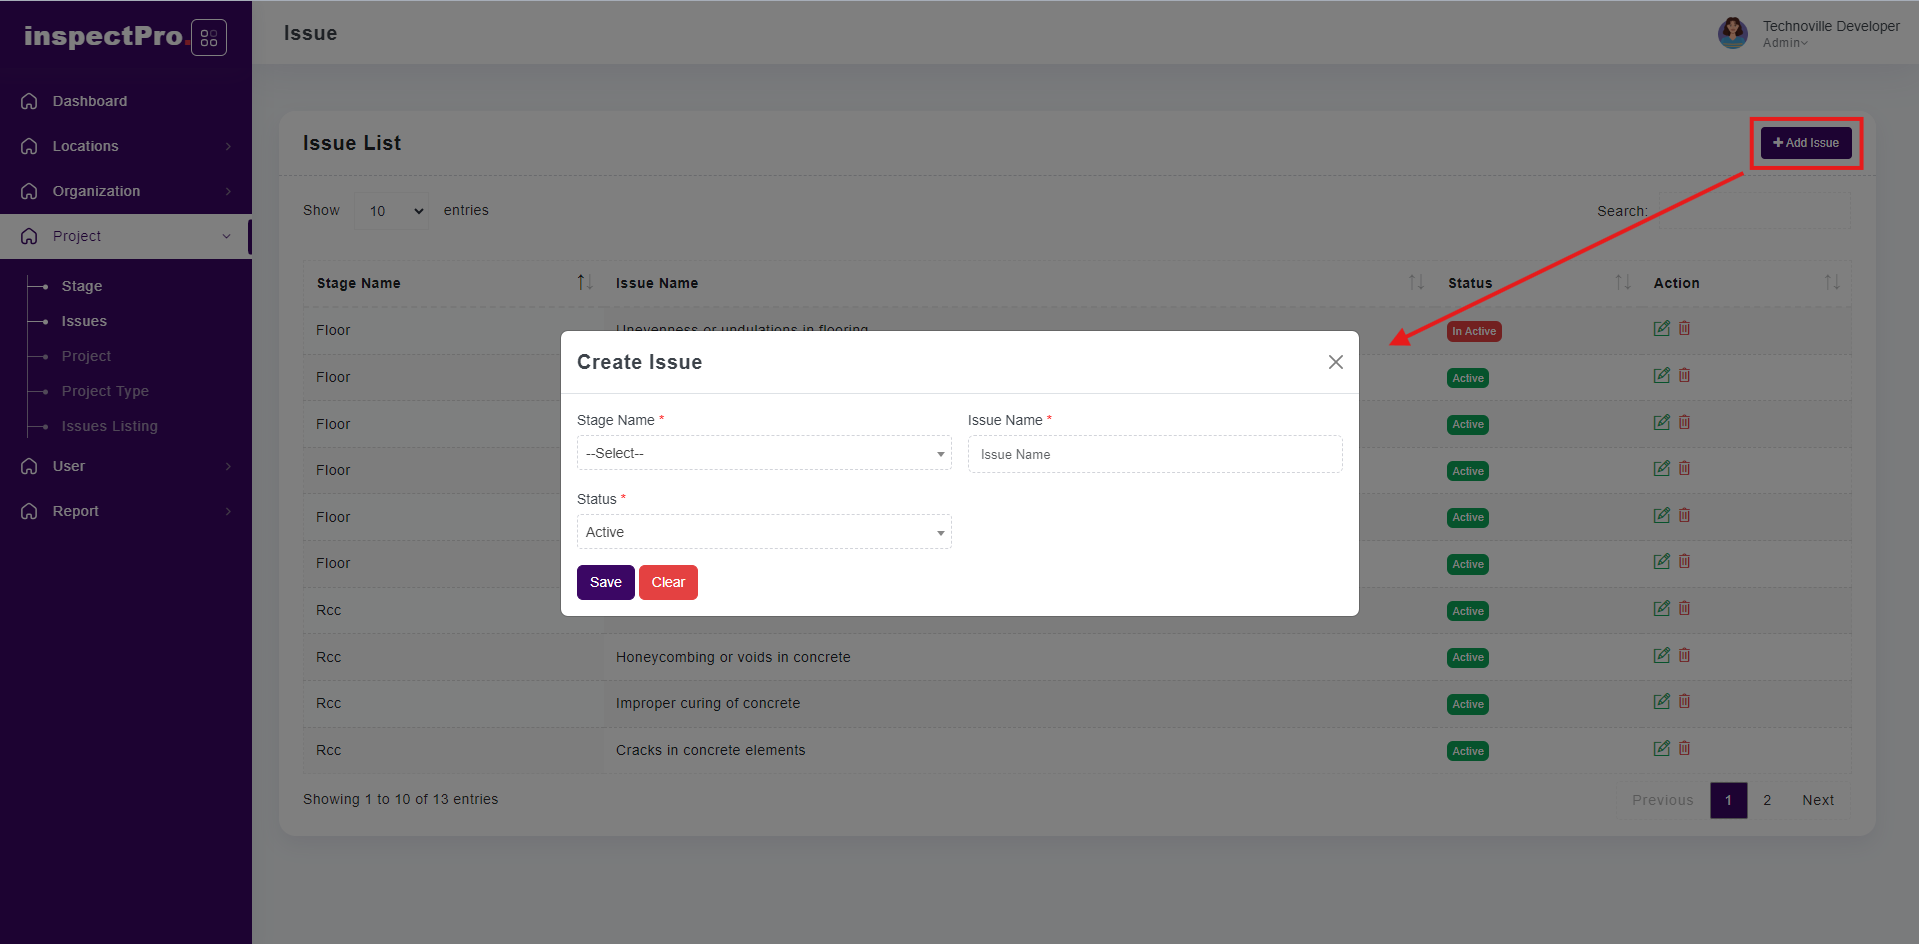
When you click on add issue button at that time first you need to select stage then after add issue and click on save button that issue will be added in listing page
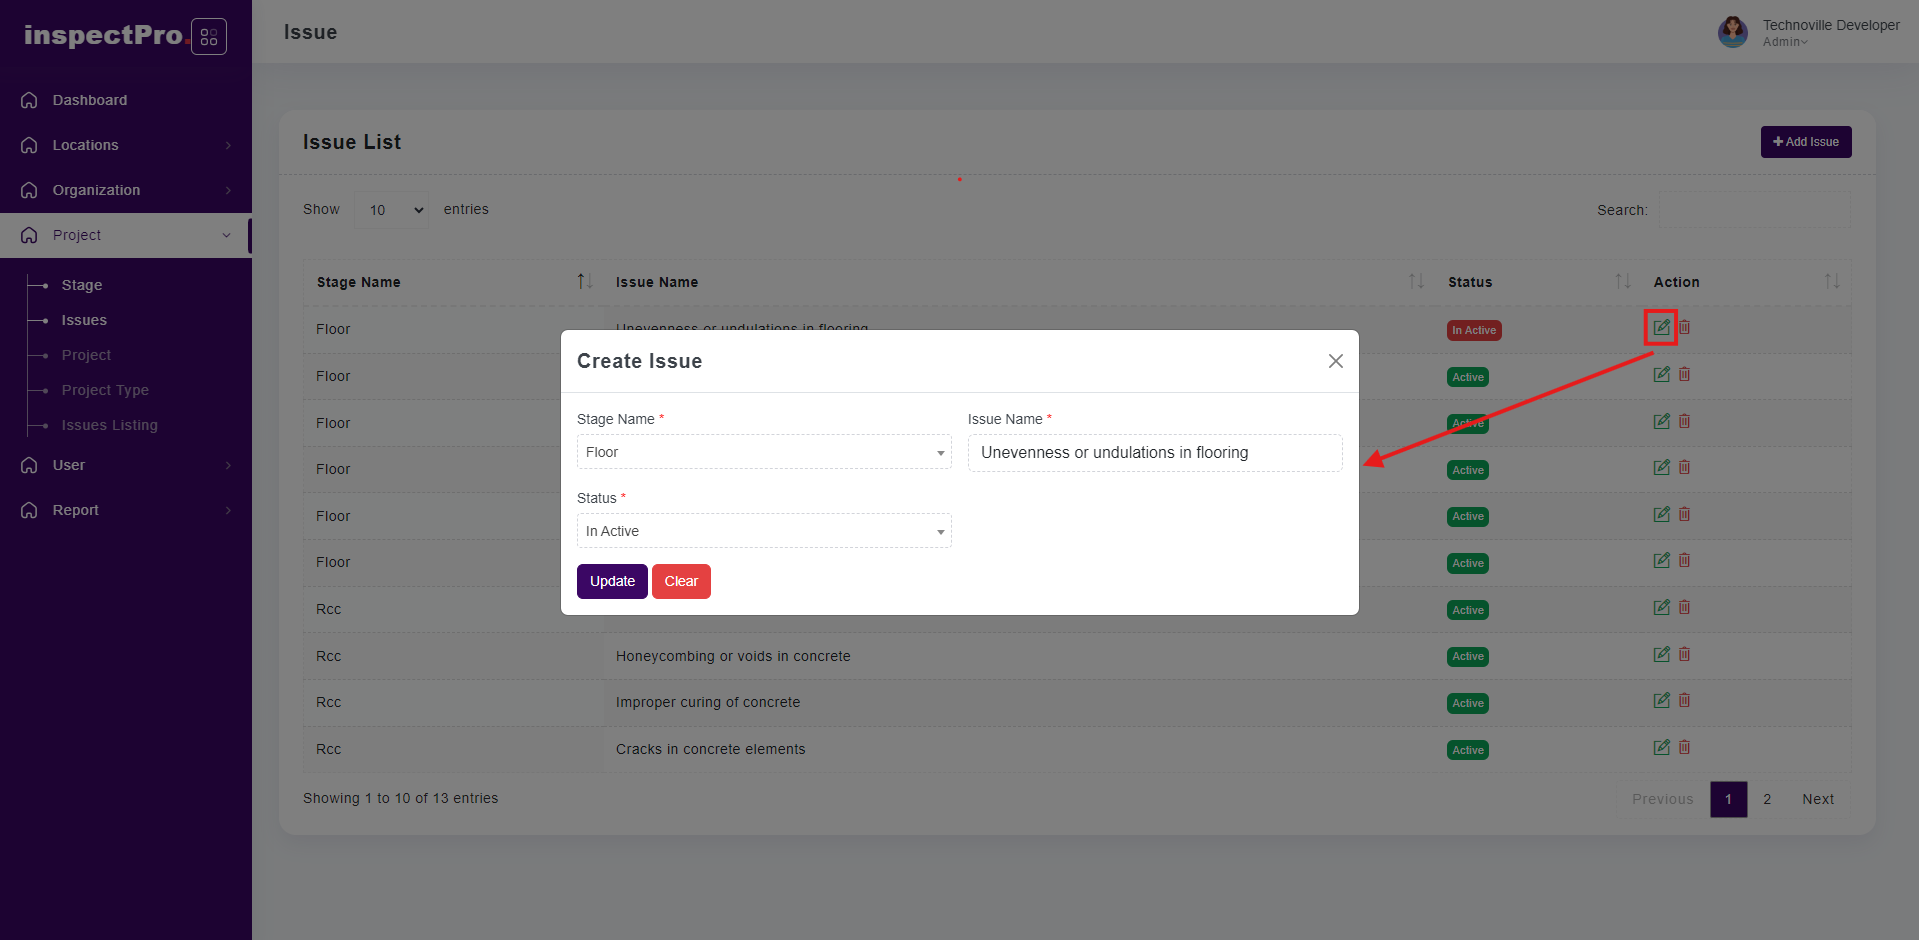
When you click on edit button at that time if you want to change anything change it and click on update button that changes would be updated
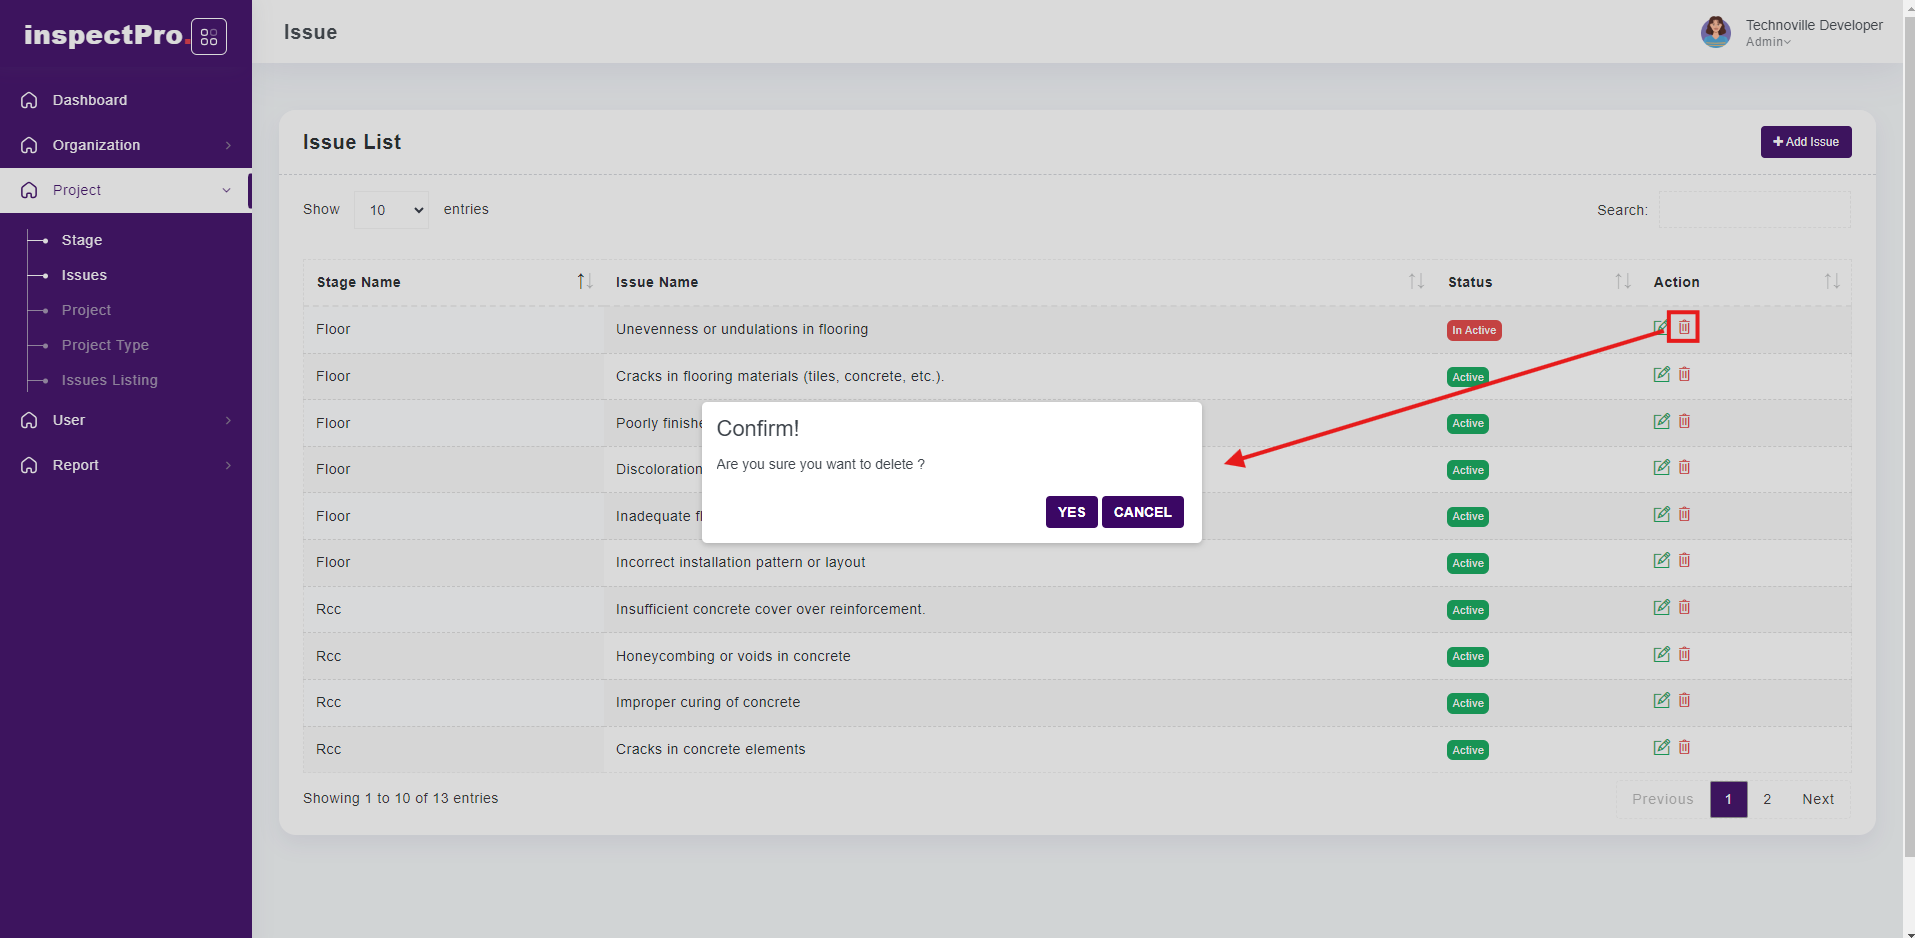
When you click on delete button then that particular issue will be inactive
If you want to active again that particular issue at that time click on edit button and change status from inactive to active and click on save or update button then that issue is active.
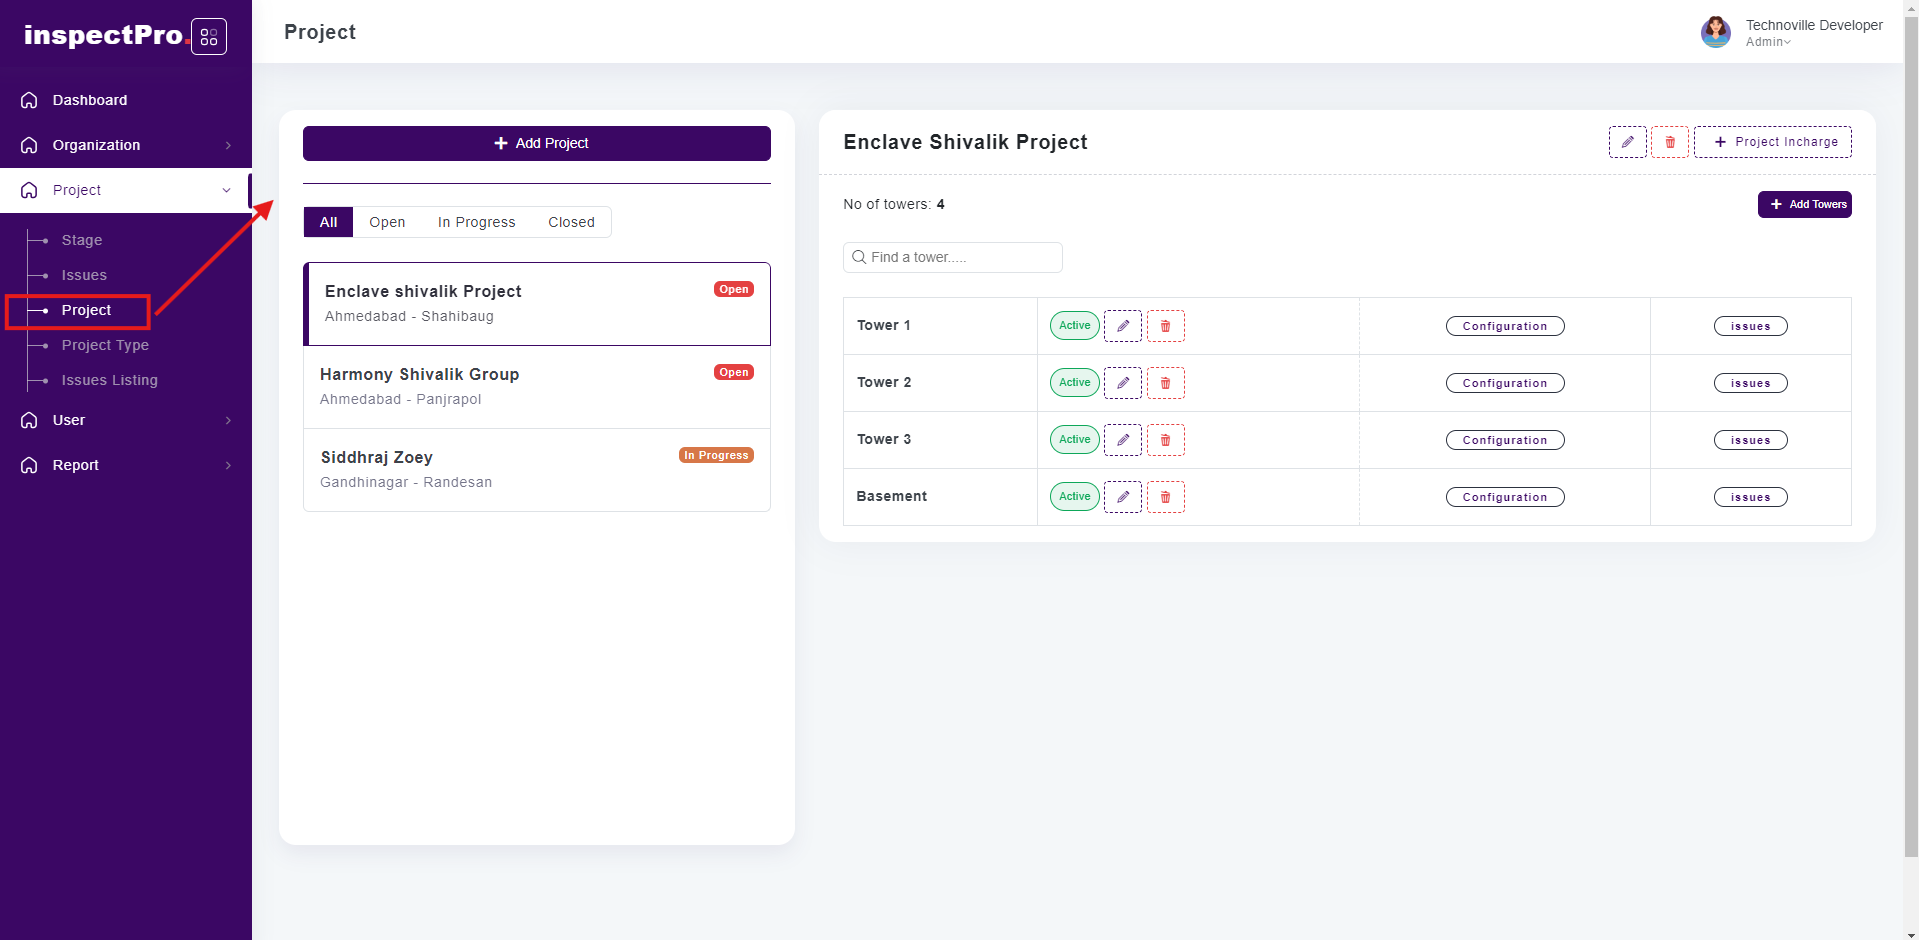
Clicking on "Project" under "Project" will display the project list.
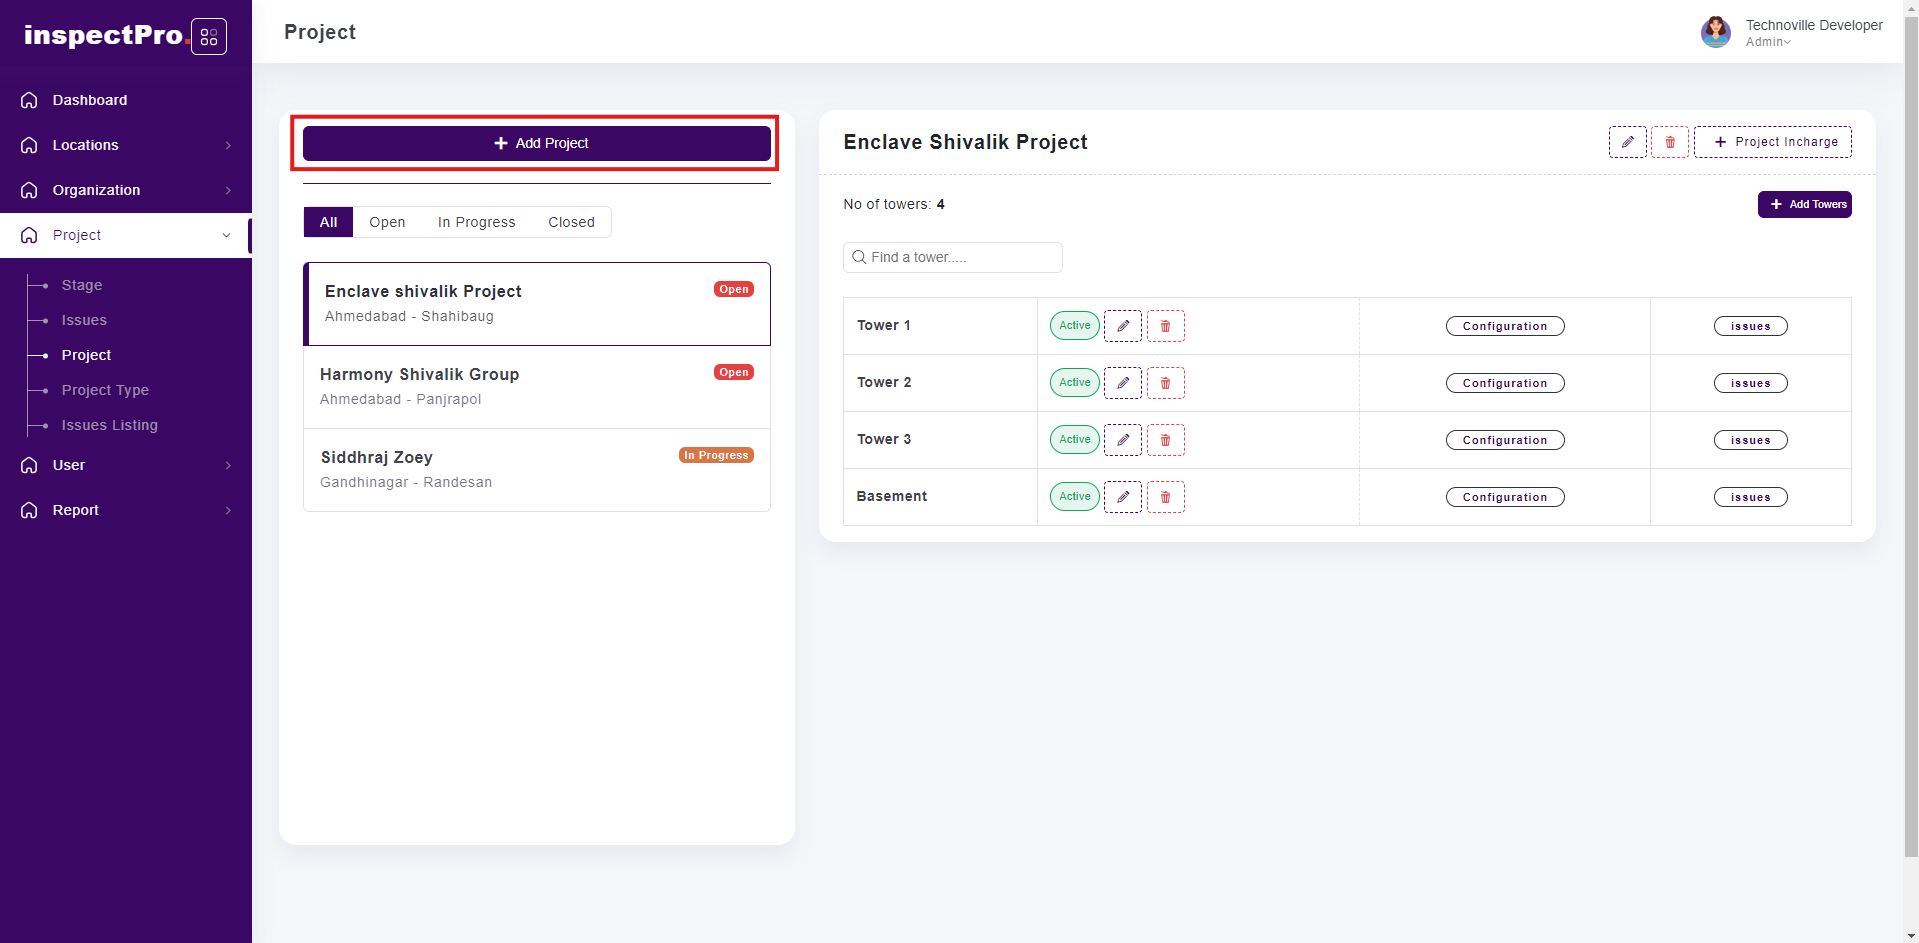
First you need to click on add project button.
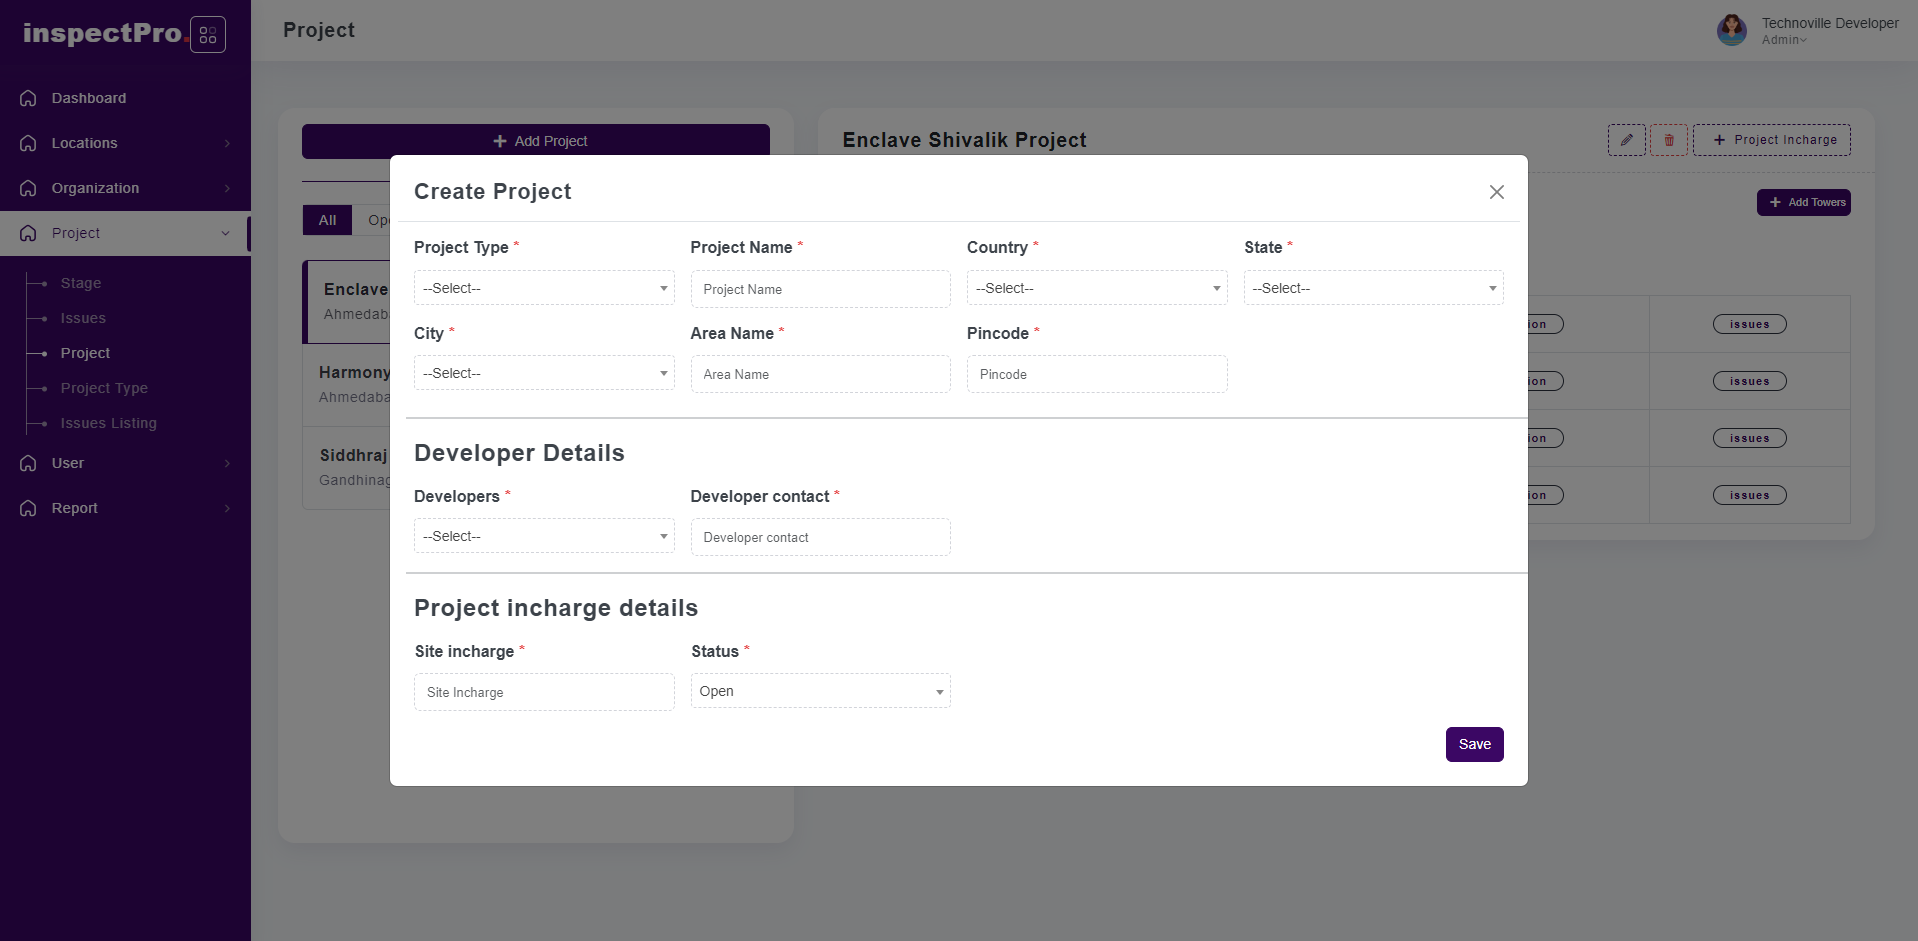
Create project screen will be displayed then you need to fill all compulsory fields and then click on save button then project will be created successfully.
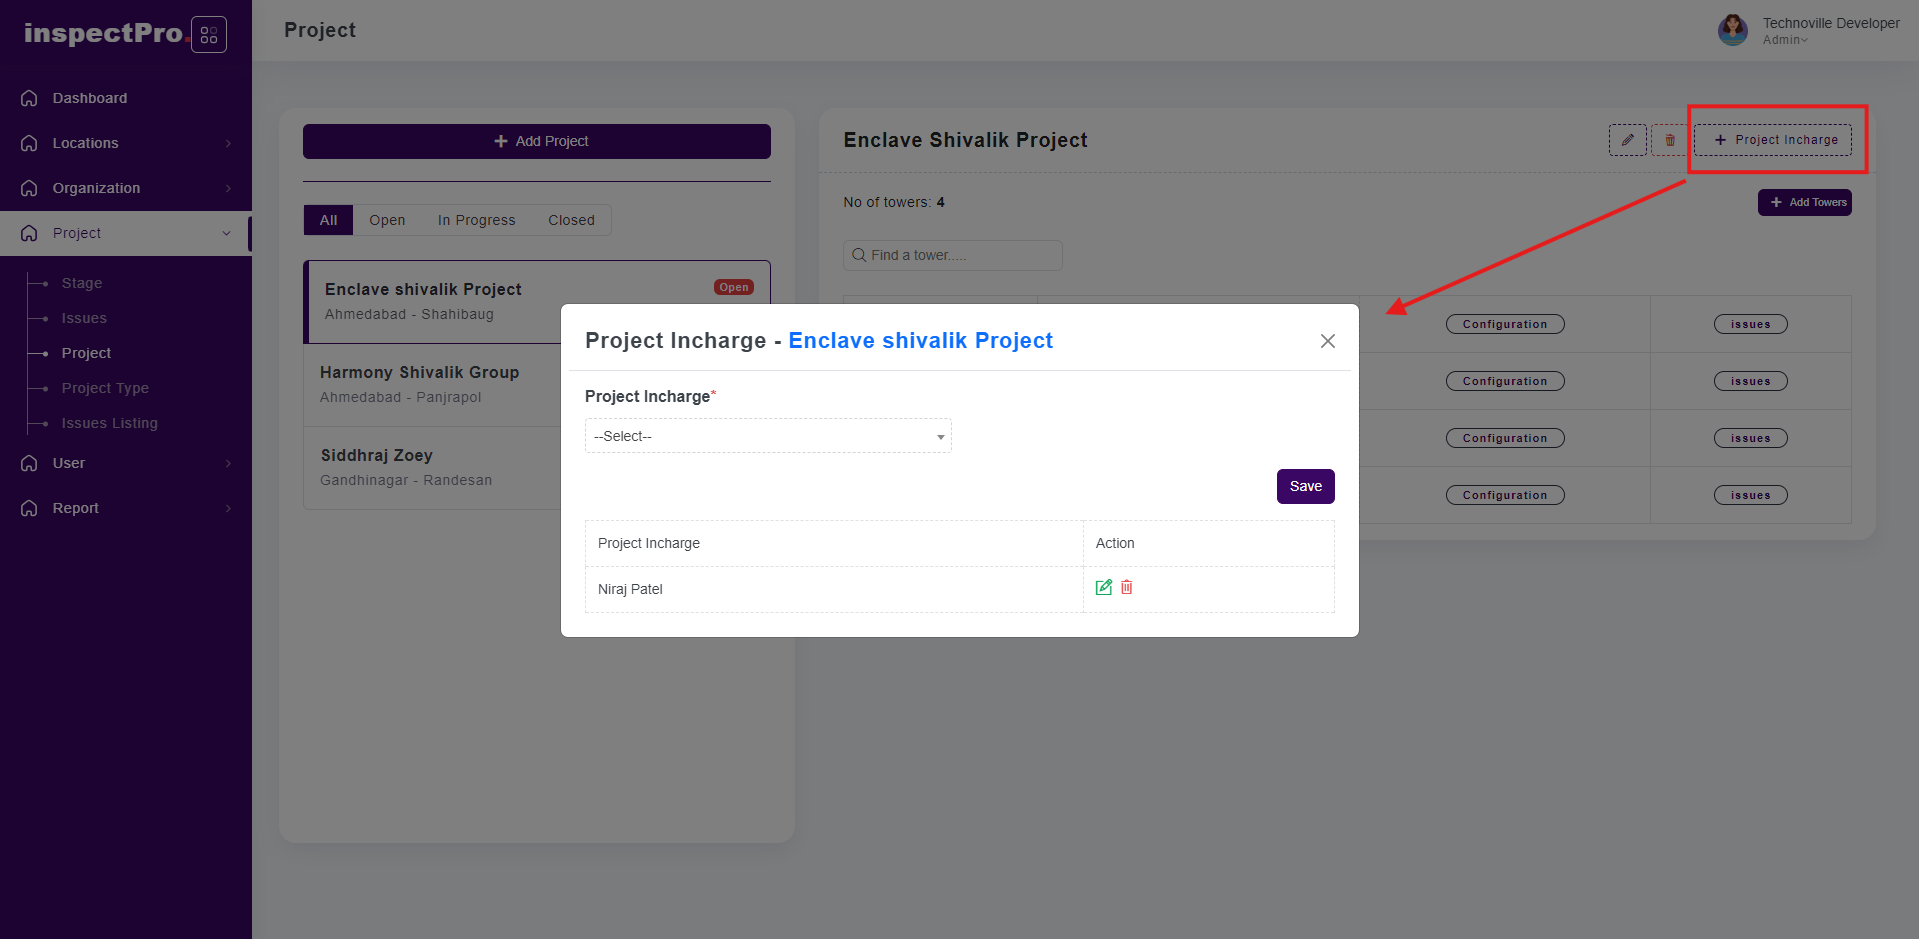
After project creation on listing screen right side top "project in charge" first you need to click and add project incharge name & click on save button.
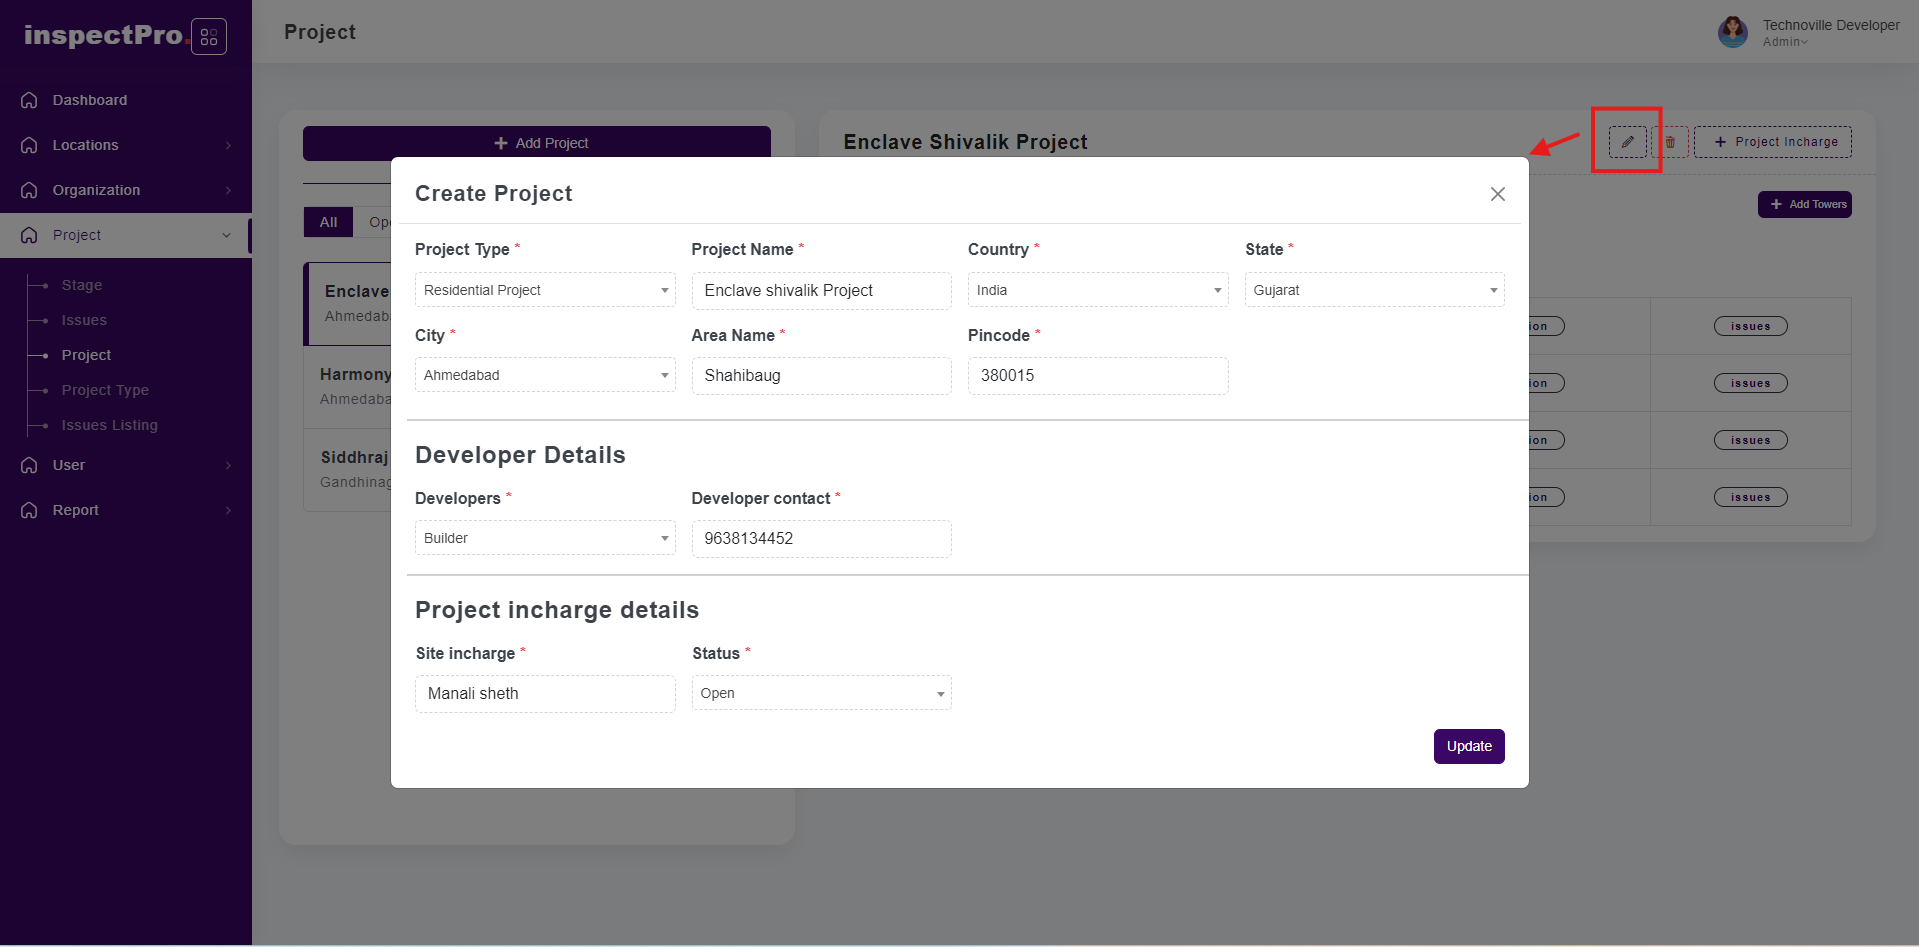
After completion of project incharge there is edit button if you are clicking on edit button then you will be able to edit project name & etc and after changing click on save button changes will be updated.
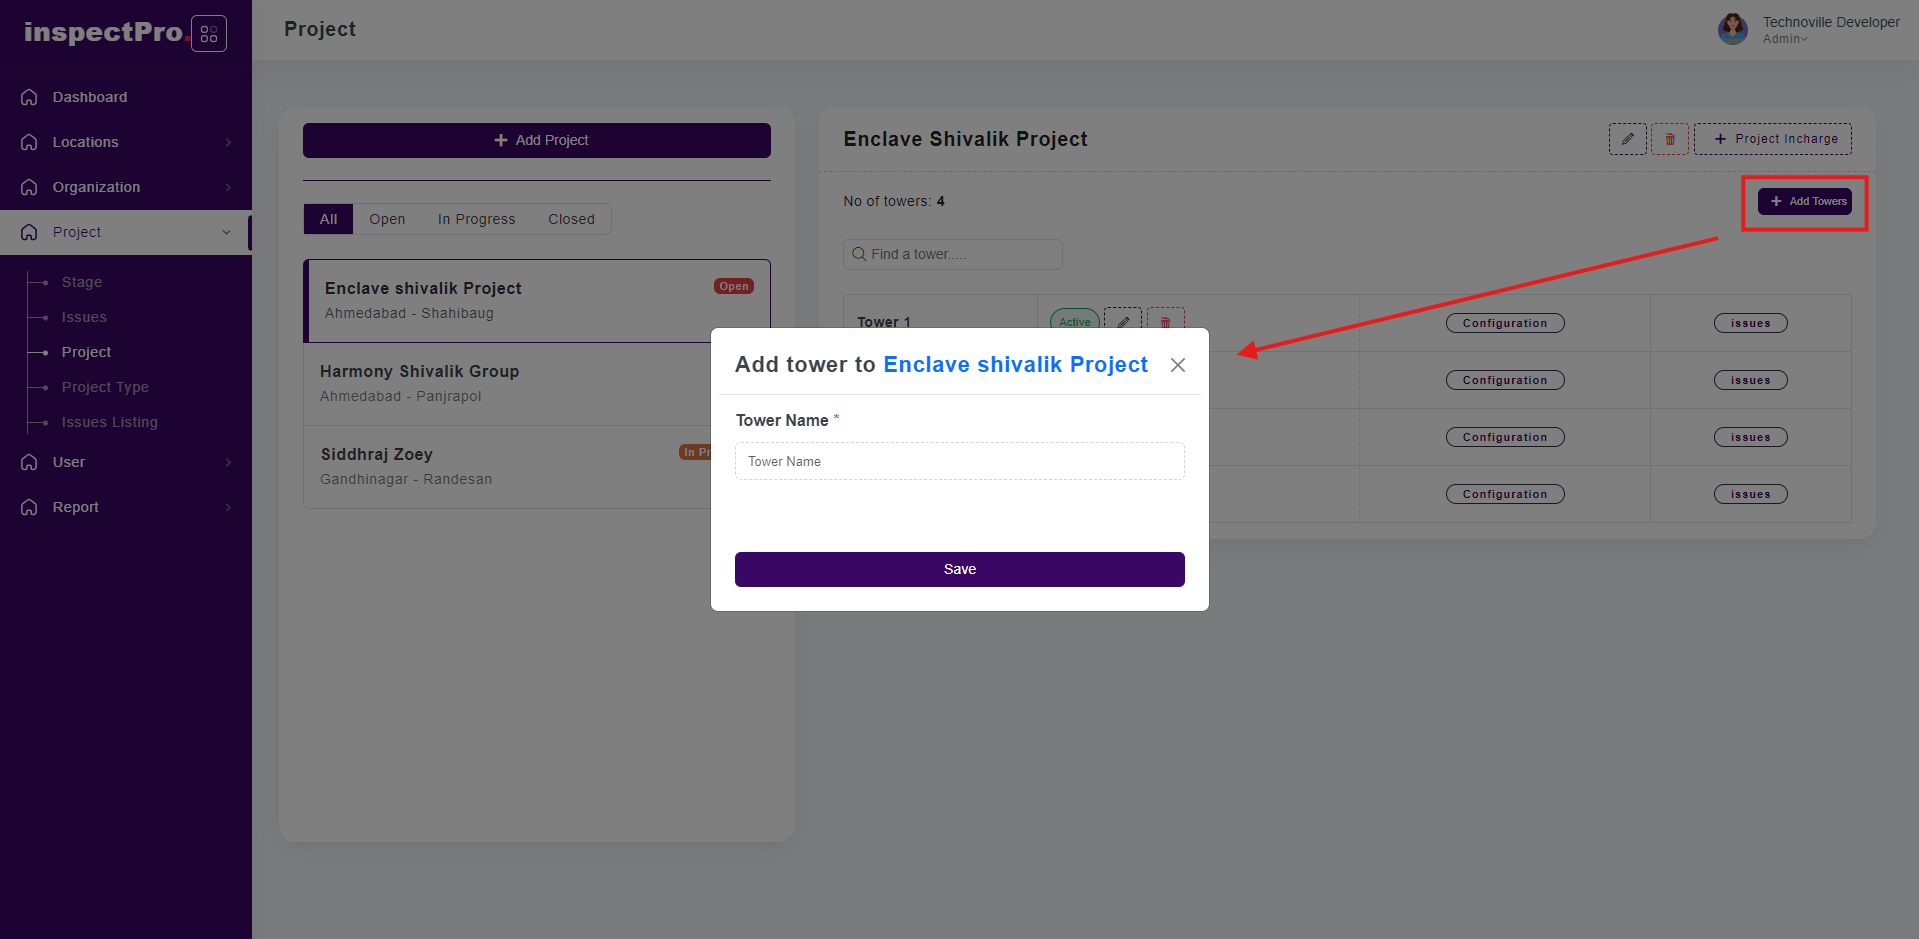
After completion of all this process now you need to click on add tower and you will be able to add tower as per your project.
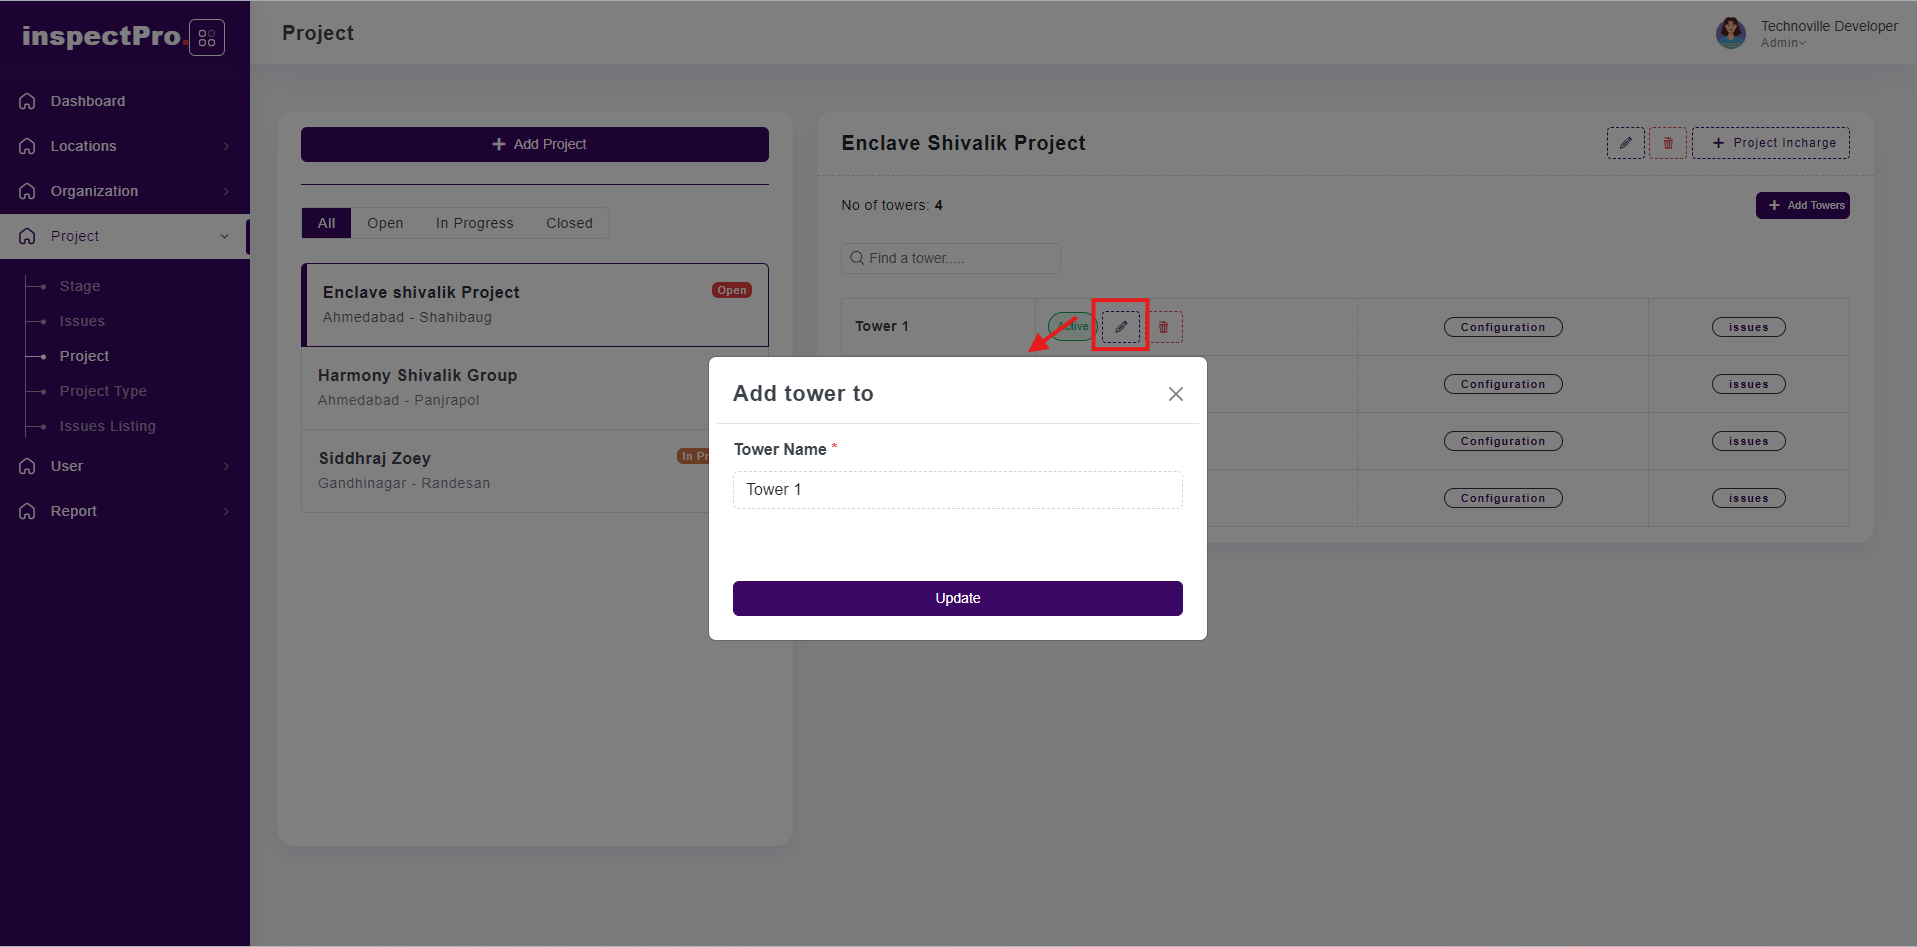
After adding tower, there is an edit button if you want to change tower name click on edit button.
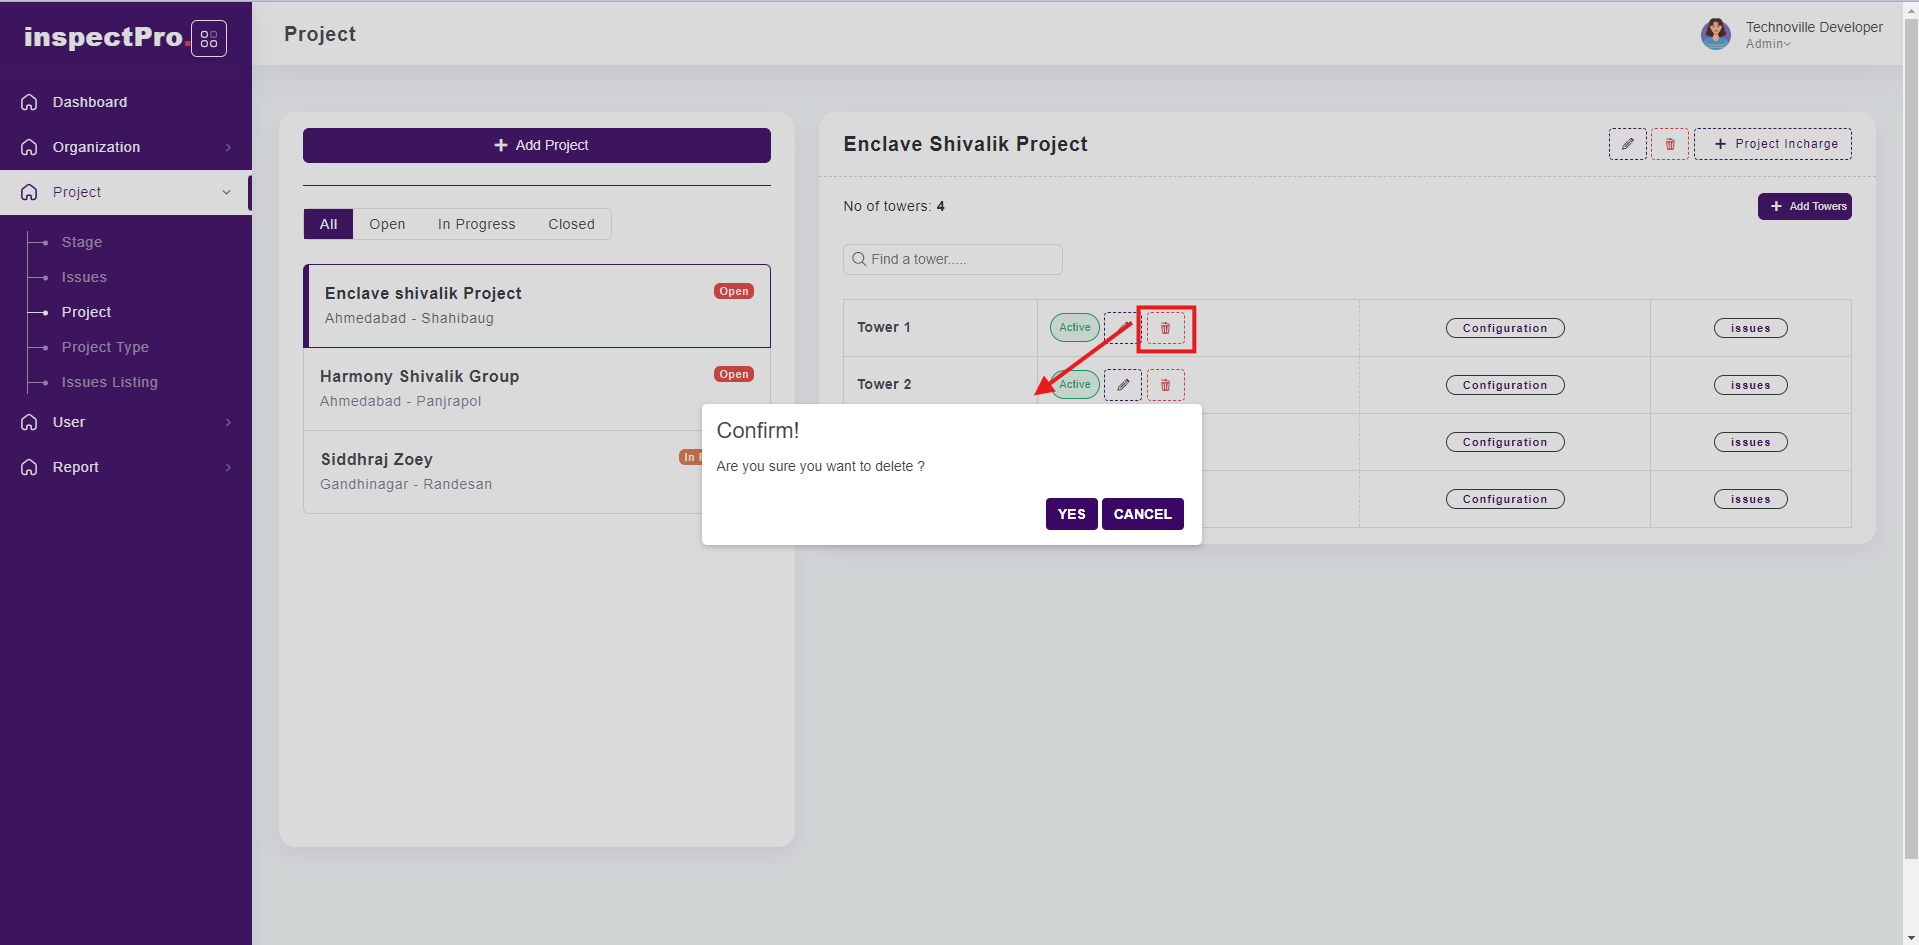
If you want to delete any tower click on delete button that particular tower is inactive. In future if you want to active that particular tower then click on edit and update button then that tower will be active.
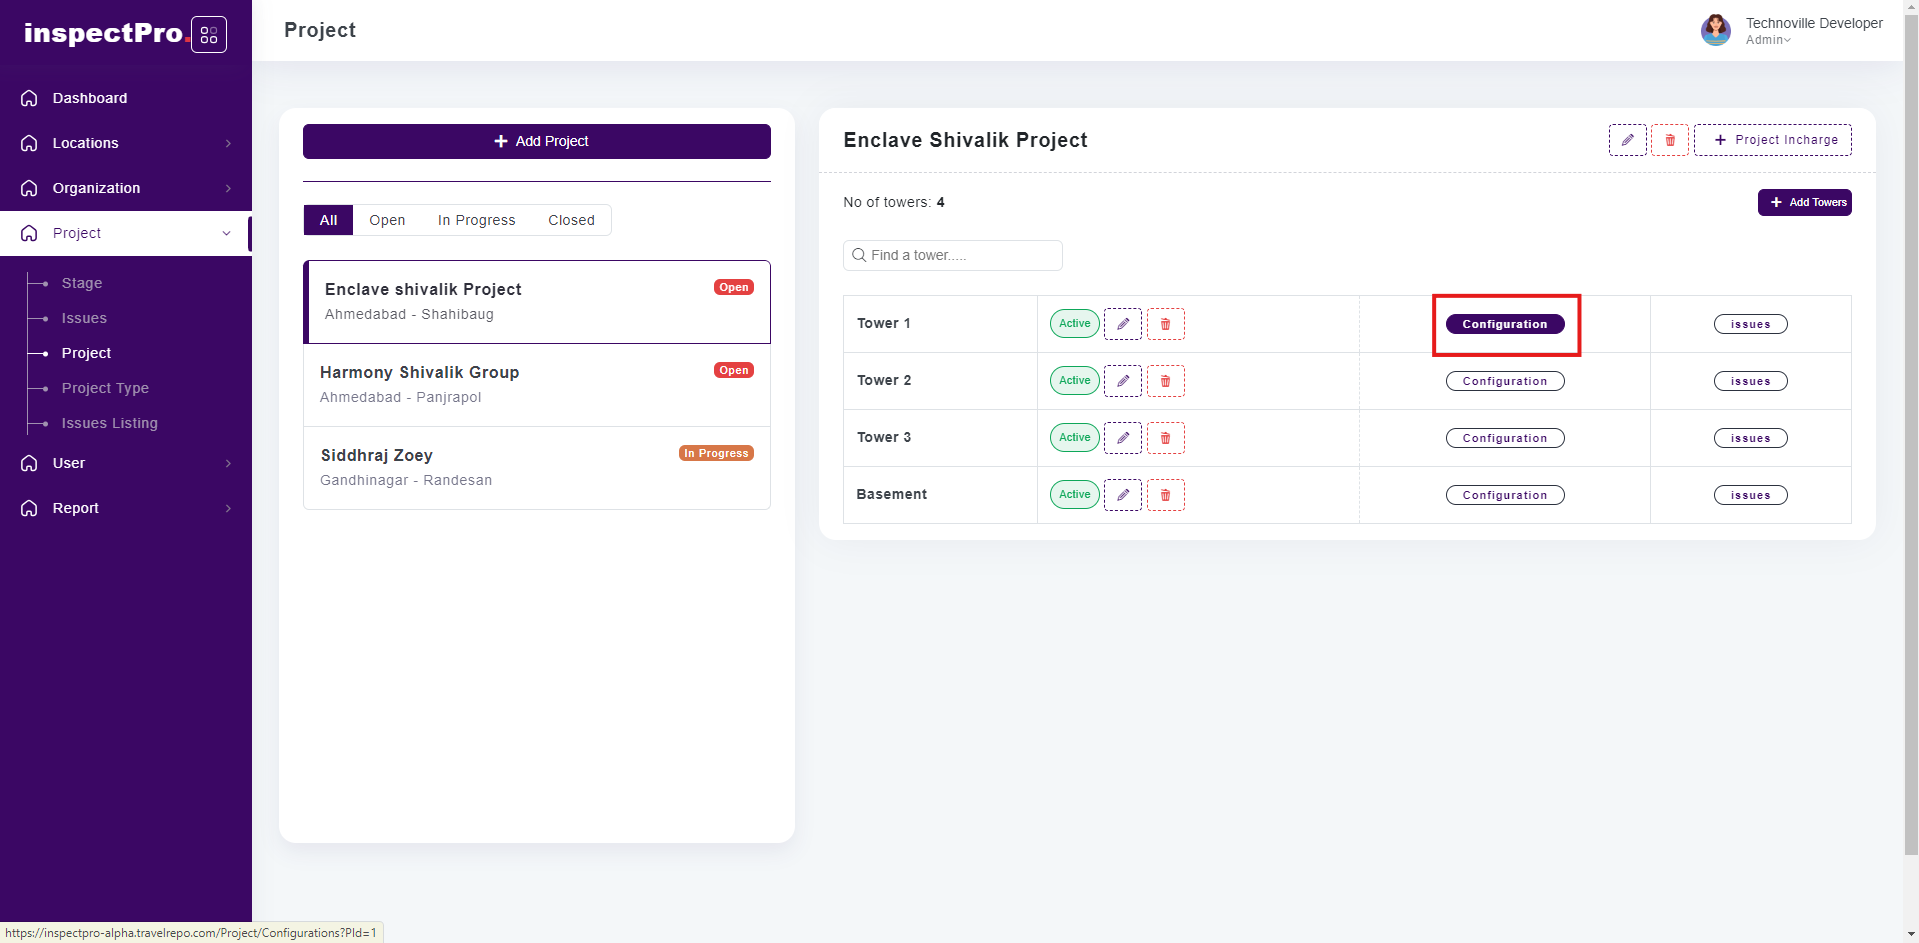
Now you need to click on Configuration button and Configuration screen will be displayed.
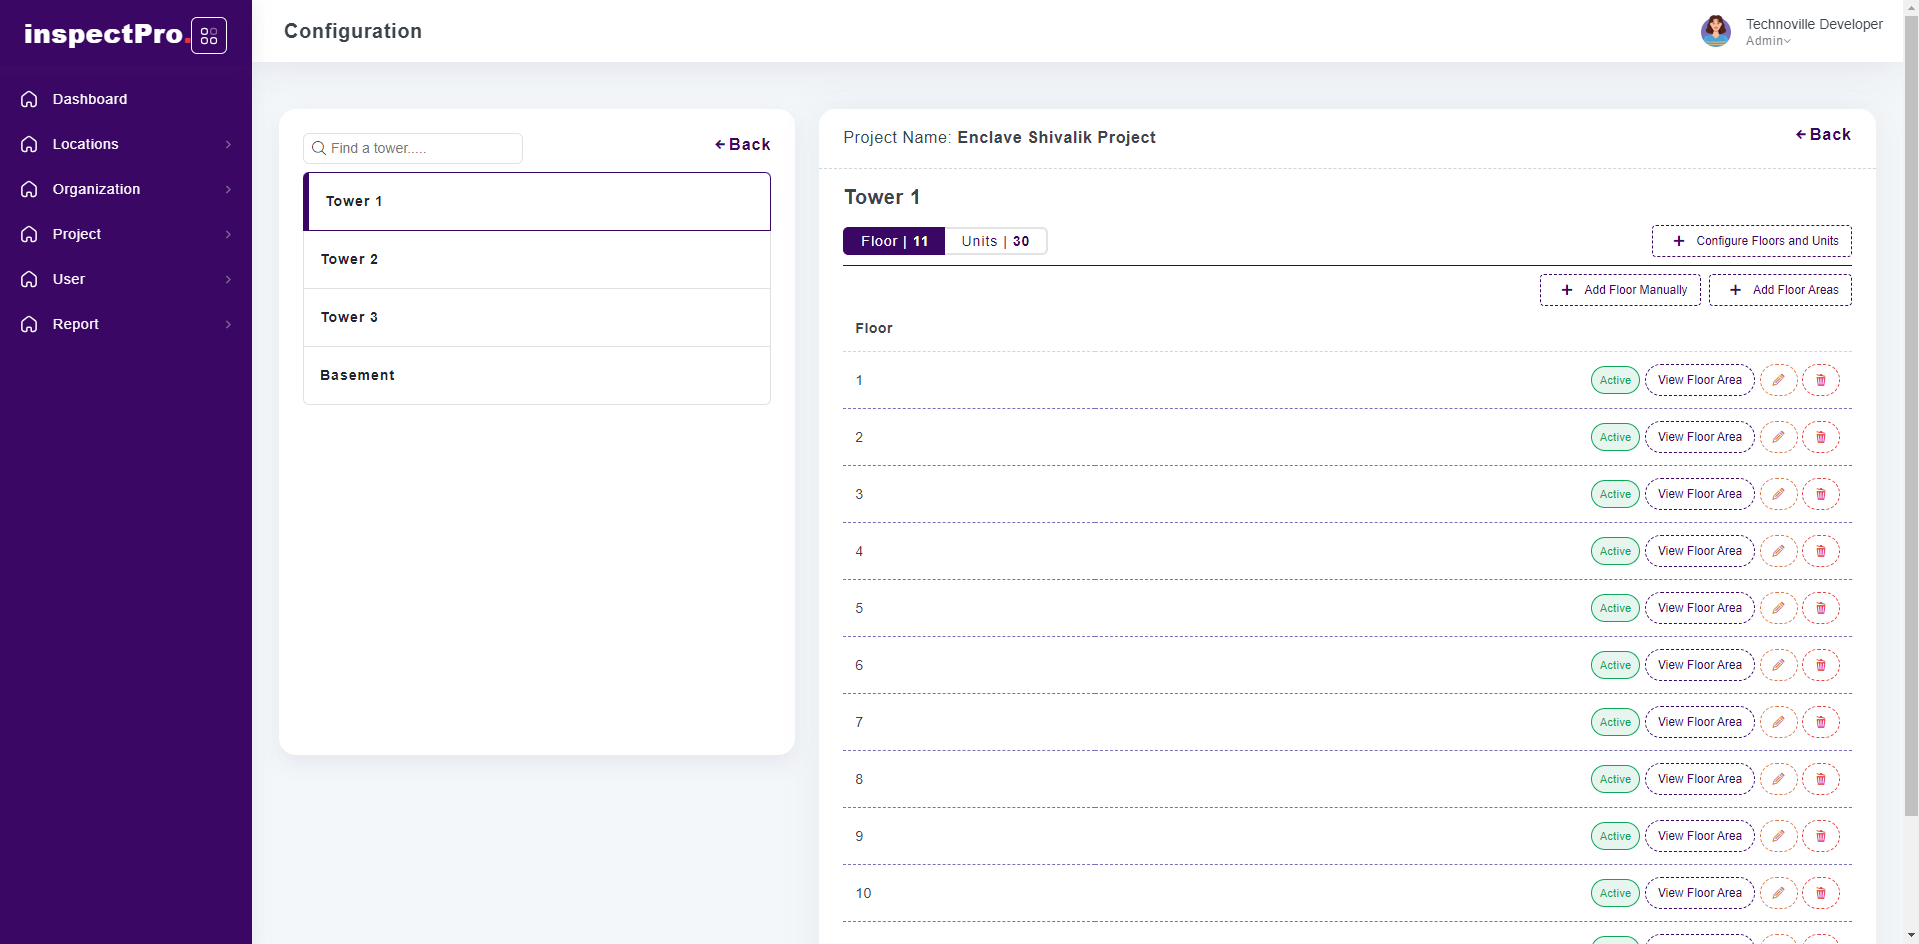
Then there are 3 options available in top right corner, if you want to add floor manually than you will be able to add it or else click on configure floors & units than you will be able to add floor and unit parallelly.
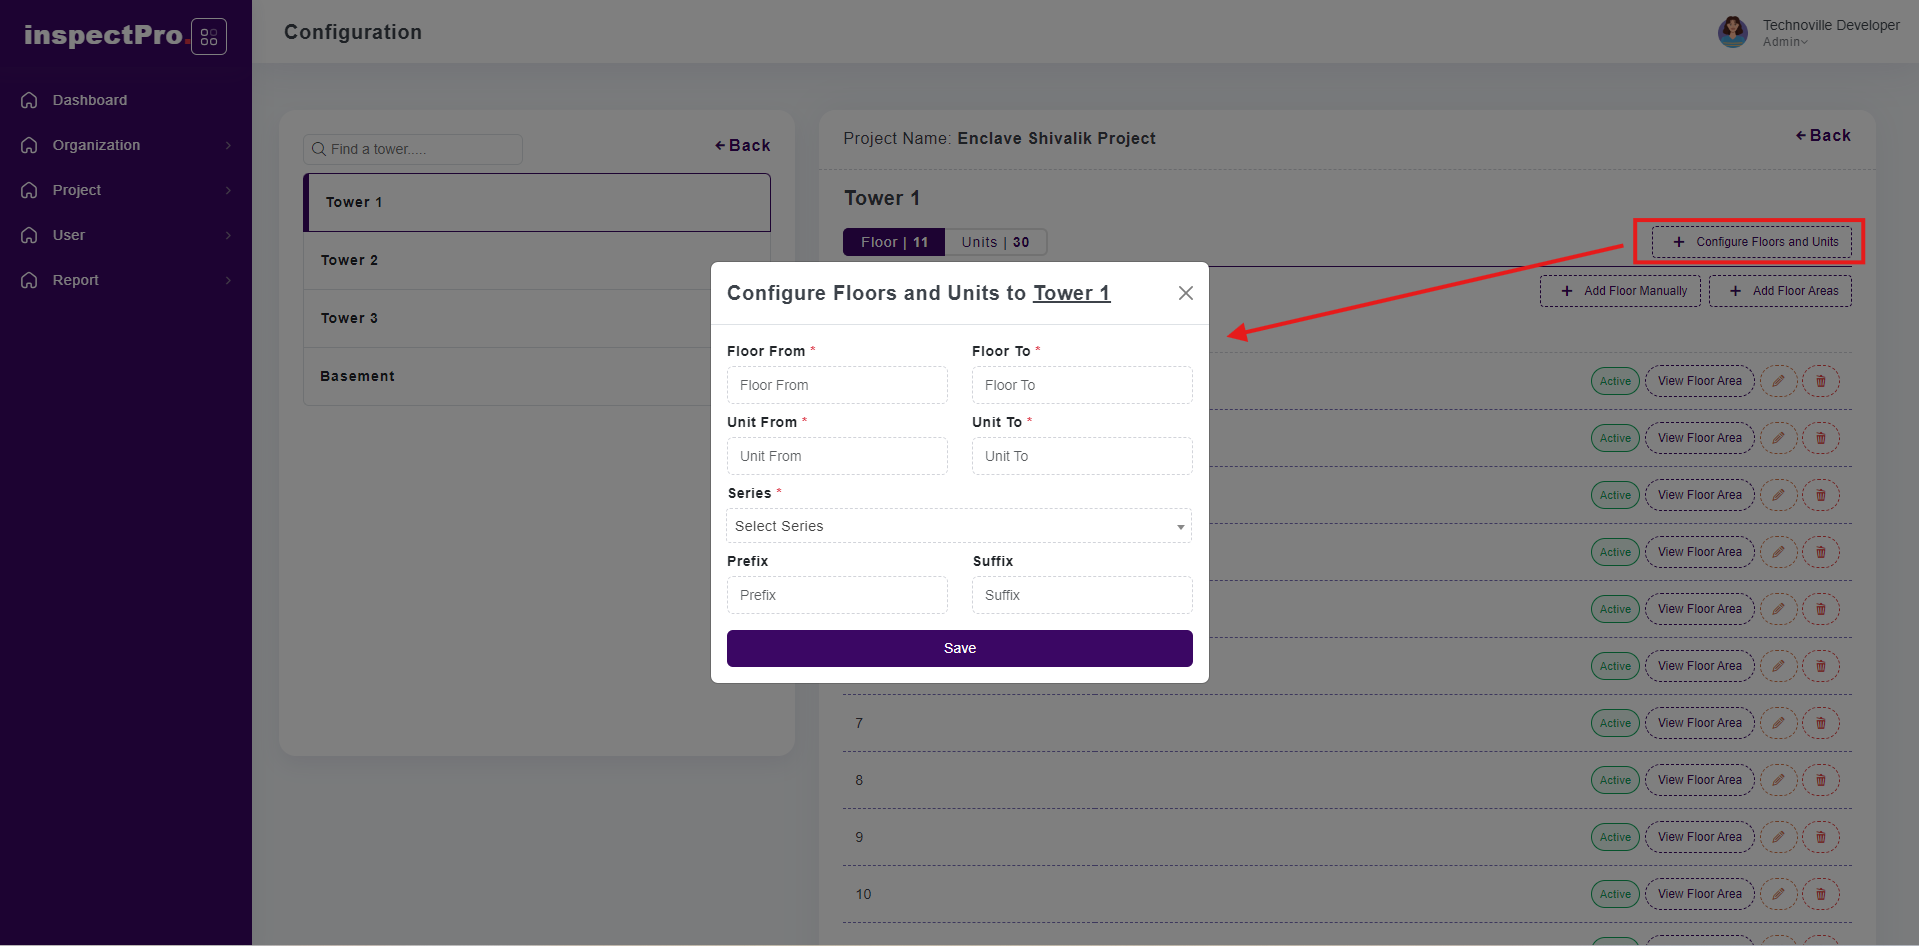
On clicking the Configure Floors and Units button, you will be able to add floors and units parallelly.
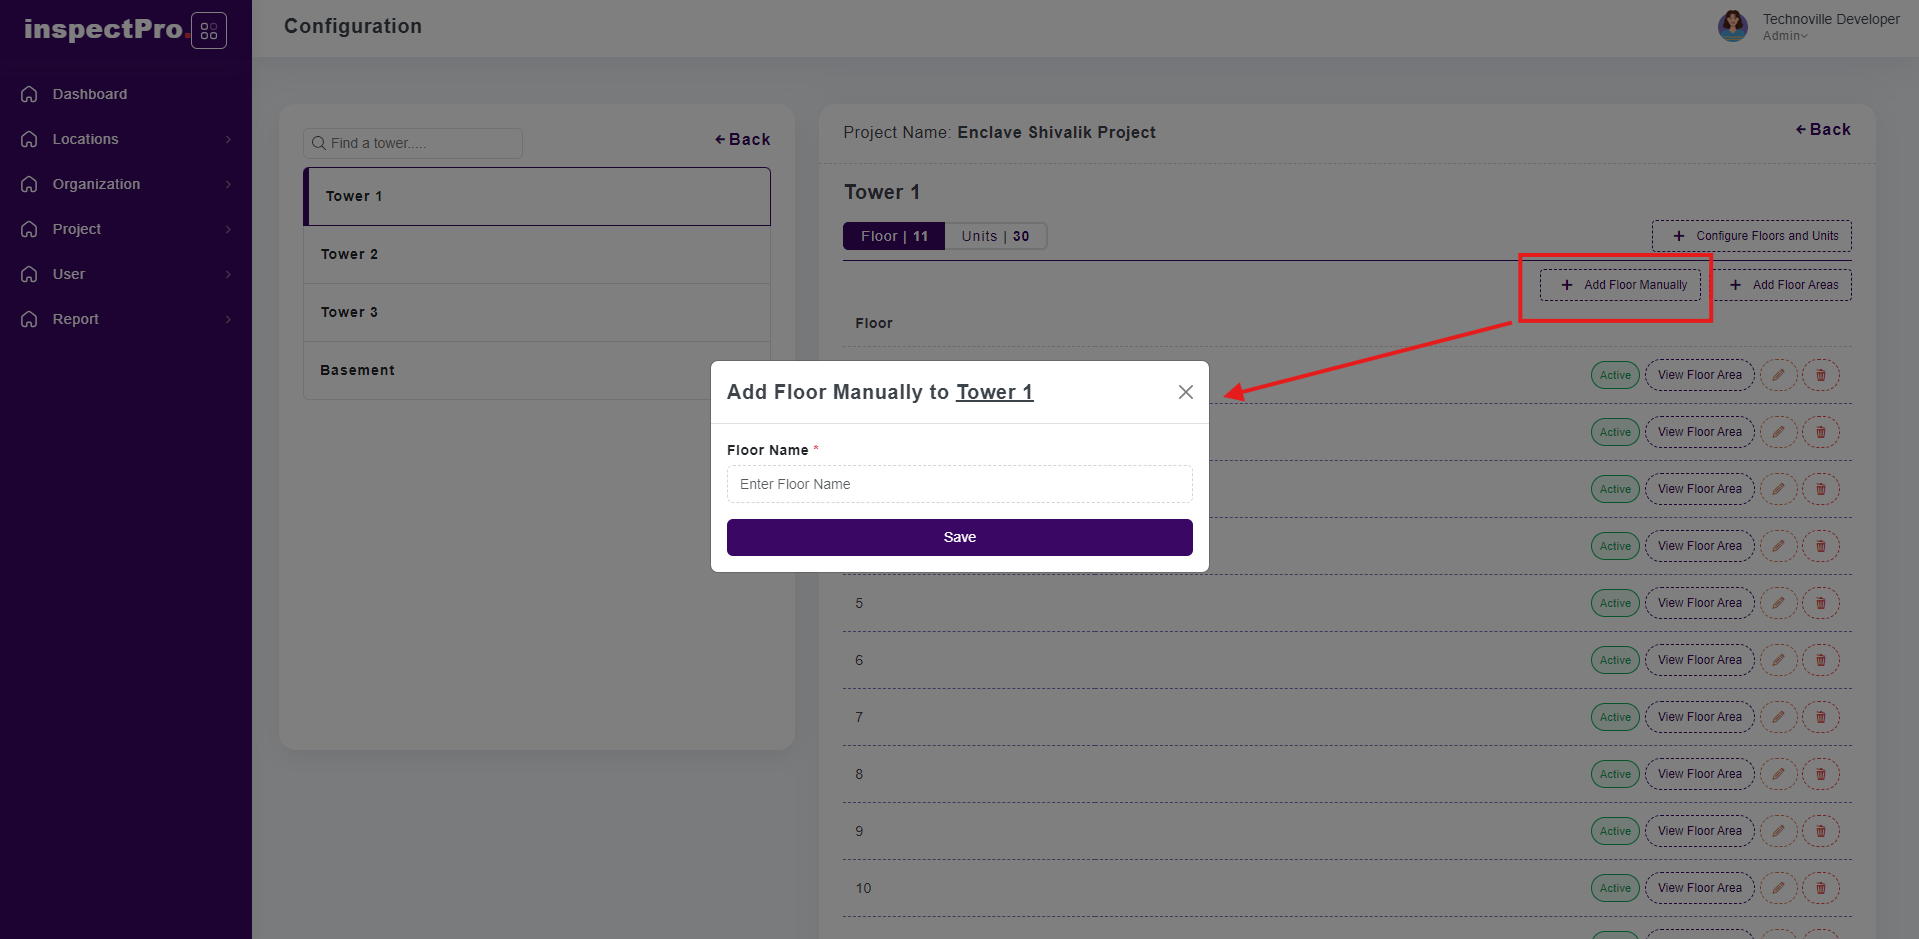
On clicking Add Floor Manually button, you will be able to add floor manually.
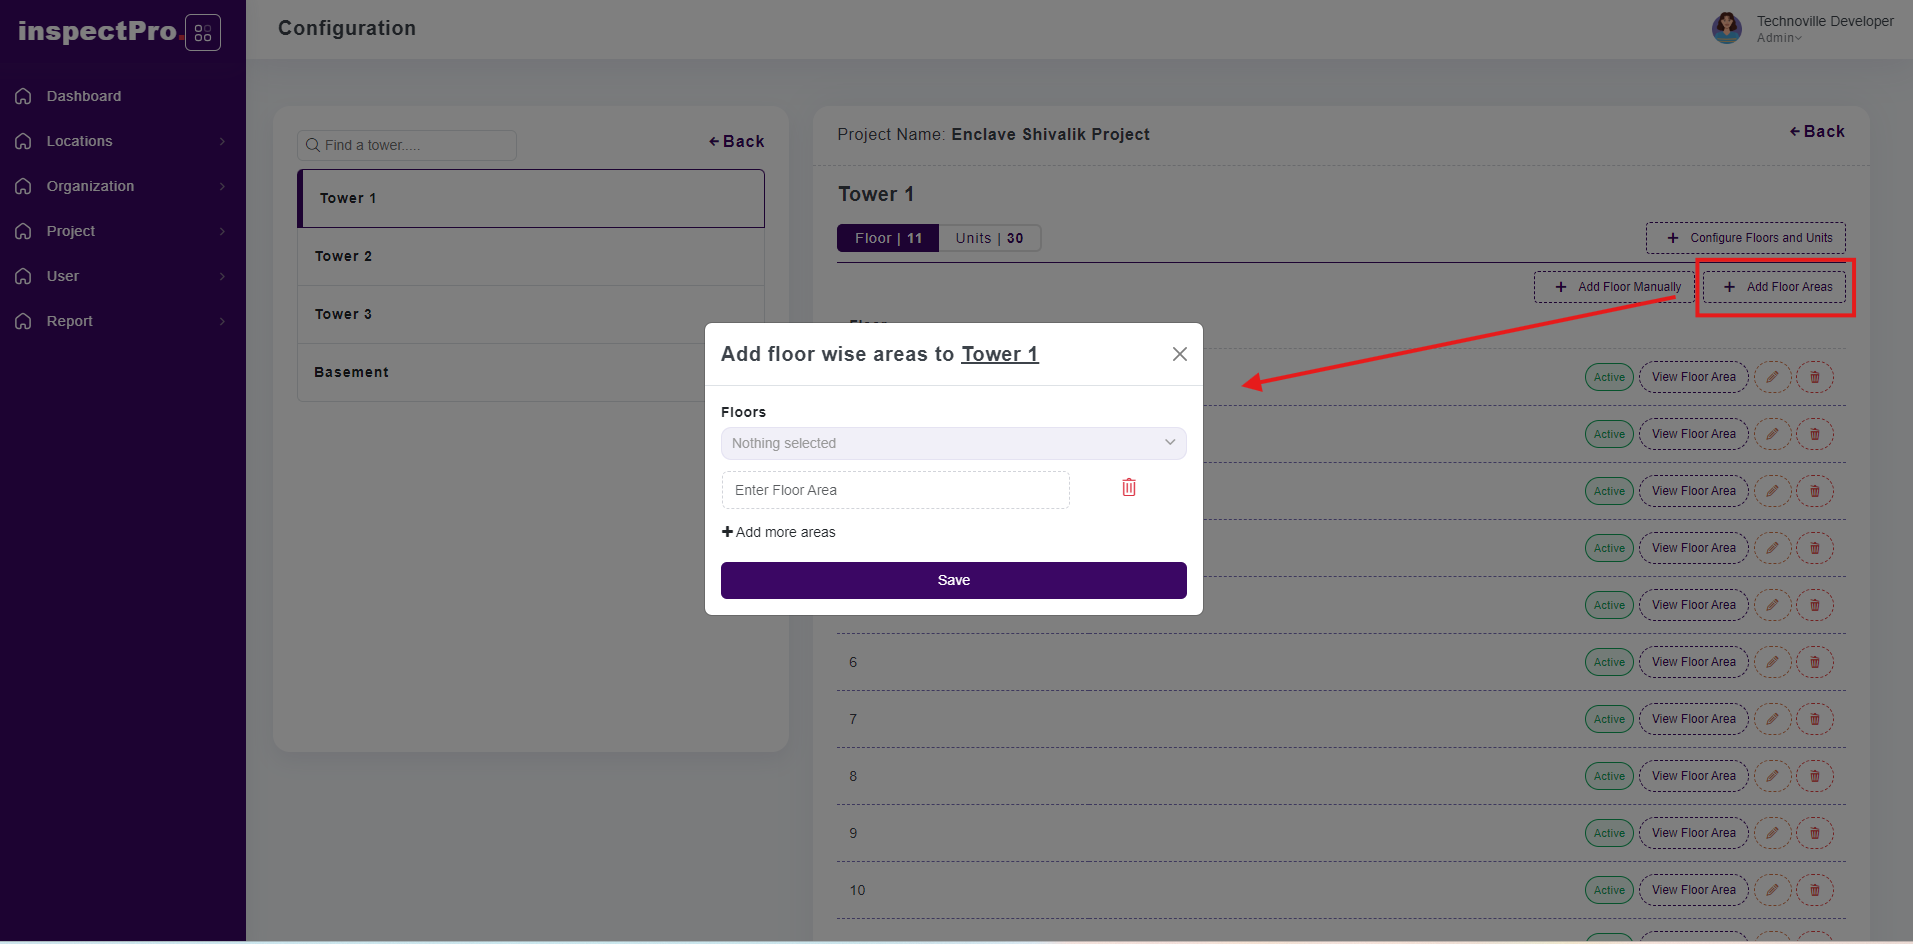
On clicking Addd Floor Areas button, here are 2 options if you want to add all area for all floors than you have to select all and if you want to add floor wise area than you select one by one floor and area accordingly.
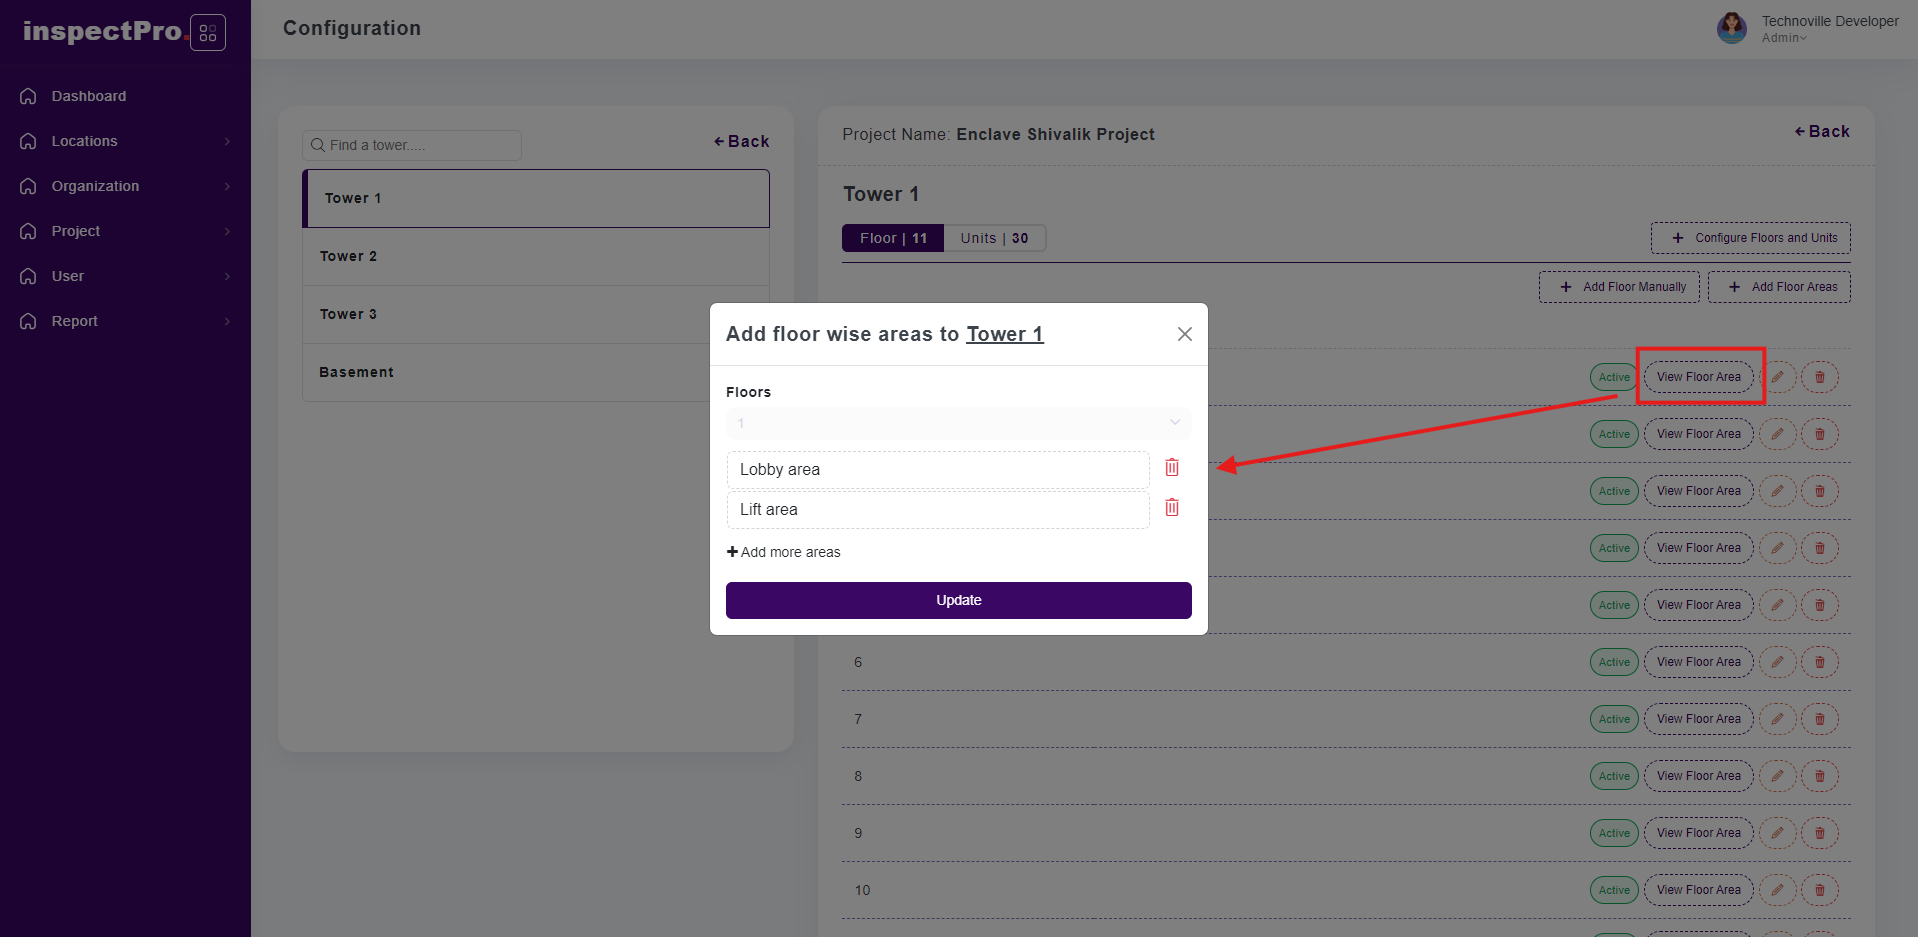
On click of View Floor Area, you will be able to see the added areas to a particular floor.
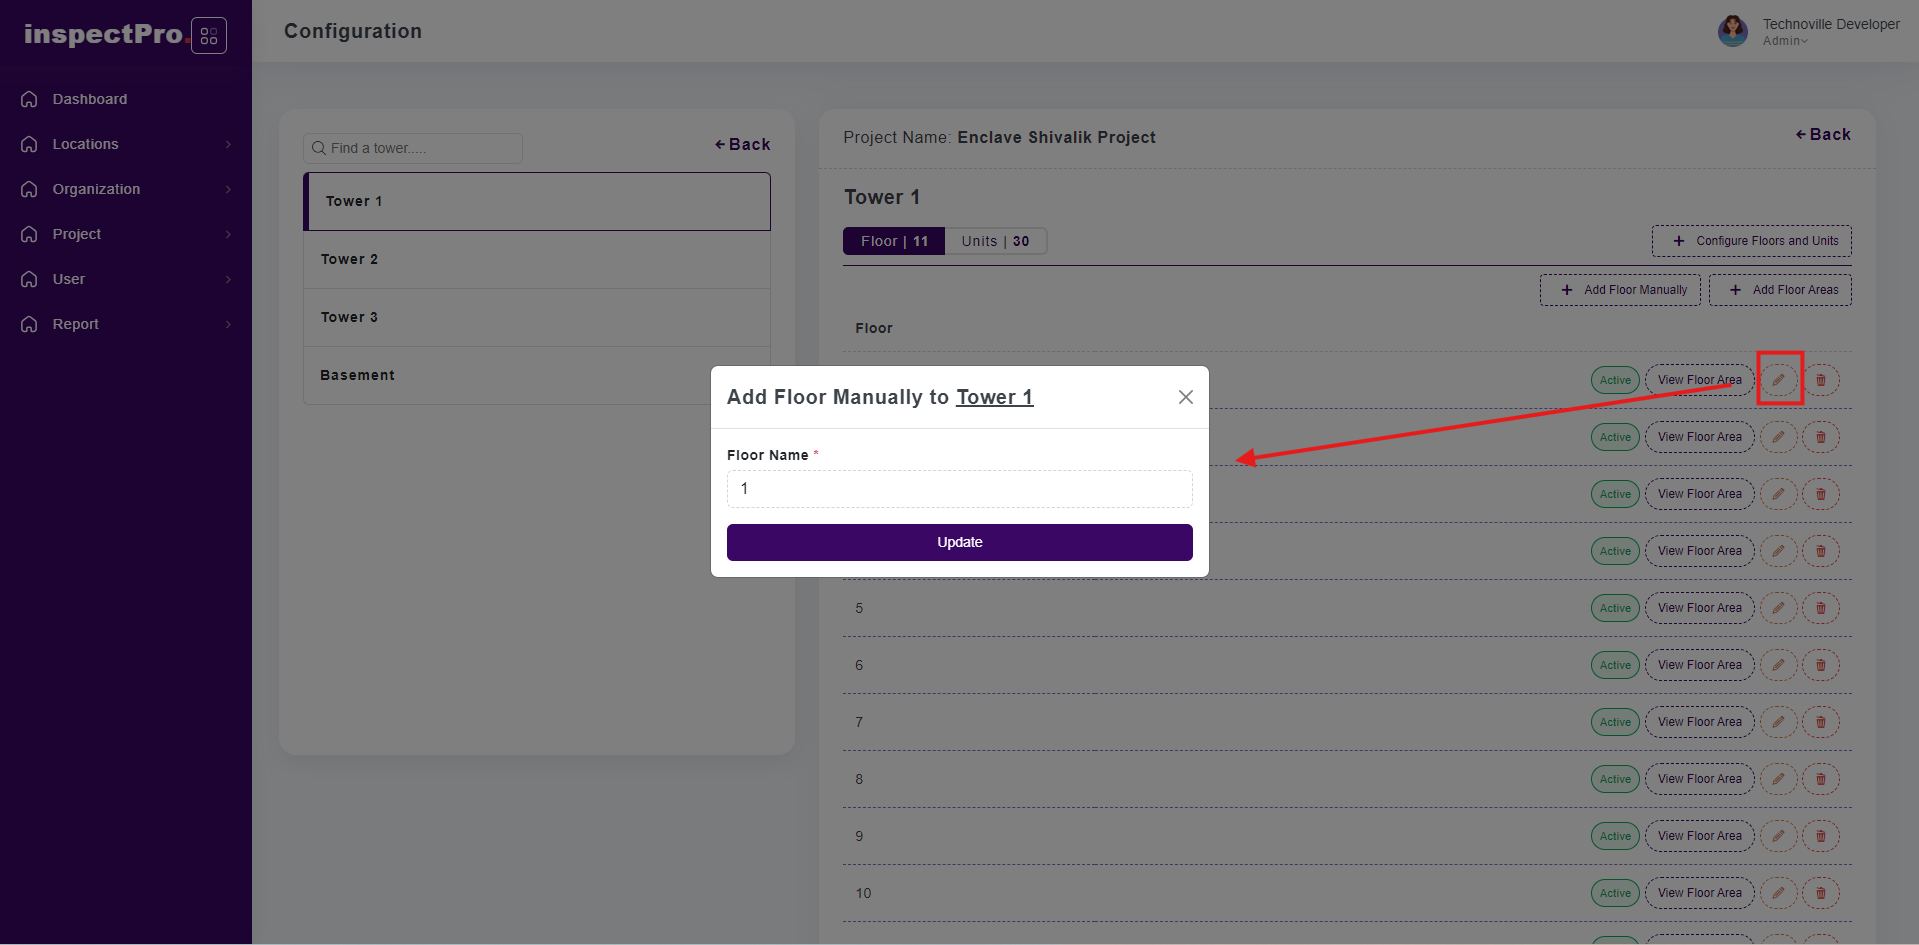
If you want to edit any particular floor you will be able to do it with the edit button.
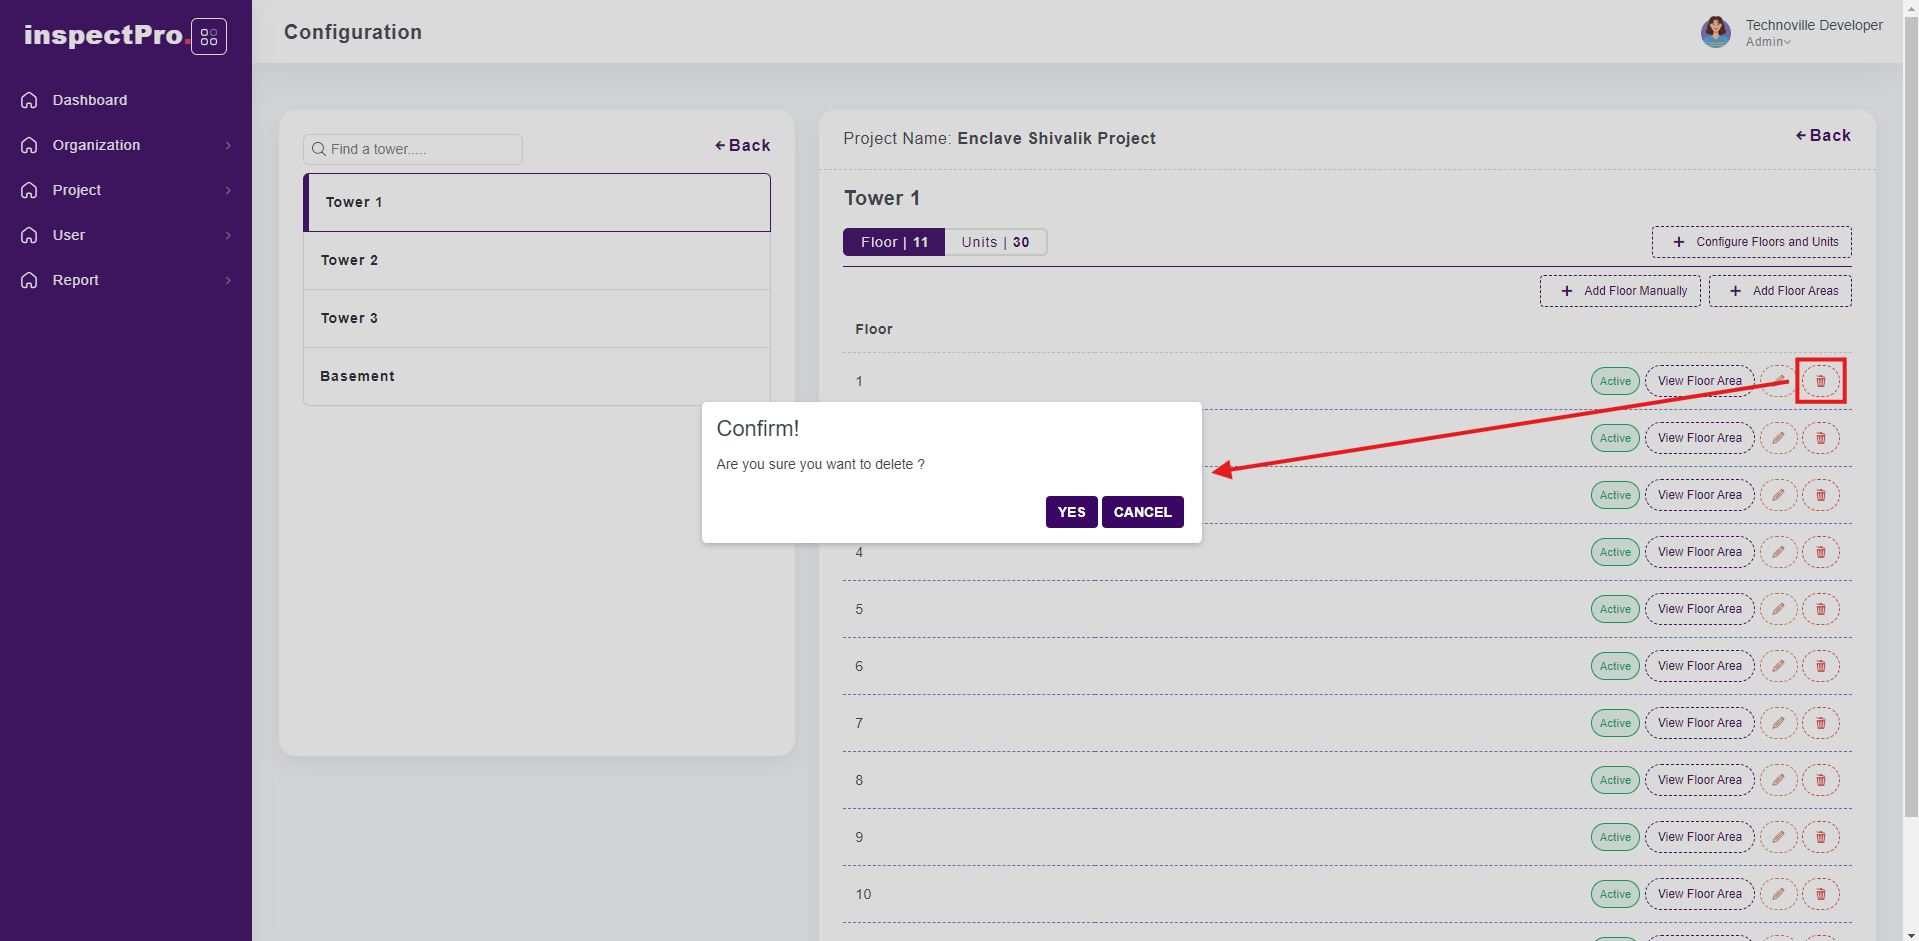
If you want to delete any particular record you will be able to do it with the delete button. If you want to active that floor & area than you need to click on edit button and click on update than that floor & unit will be active
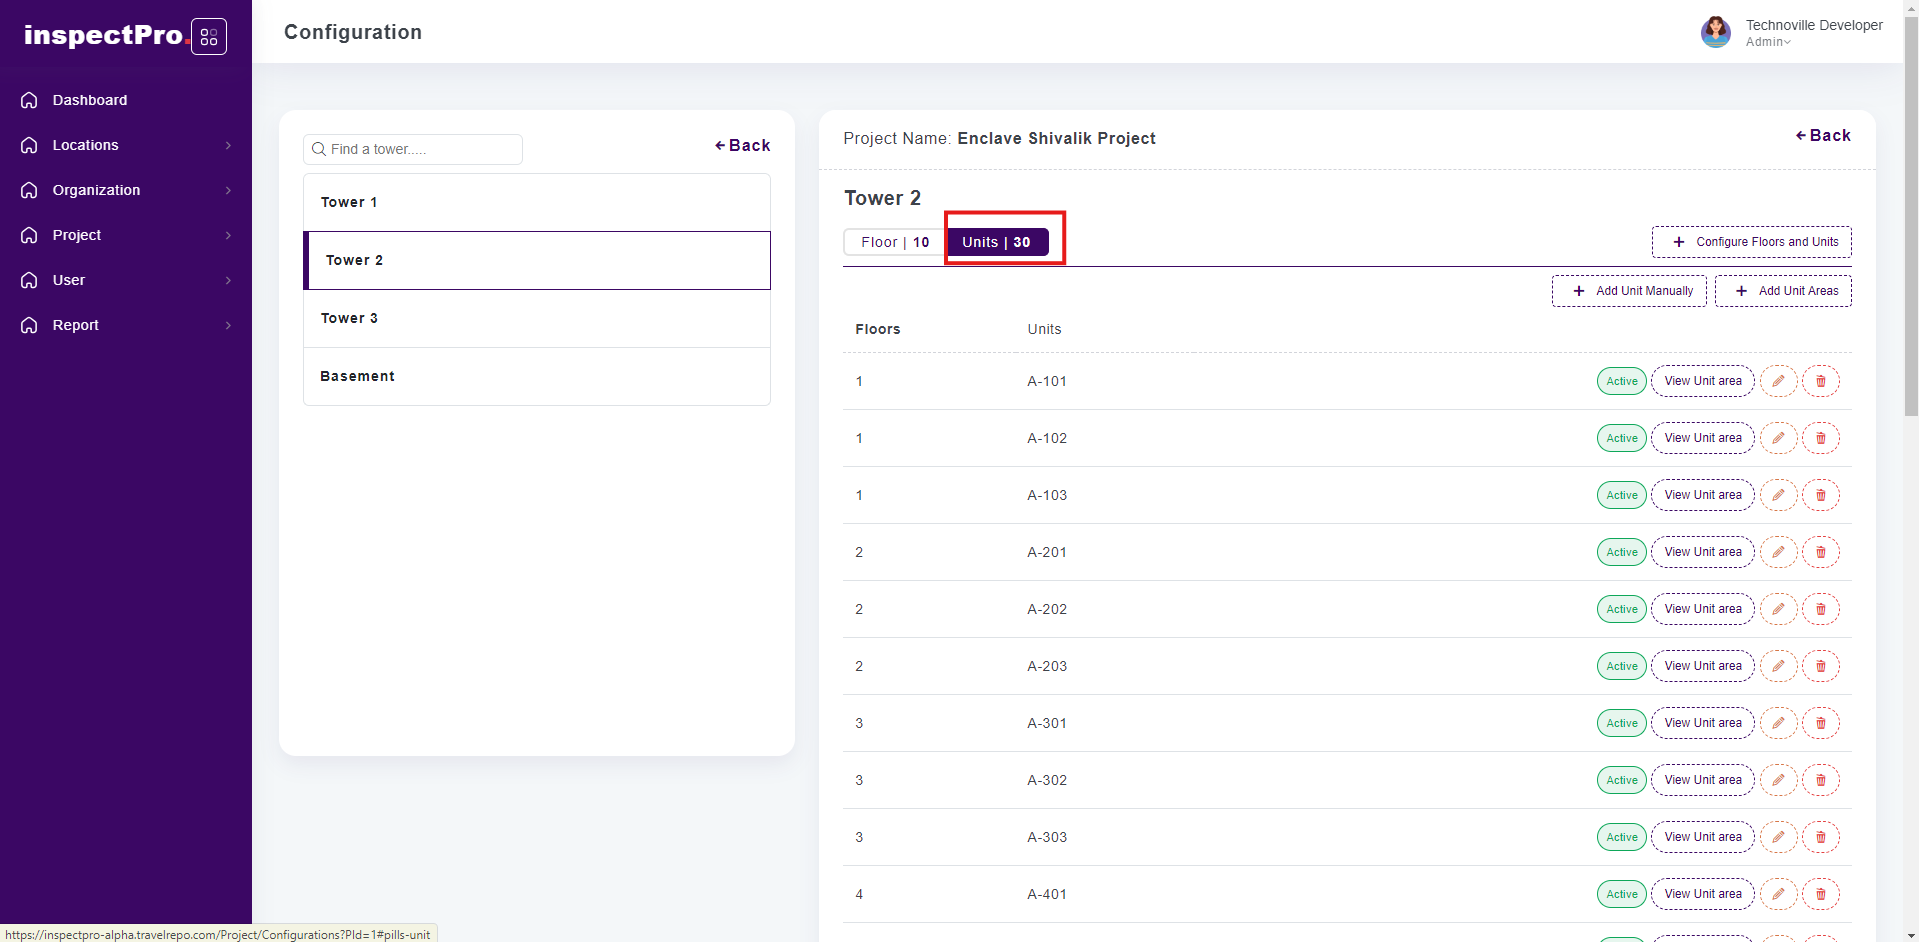
Now on click of Units tab that particular tab will be visible.
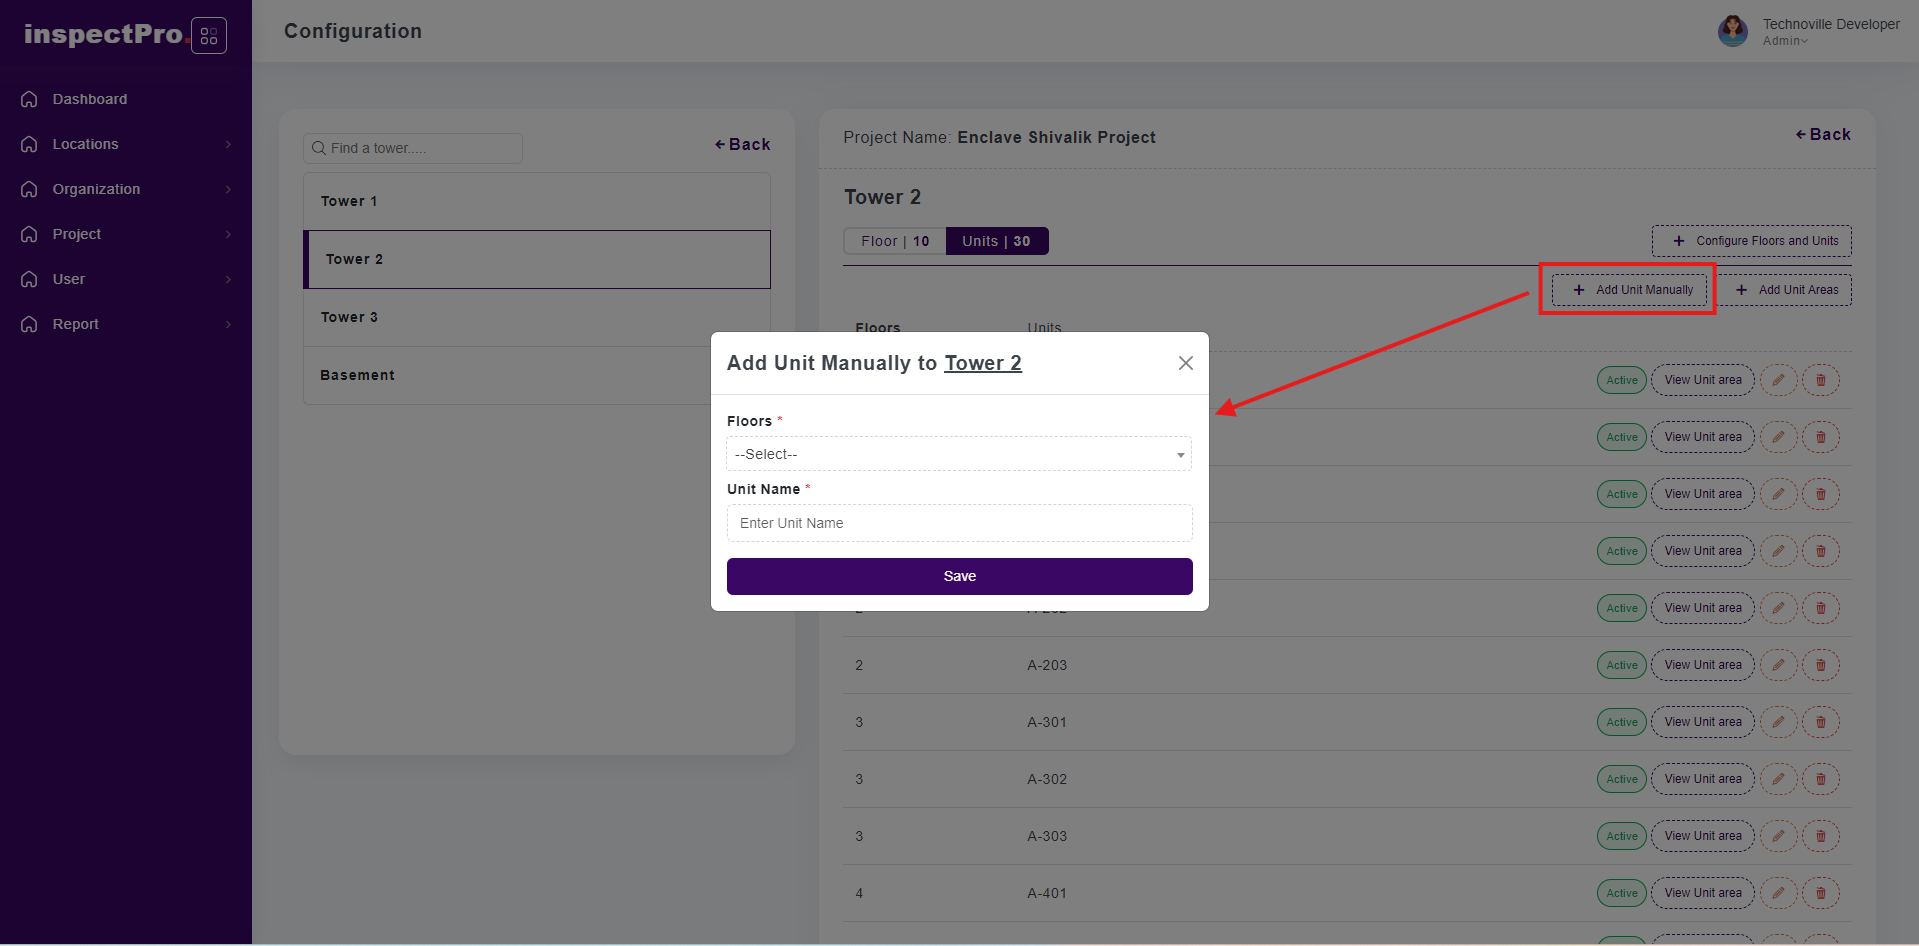
On clicking Add Unit Manually button, you will be able to add unit manually.
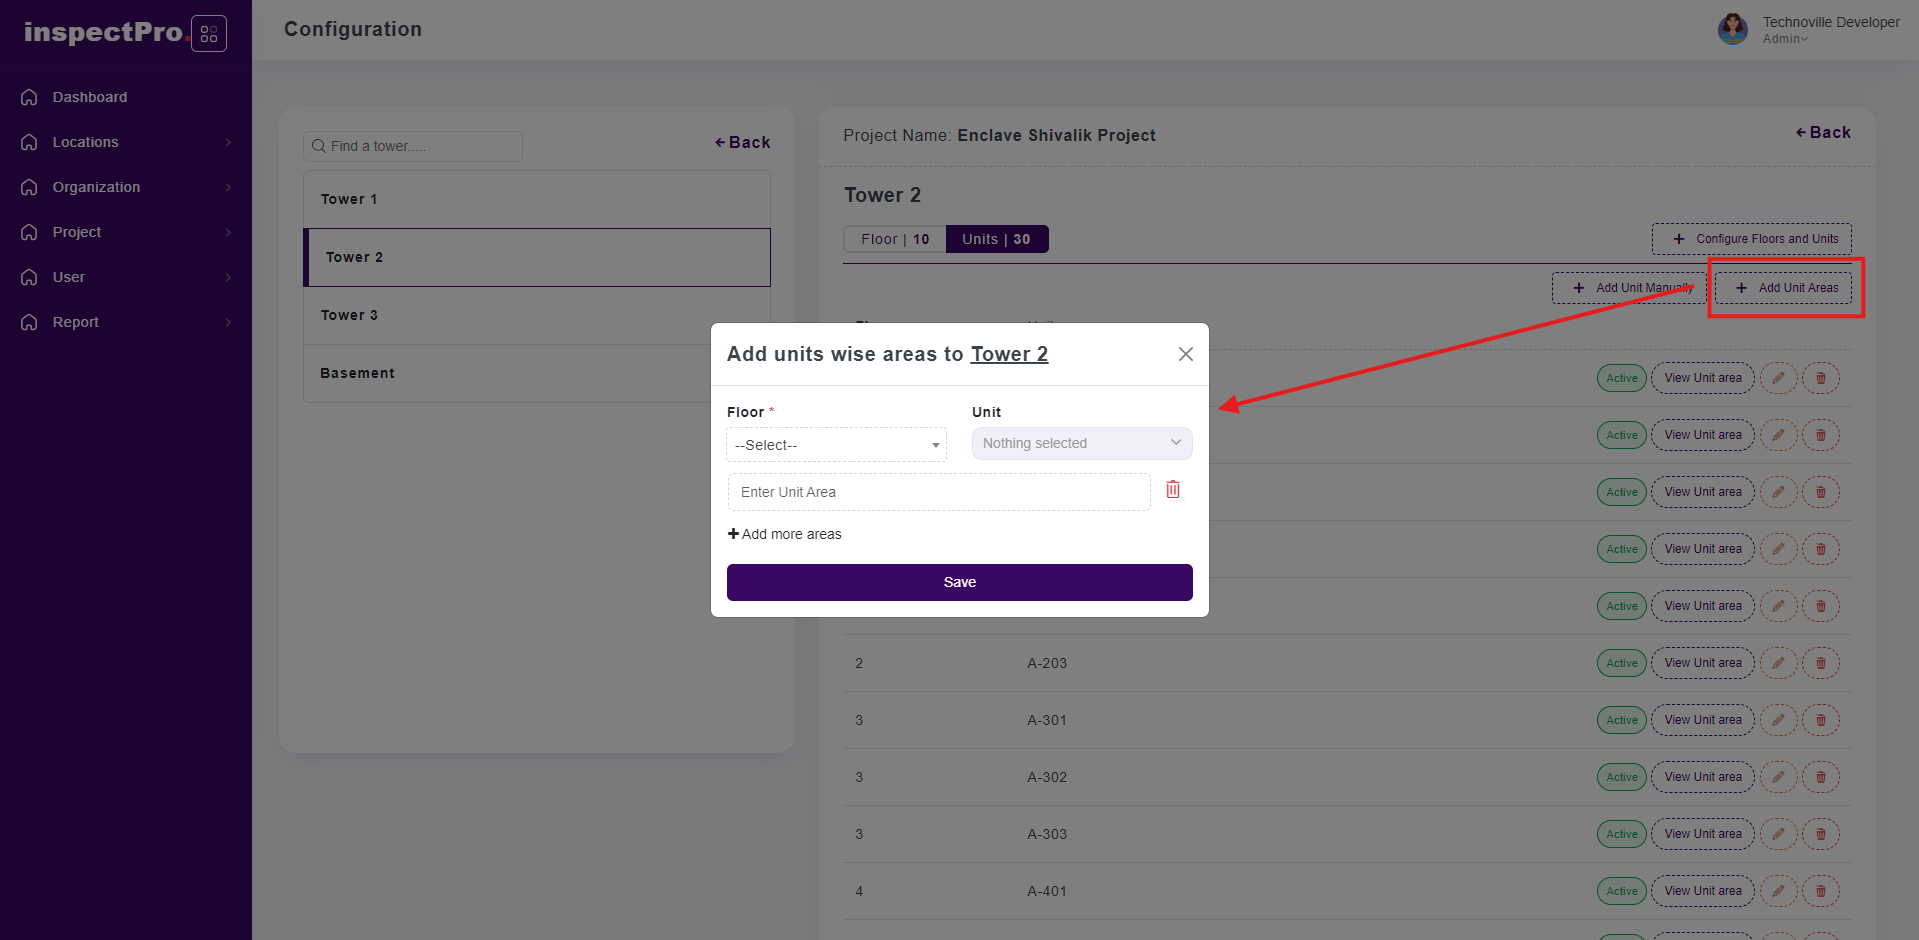
On clicking Addd Unit Areas button, here are 2 options if you want to add all units for all floors than you have to select all and if you want to add floor wise unit than you select one by one floor and unit accordingly.
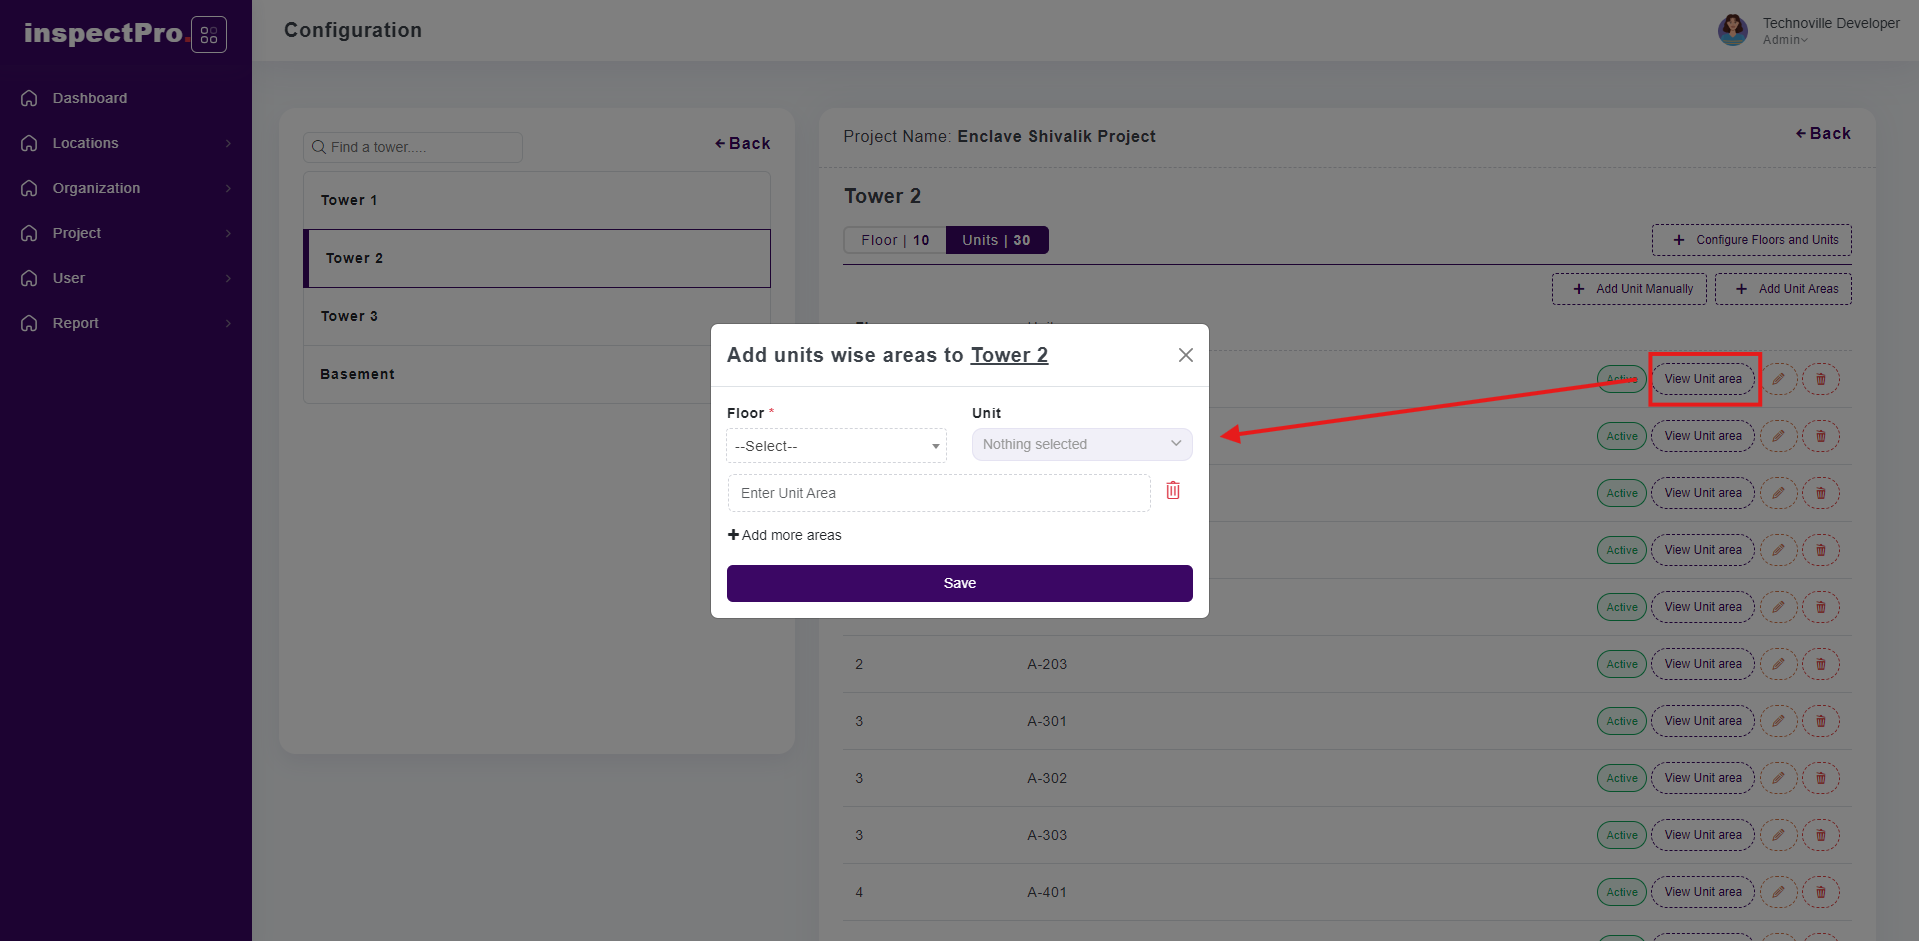
On click of View Unit Area, you will be able to see the added areas to a particular unit.
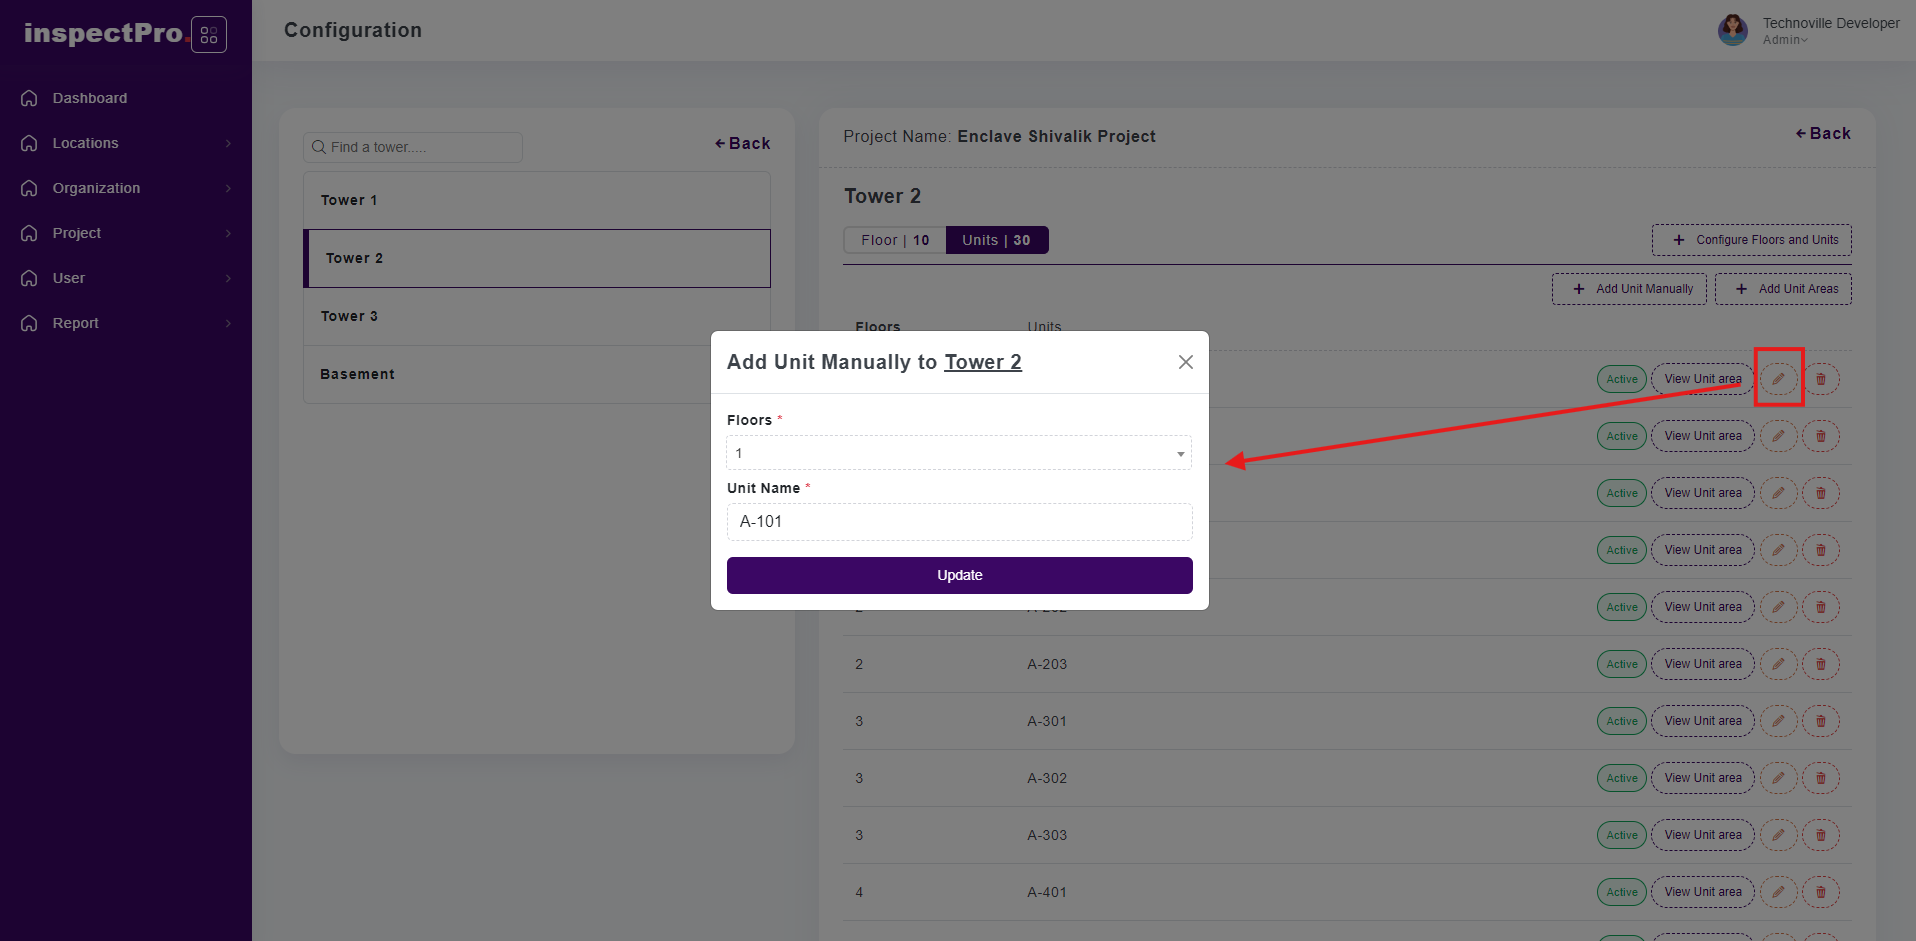
If you want to edit any particular floor and unit you will be able to do it with the edit button.
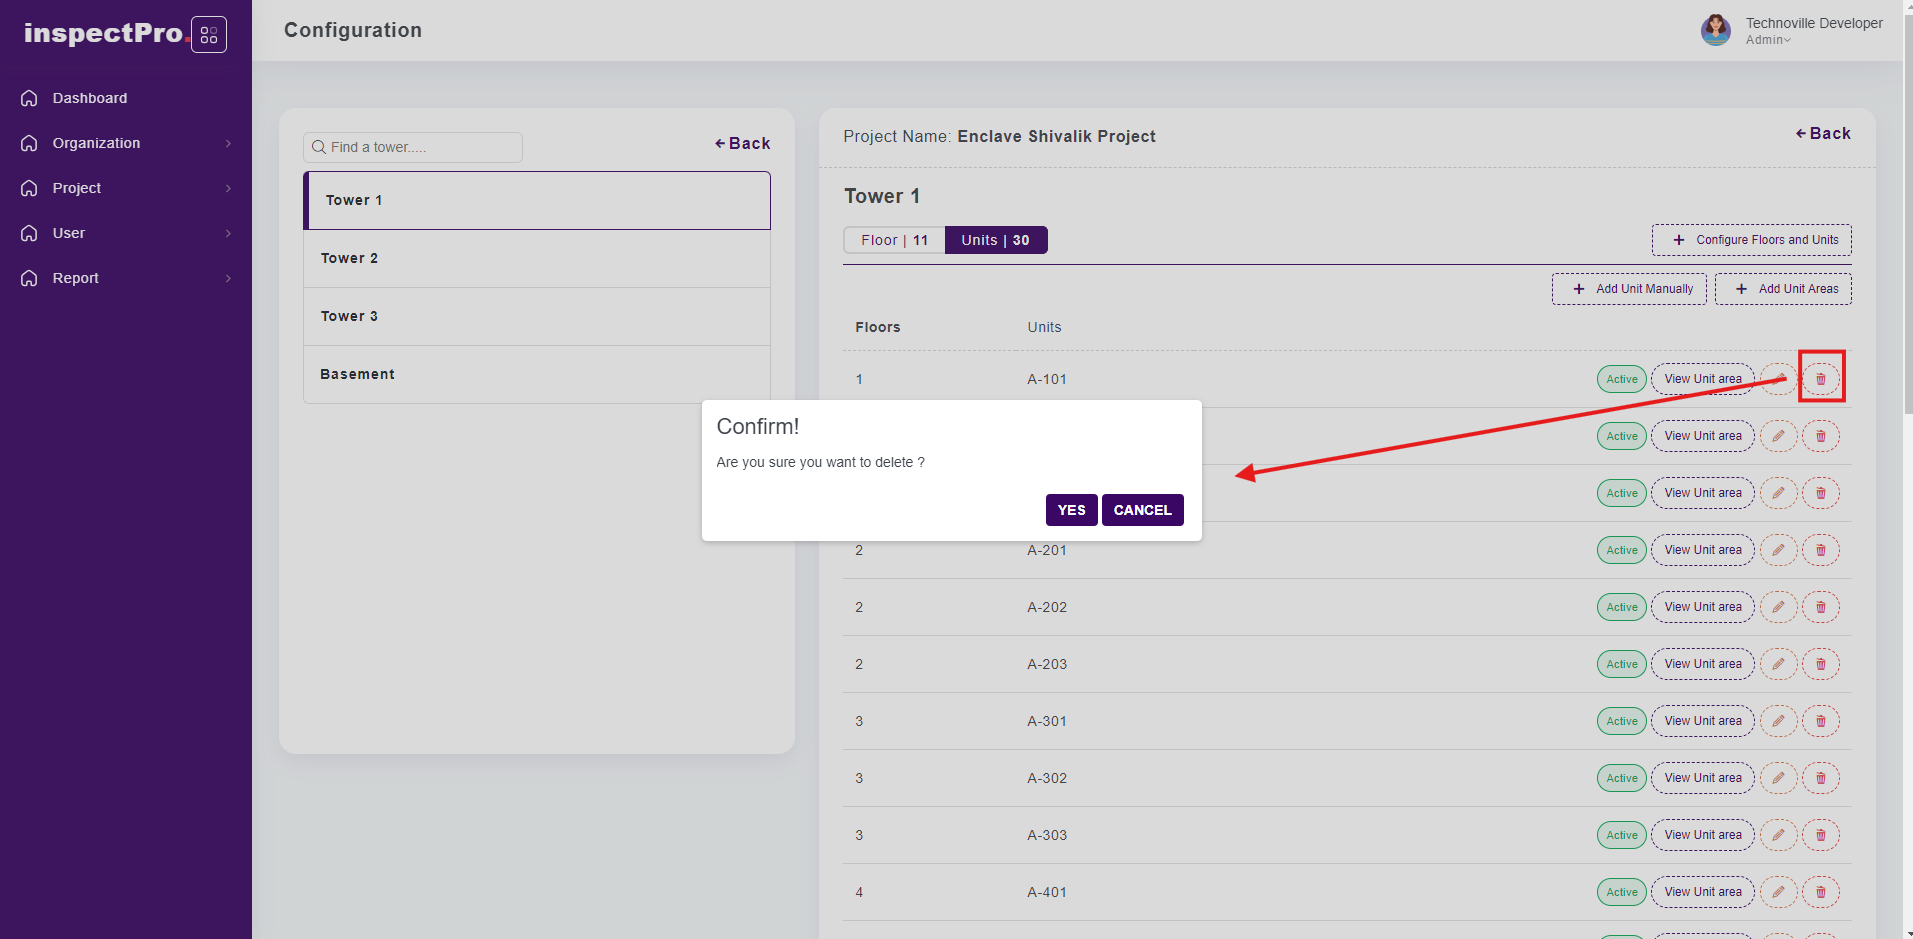
If you want to delete any particular record you will be able to do it with the delete button. If you want to active that floor & unit than you need to click on edit button and click on update than that floor & unit will be active
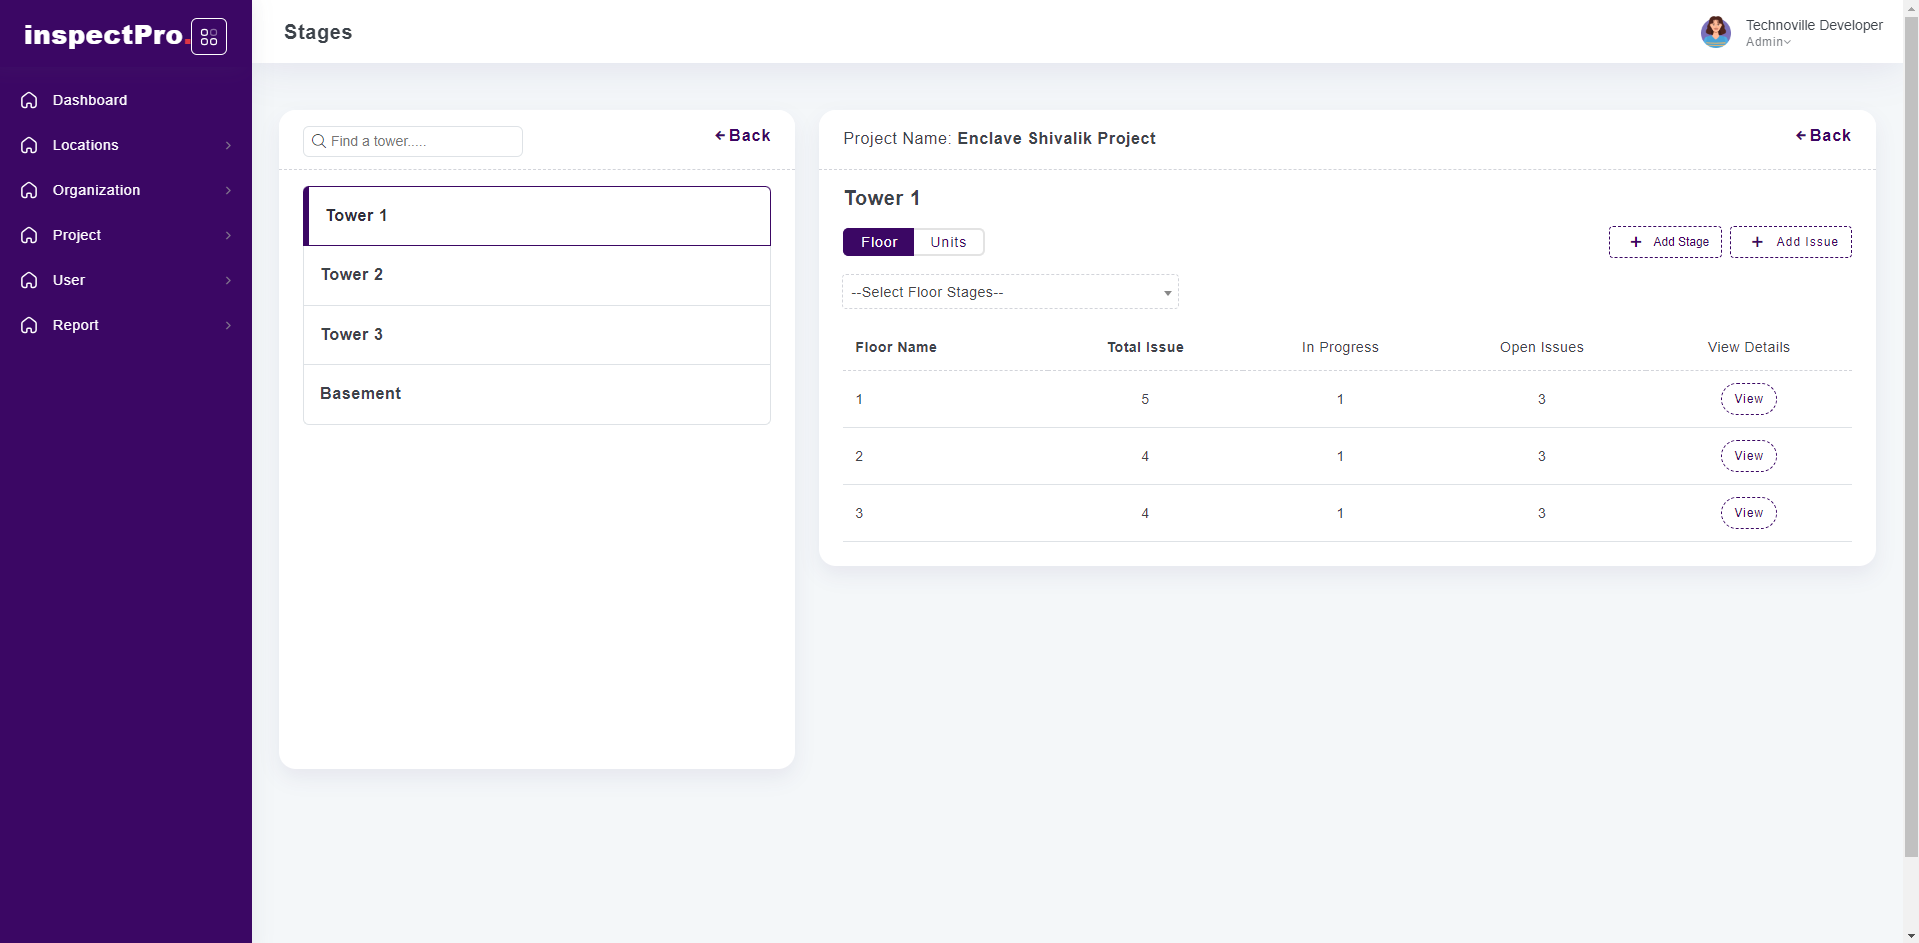
Now you need to click on Issues button and Issues screen will be displayed.
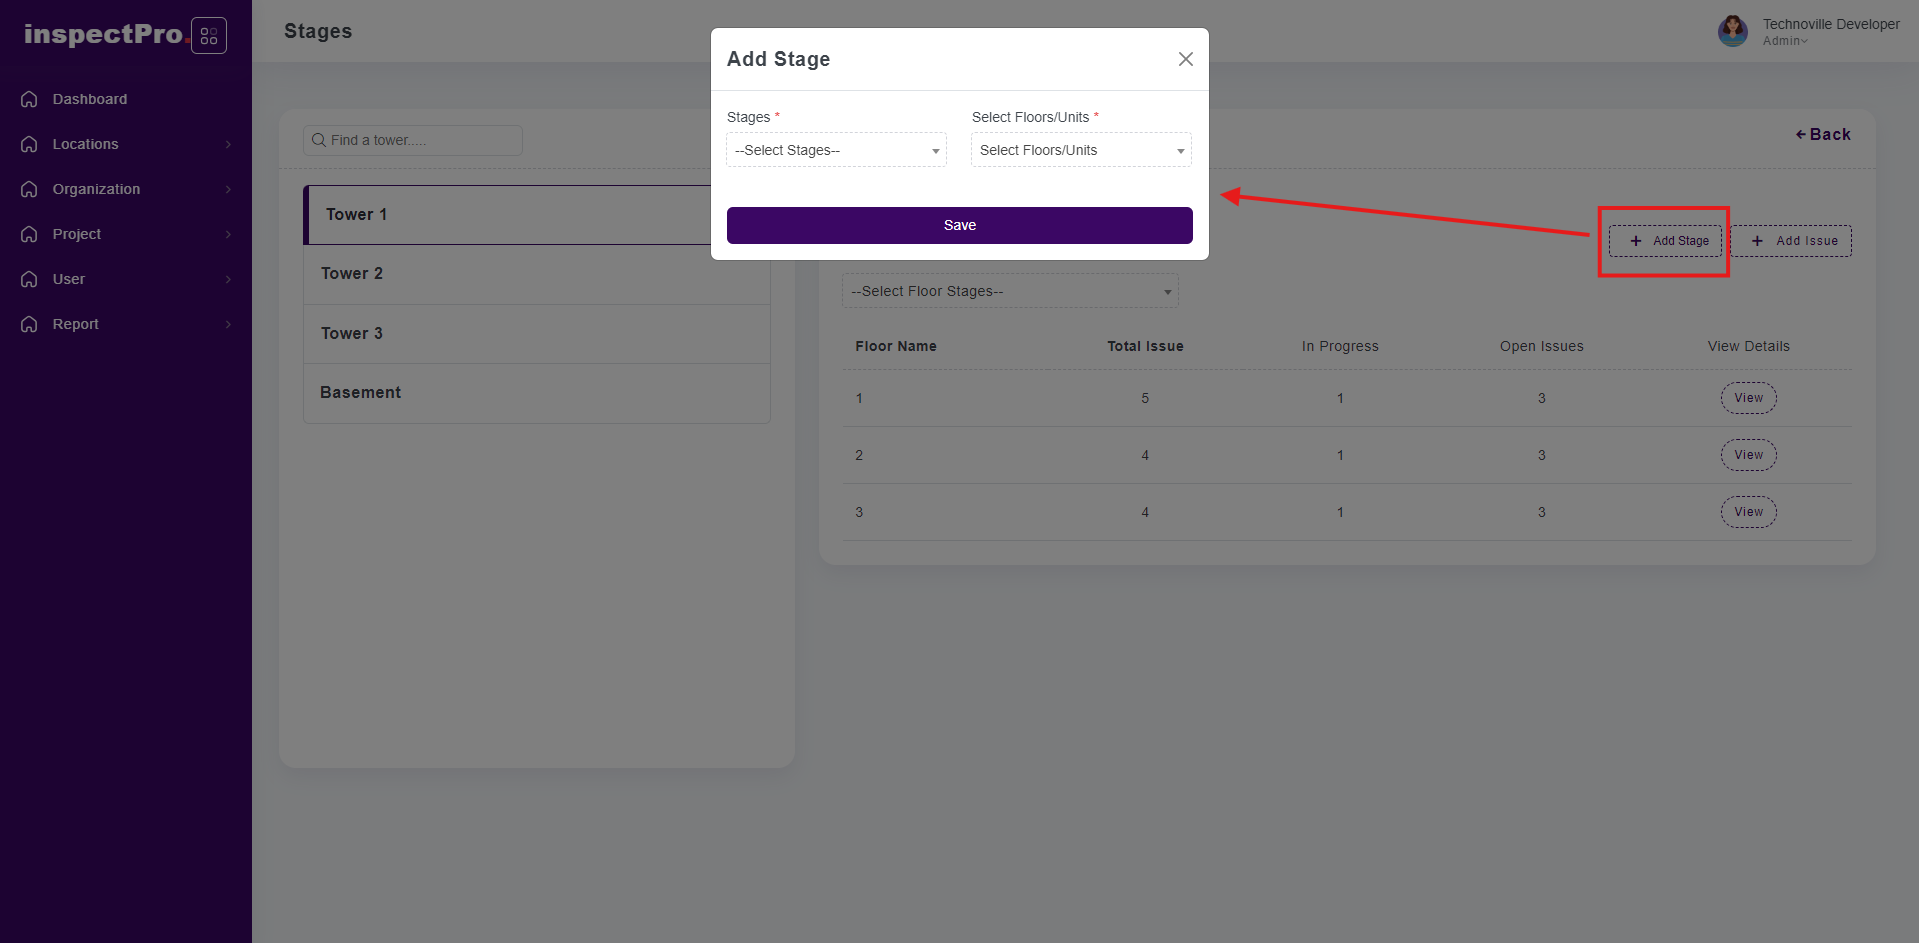
You can add stage by clicking the Add Stage button.
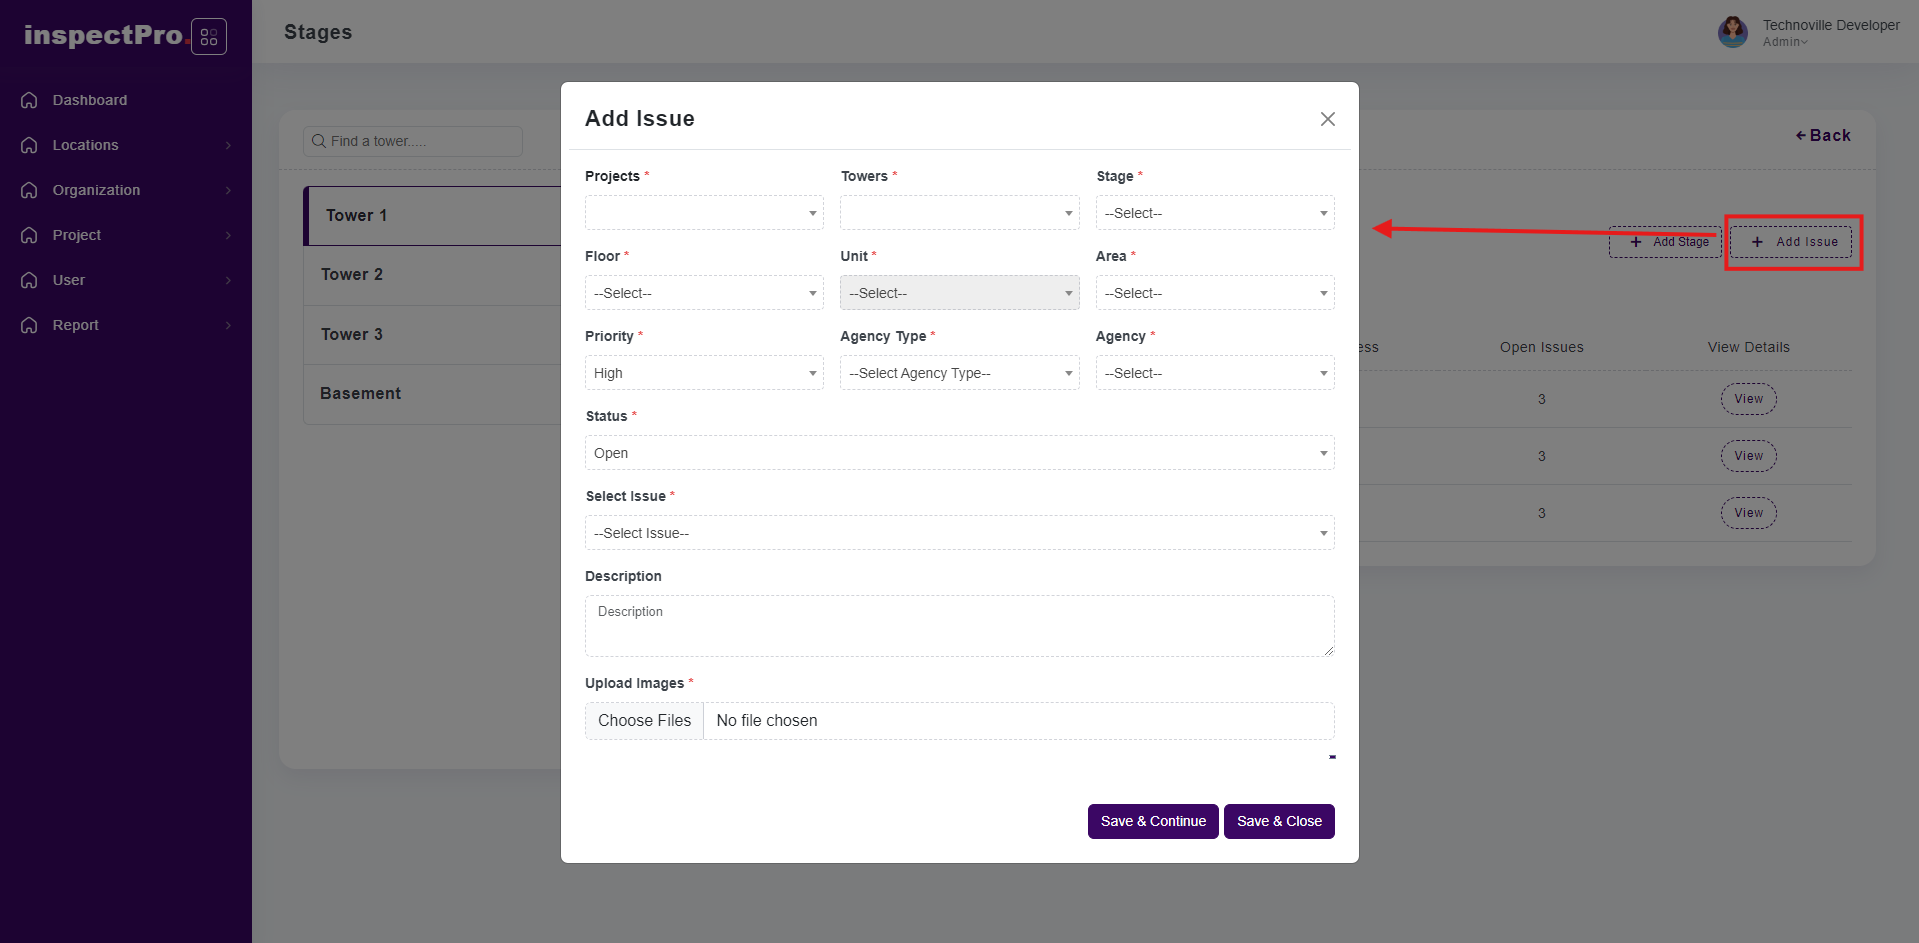
When you click on add issue first you need to select project name, than select tower , stage, floor , unit , area ,agency type , agency after select this all field now there is a 2 option either you select issue from drop down or else there is a other option you need to select that and write your own issue add photos with remarks after complete this all process there is a 2 option "save & continue" and "save & close" if you are choosing save & continue than page remains the same you will be able to add new issue & if you are choosing save & close than issue page remains close.
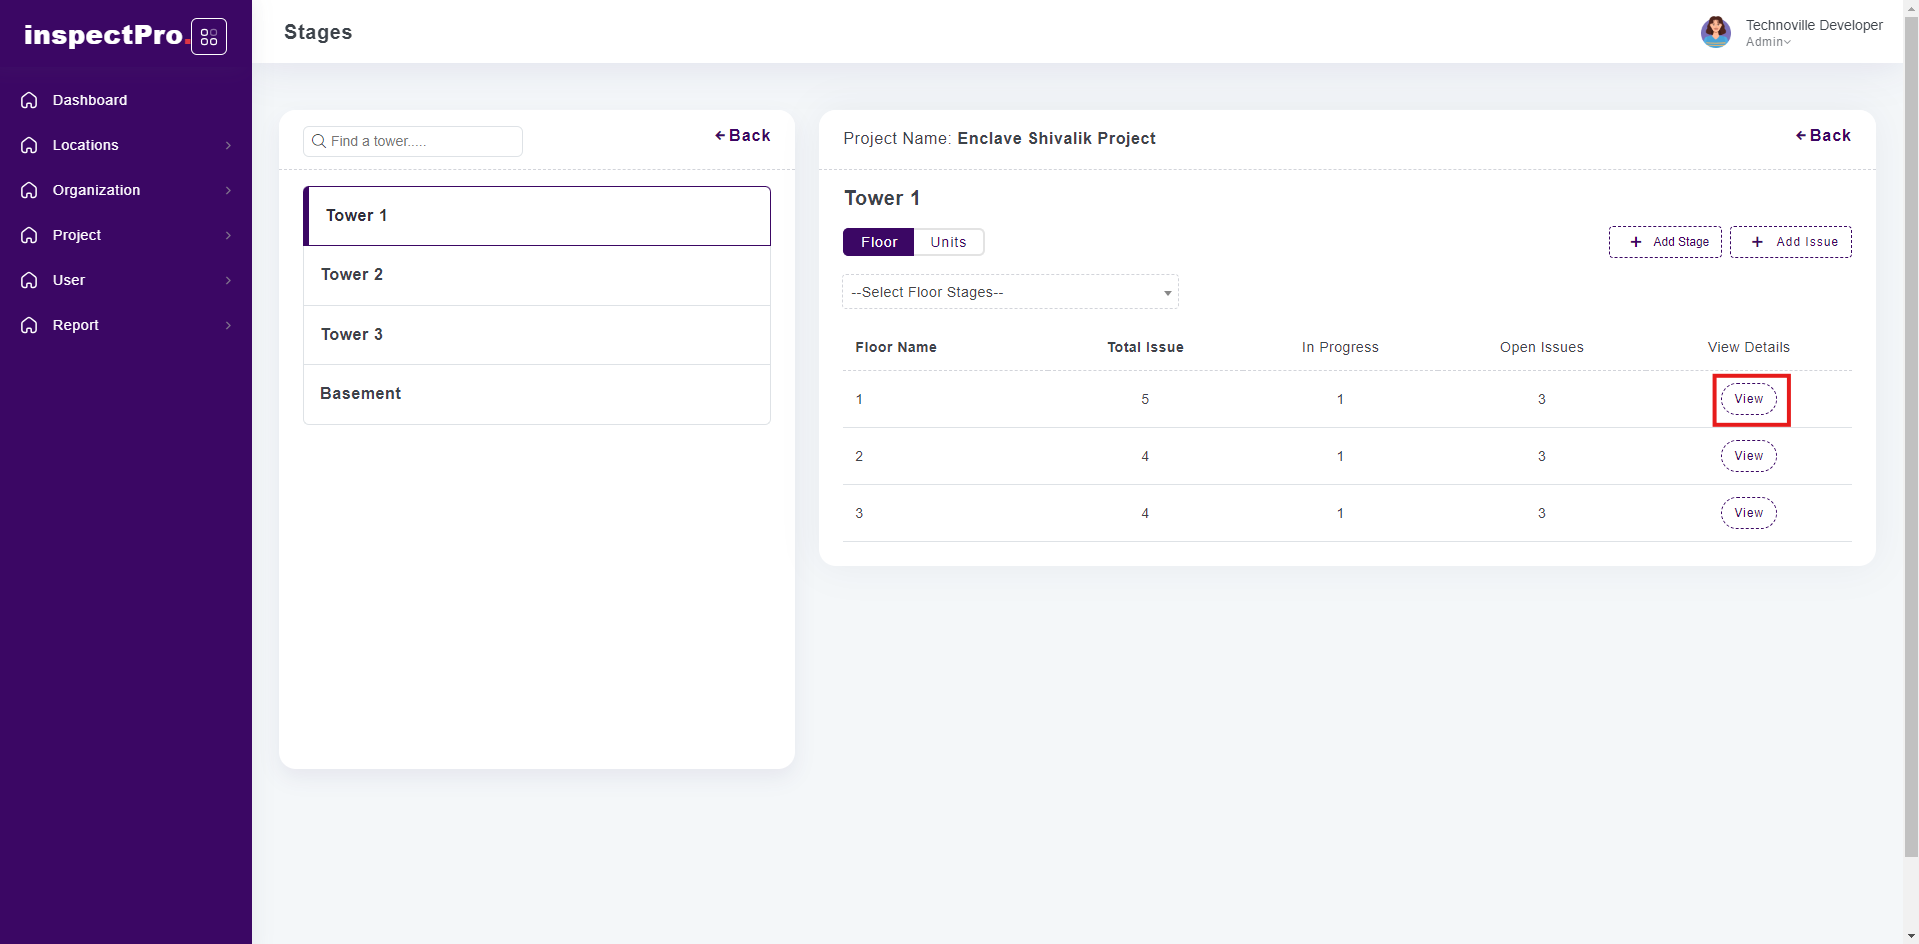
On click of View, issues of different areas will be displayed for that particular tower.
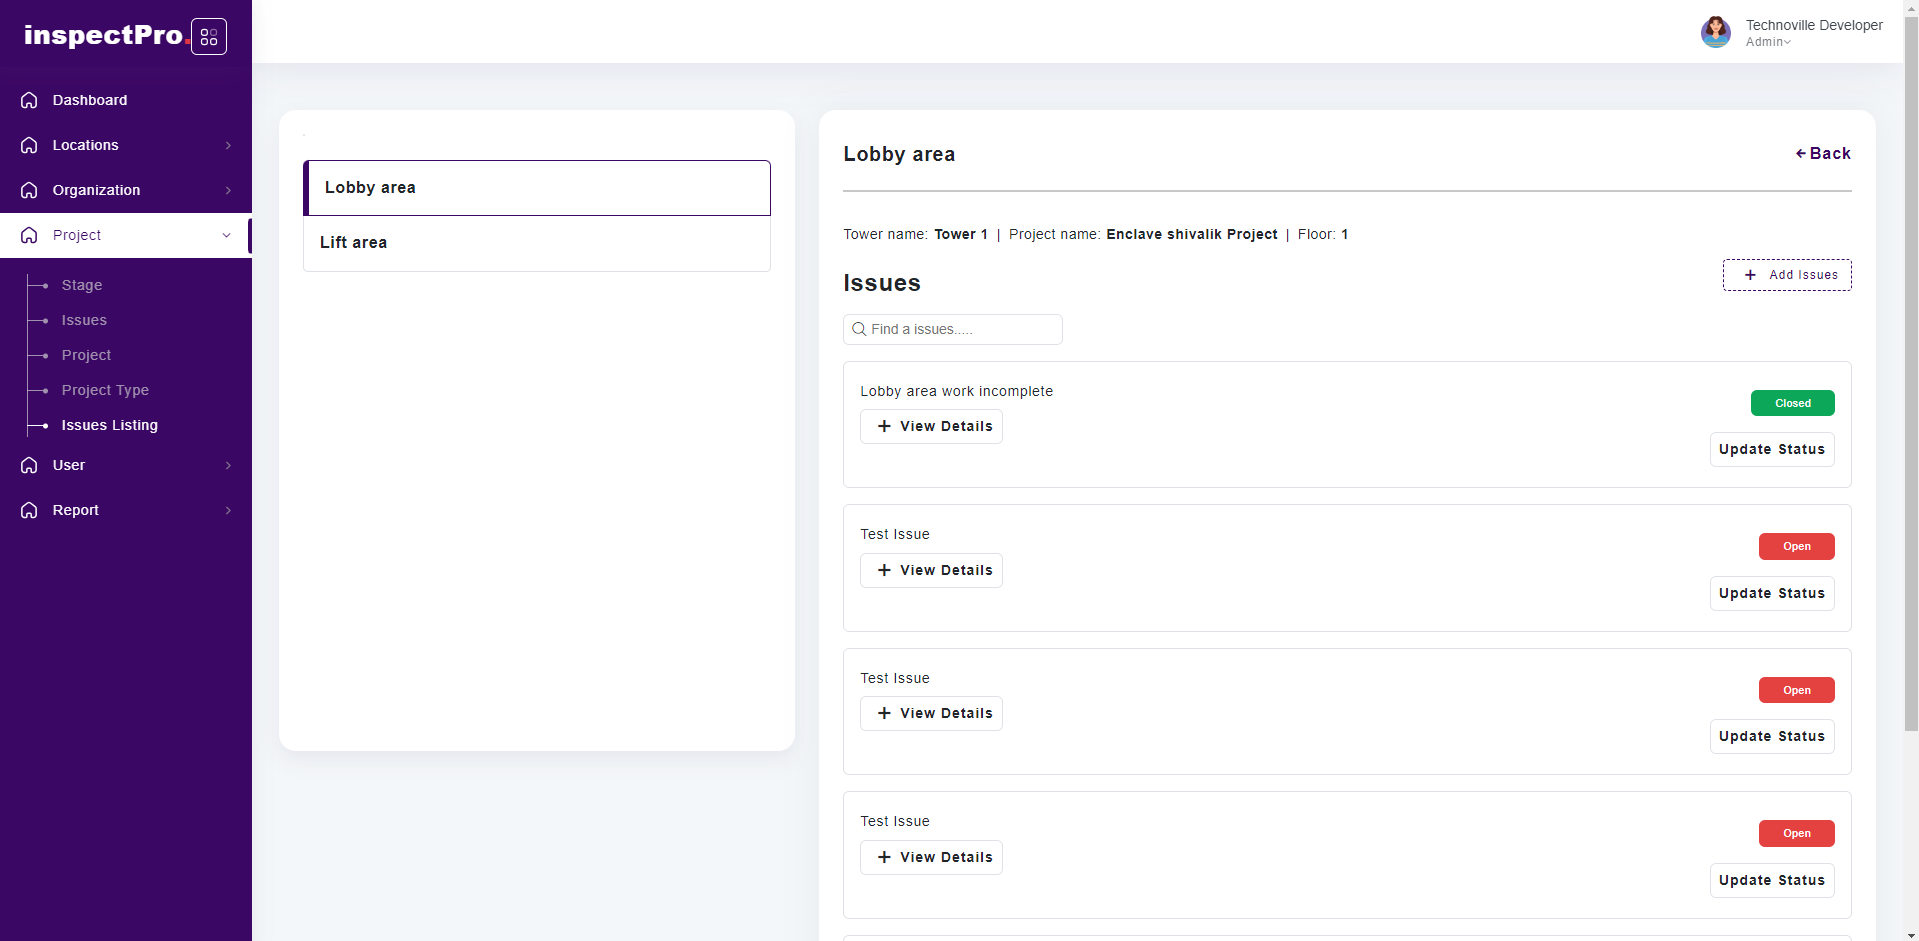
Here are issues of different areas visible.
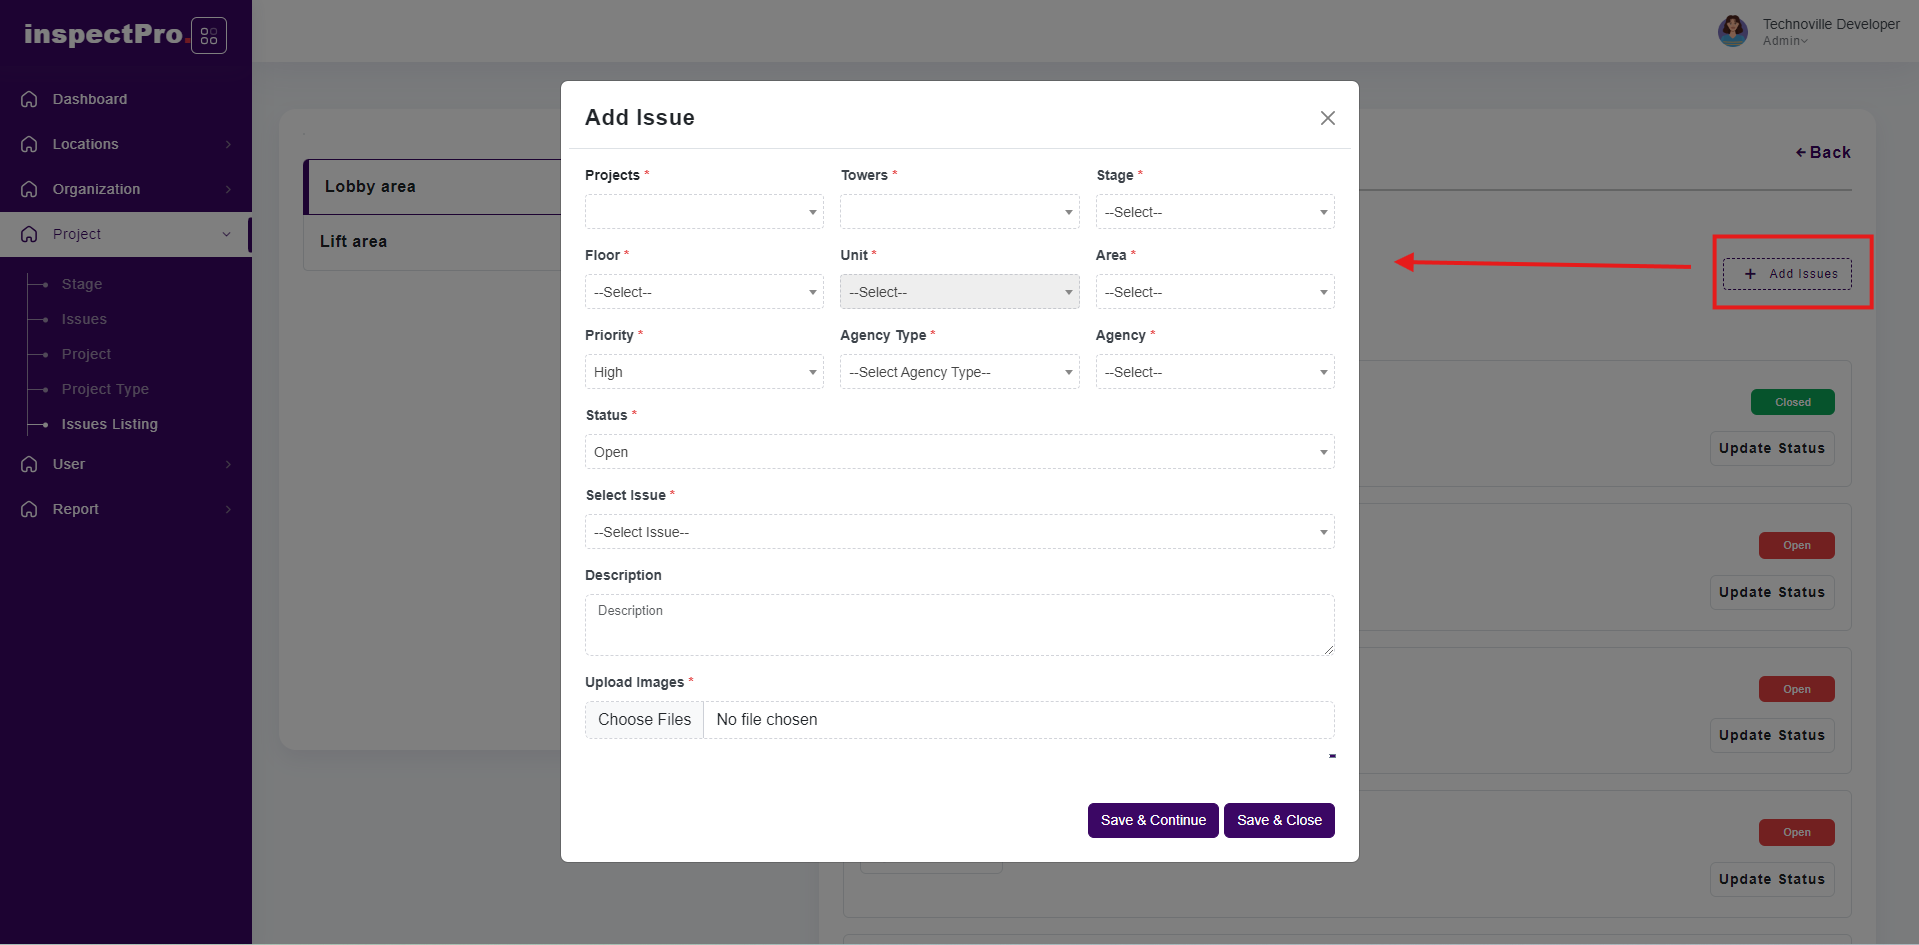
When you click on add issue first you need to select project name, than select tower , stage, floor , unit , area ,agency type , agency after select this all field now there is a 2 option either you select issue from drop down or else there is a other option you need to select that and write your own issue add photos with remarks after complete this all process there is a 2 option "save & continue" and "save & close" if you are choosing save & continue than page remains the same you will be able to add new issue & if you are choosing save & close than issue page remains close.
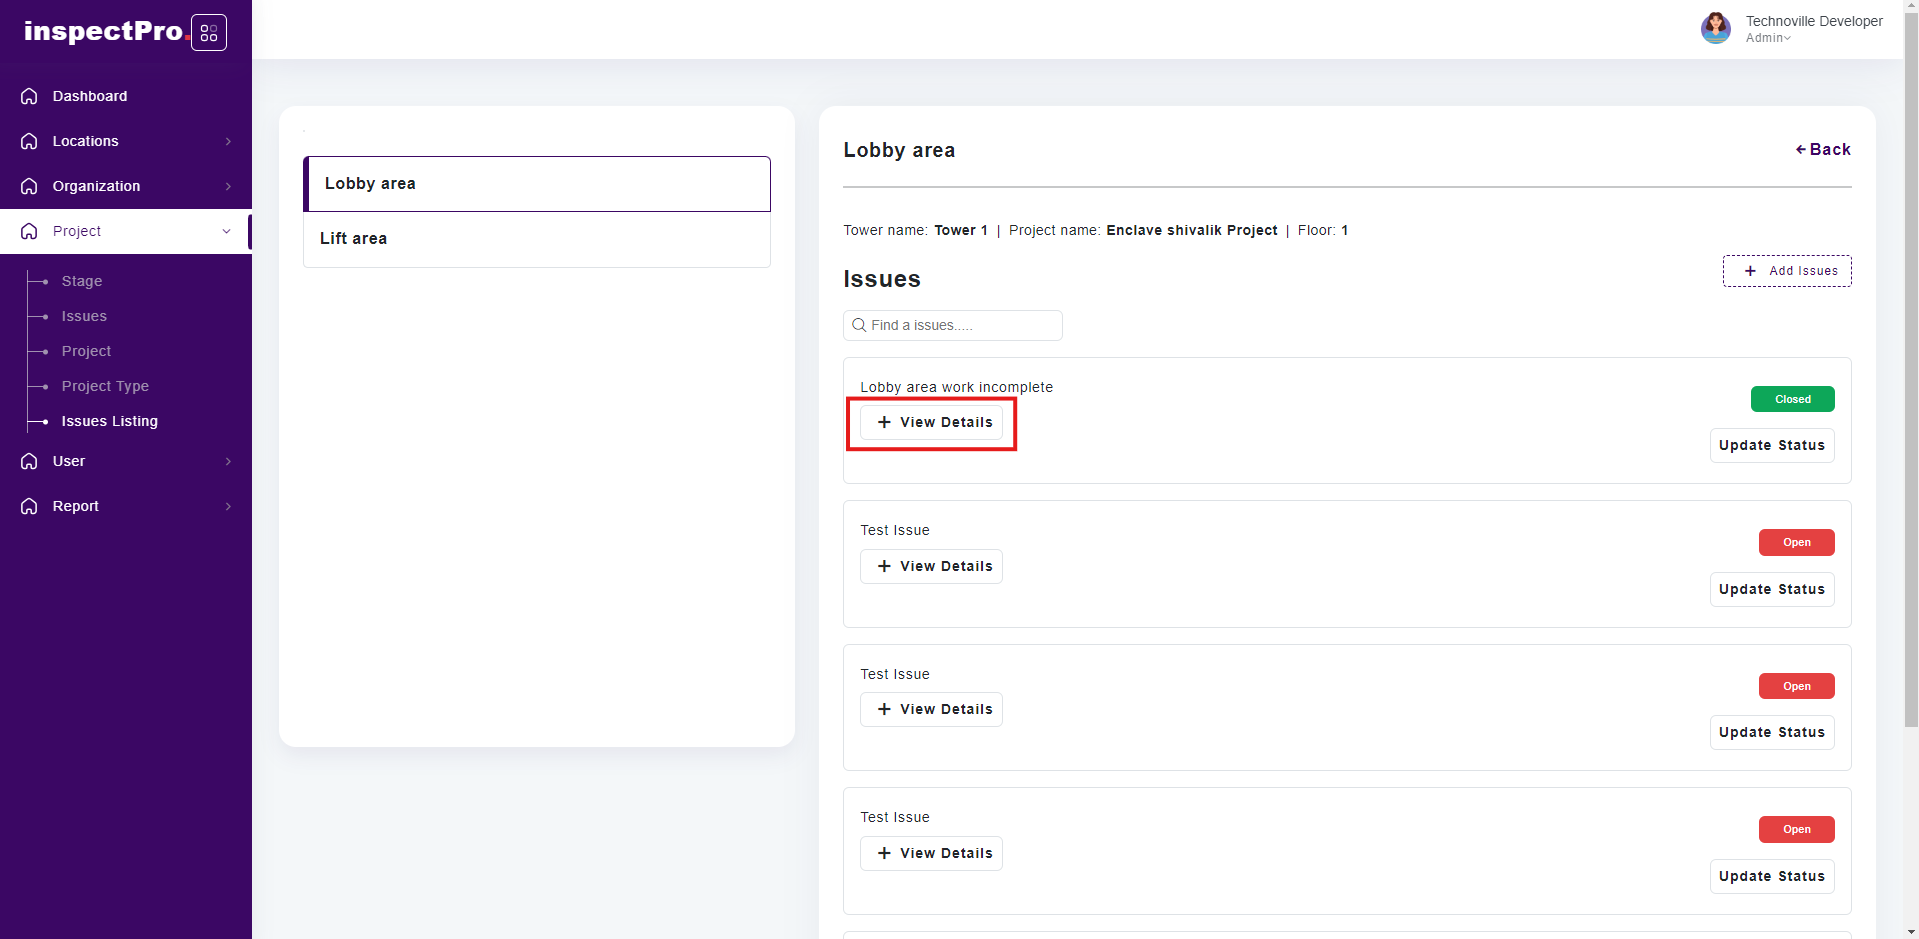
Now click View Details to check the details of the issue.
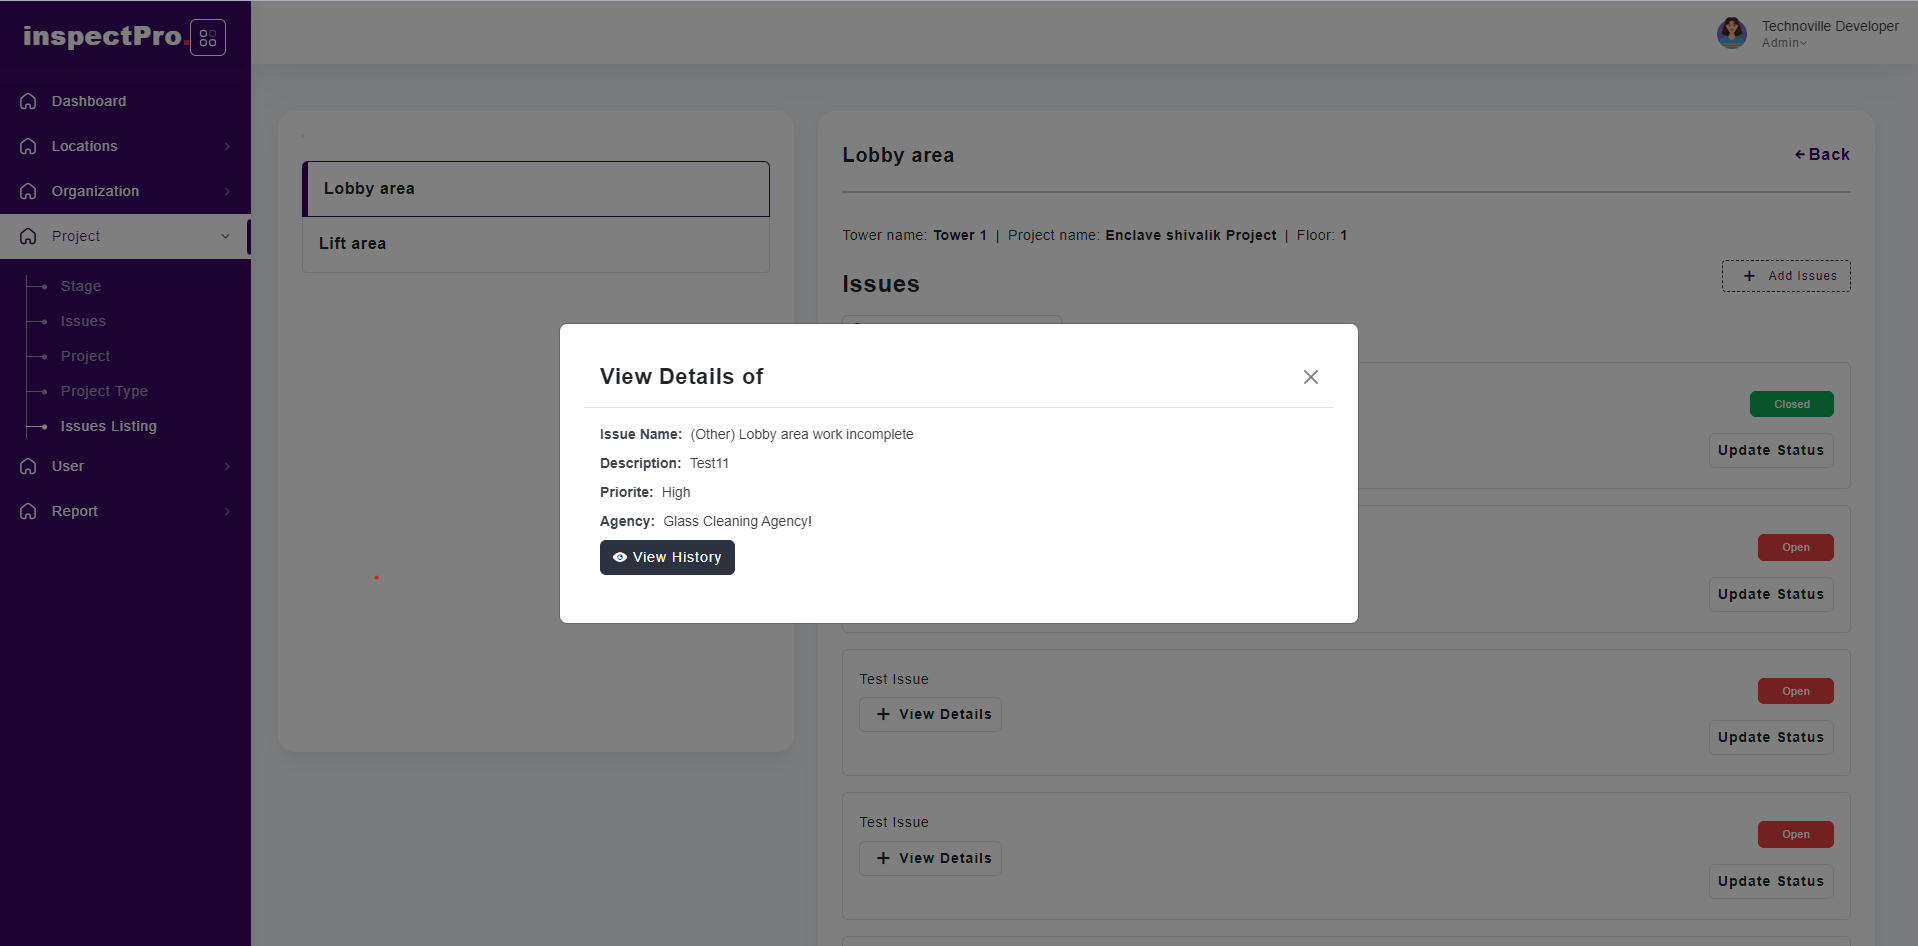
Here in the popup you can see the detsils of the issue raised.
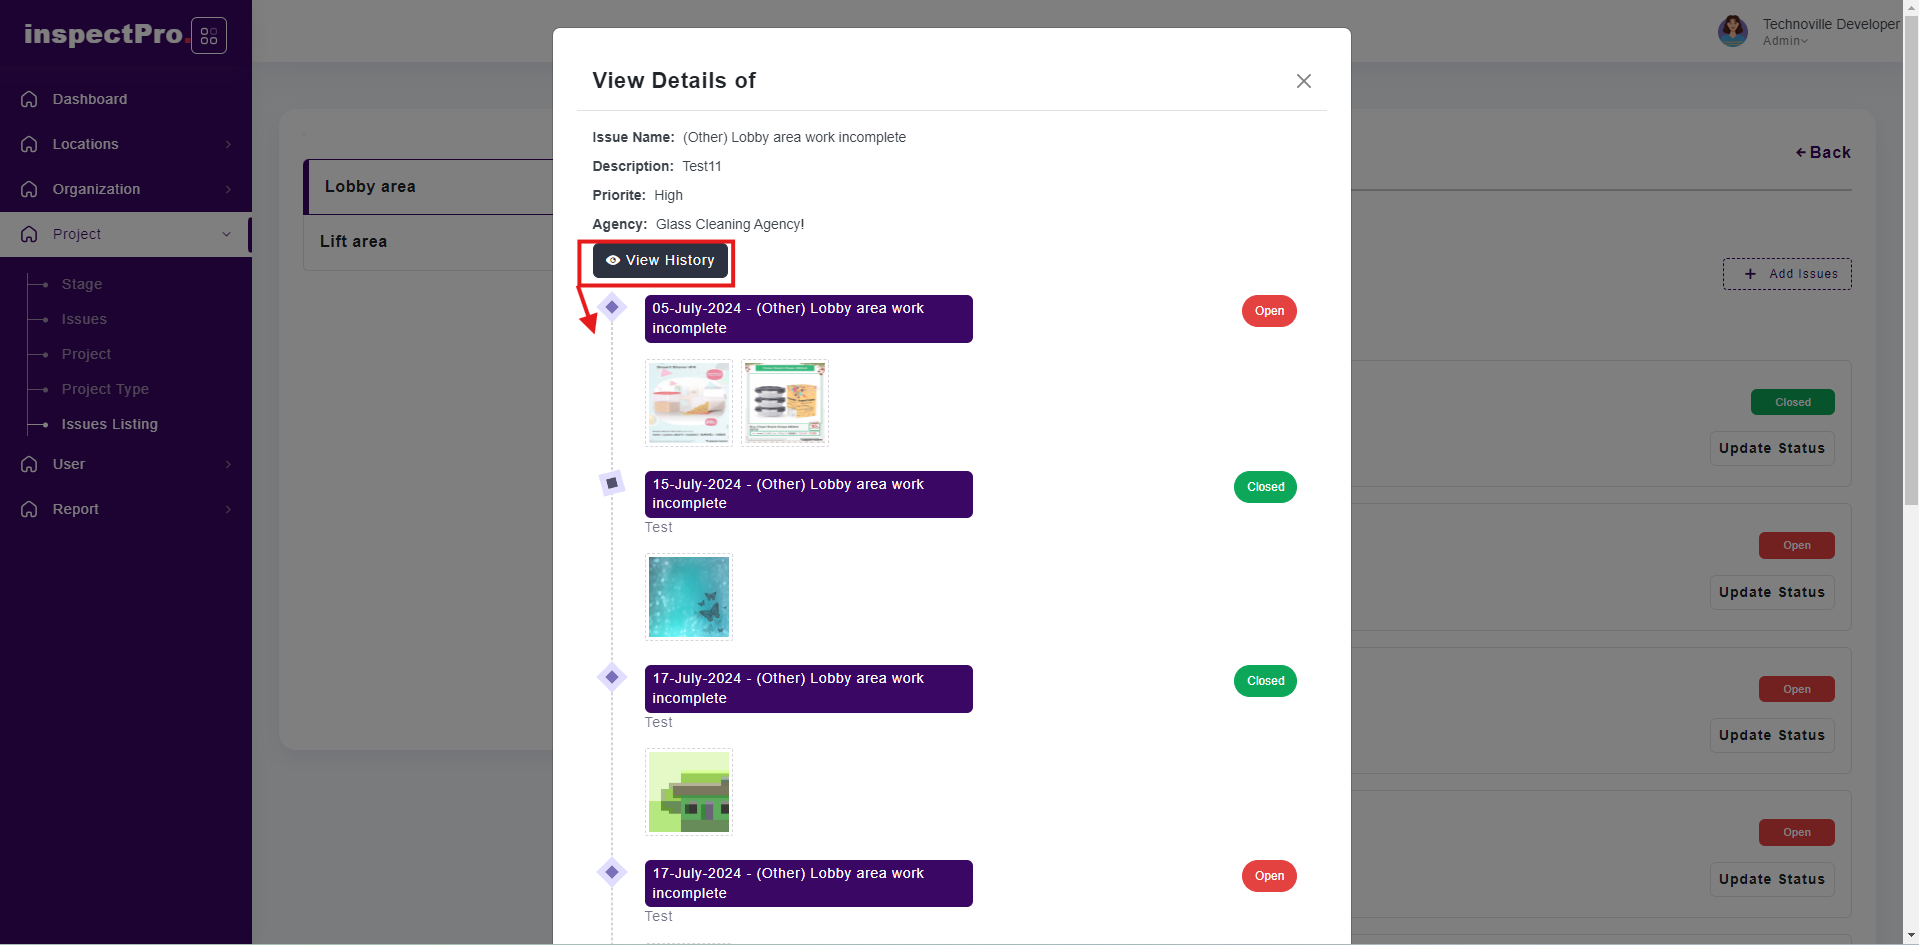
You can see the history of that particular issue by clicking on View History button.
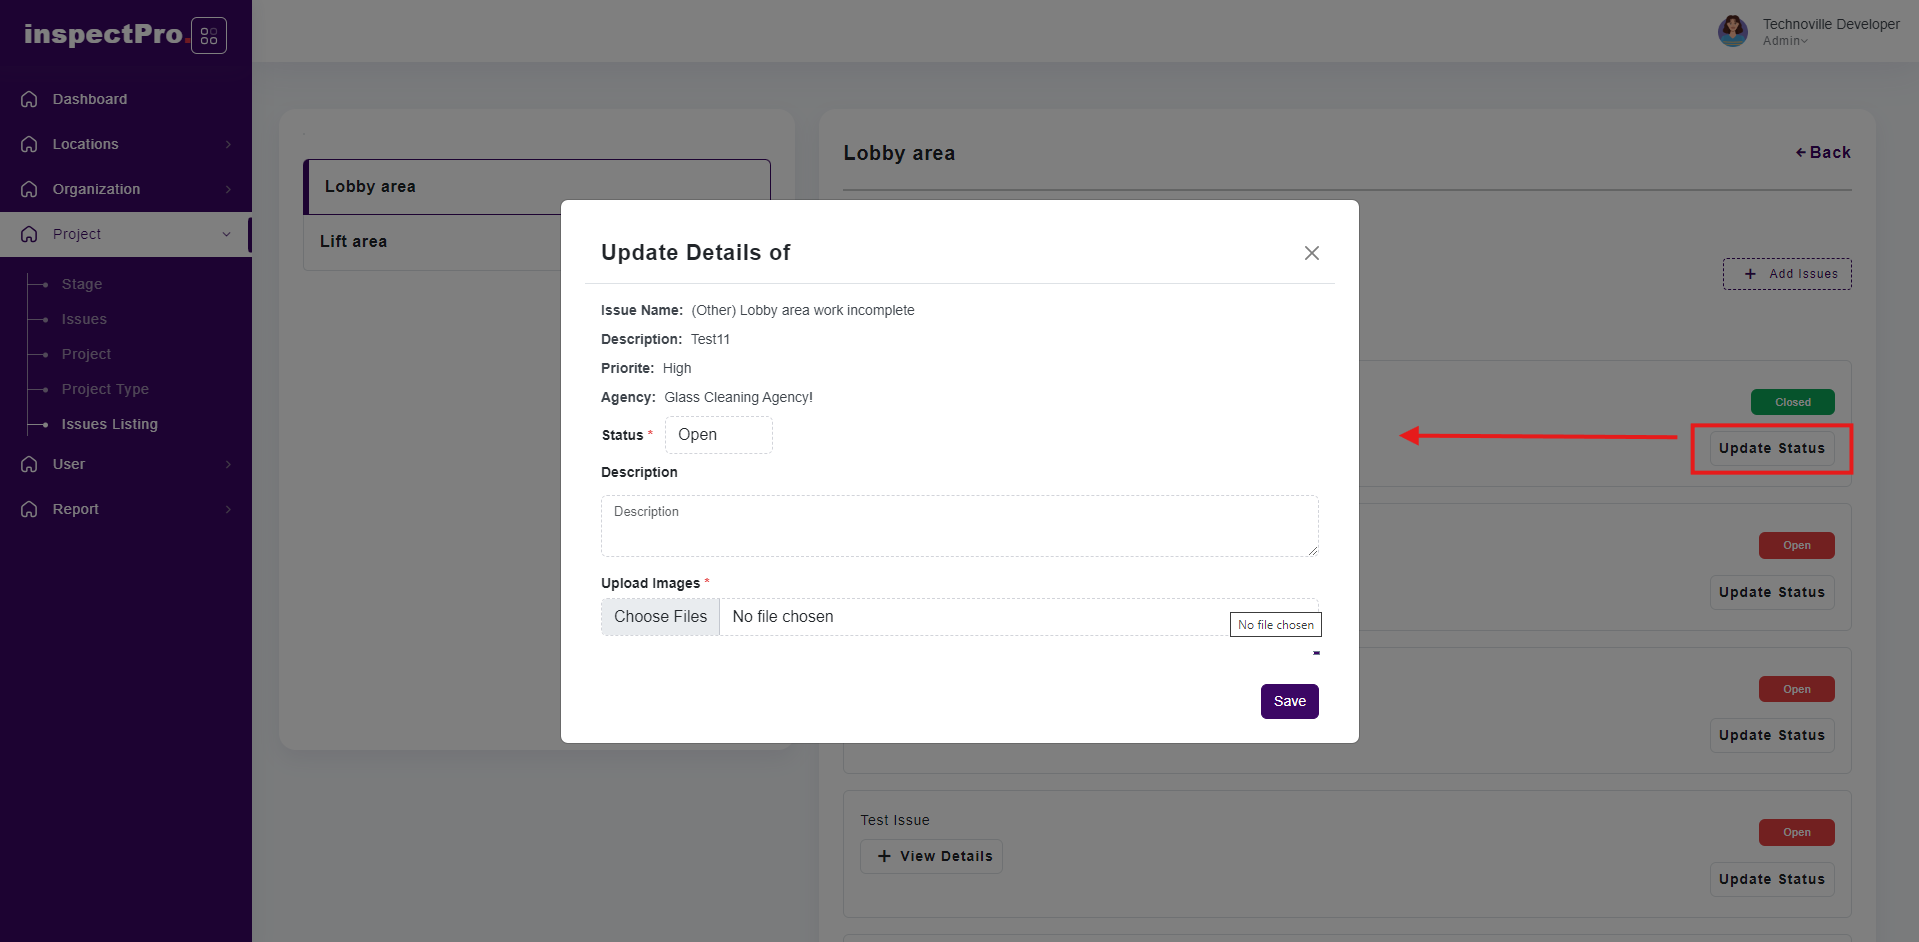
On clicking of Update Status button, you can update the status and other details of that particular issue.
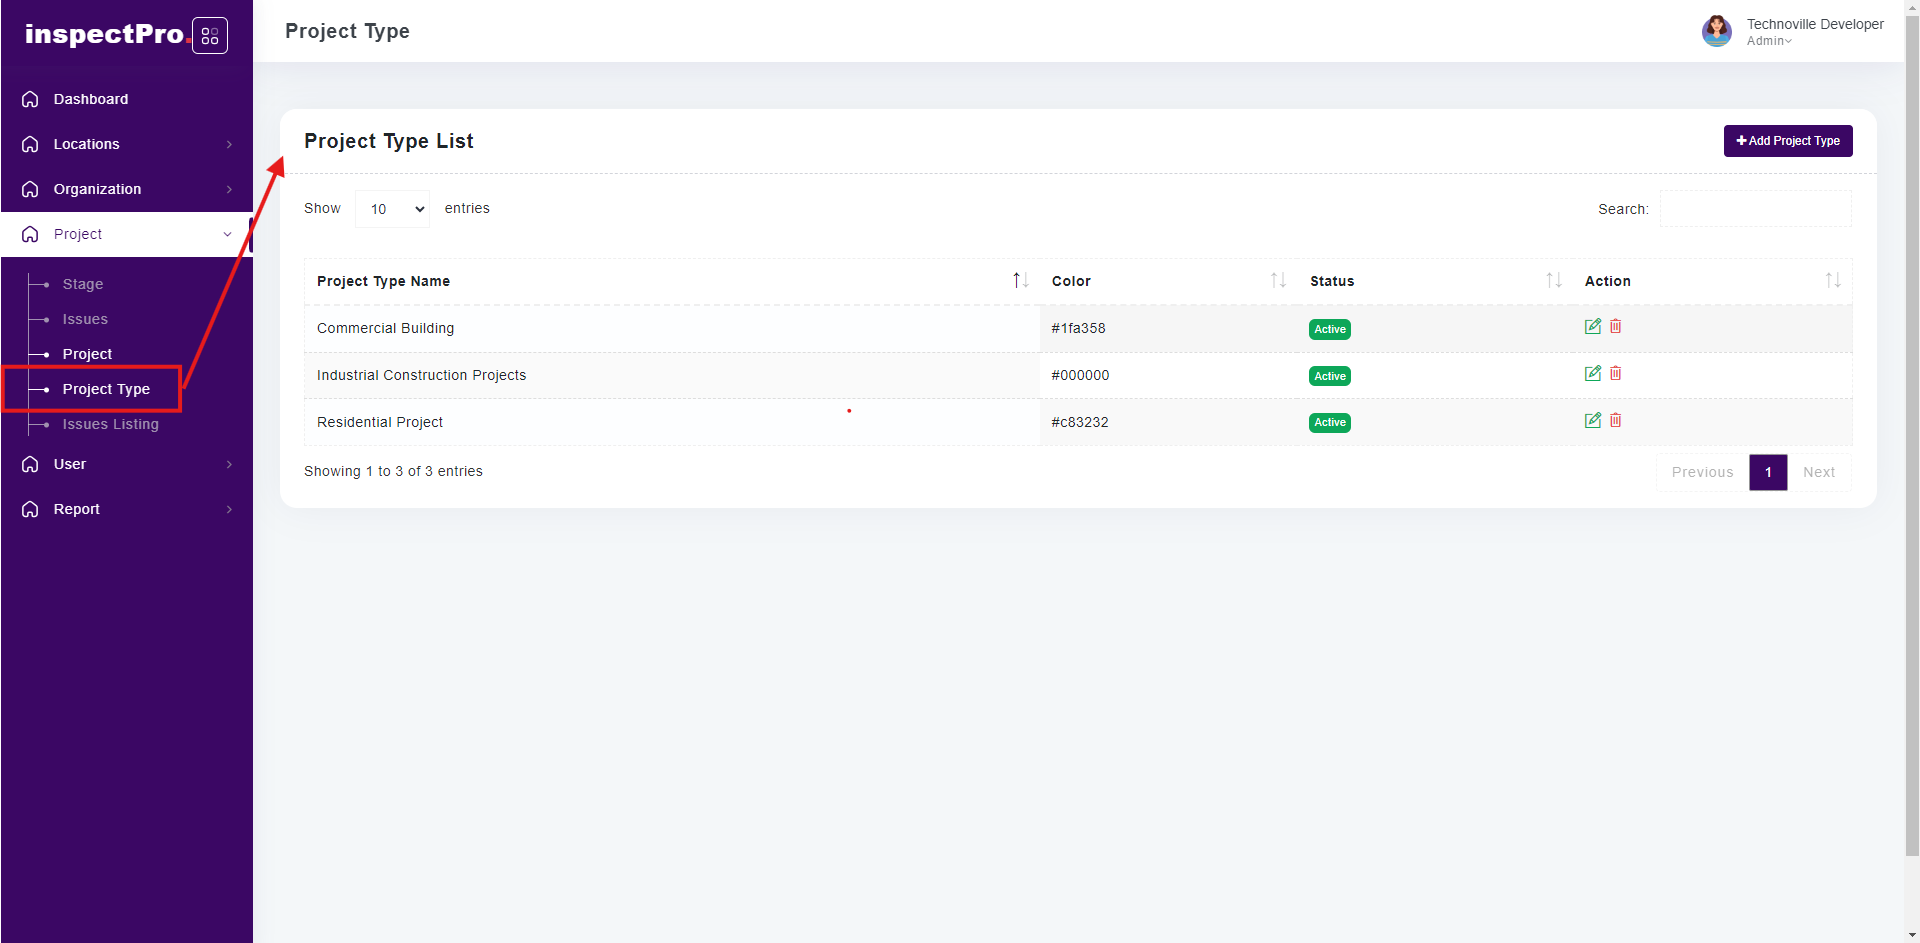
Clicking on "Project Type" under "Project" will display the project type list.
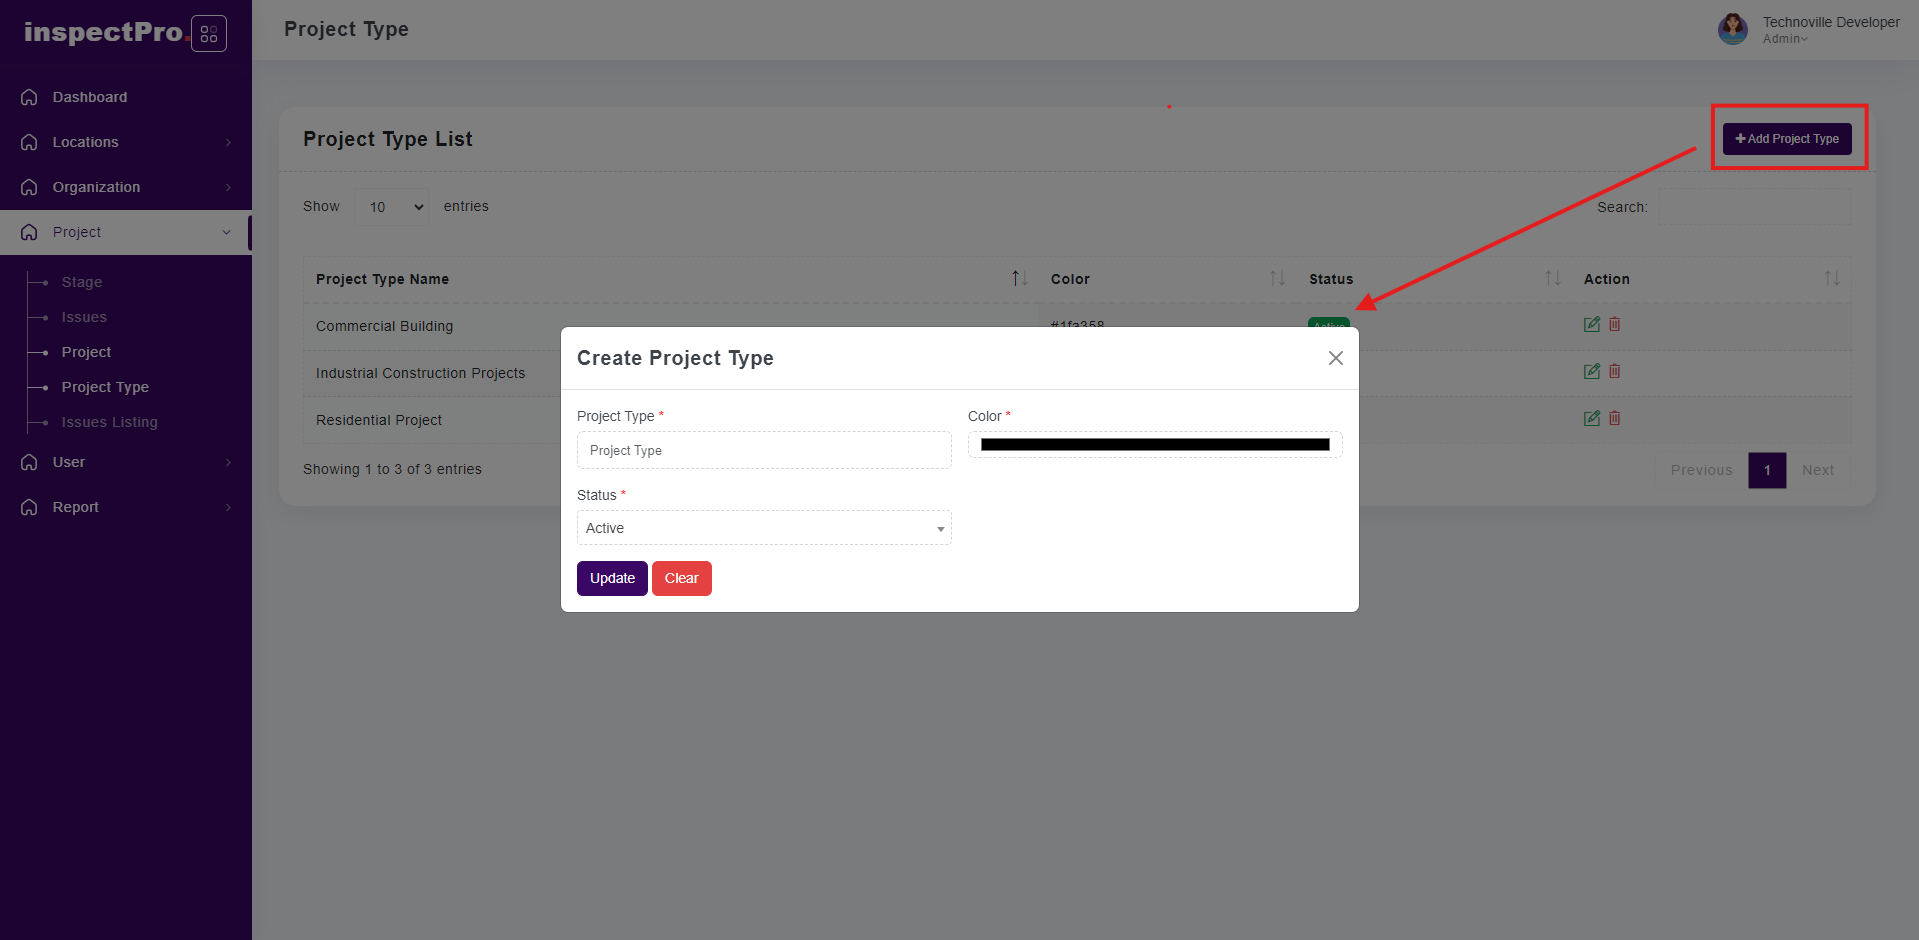
When you click on add project type then you will be able to add that project type and also select color code for that particular project and click on save button that project type is added
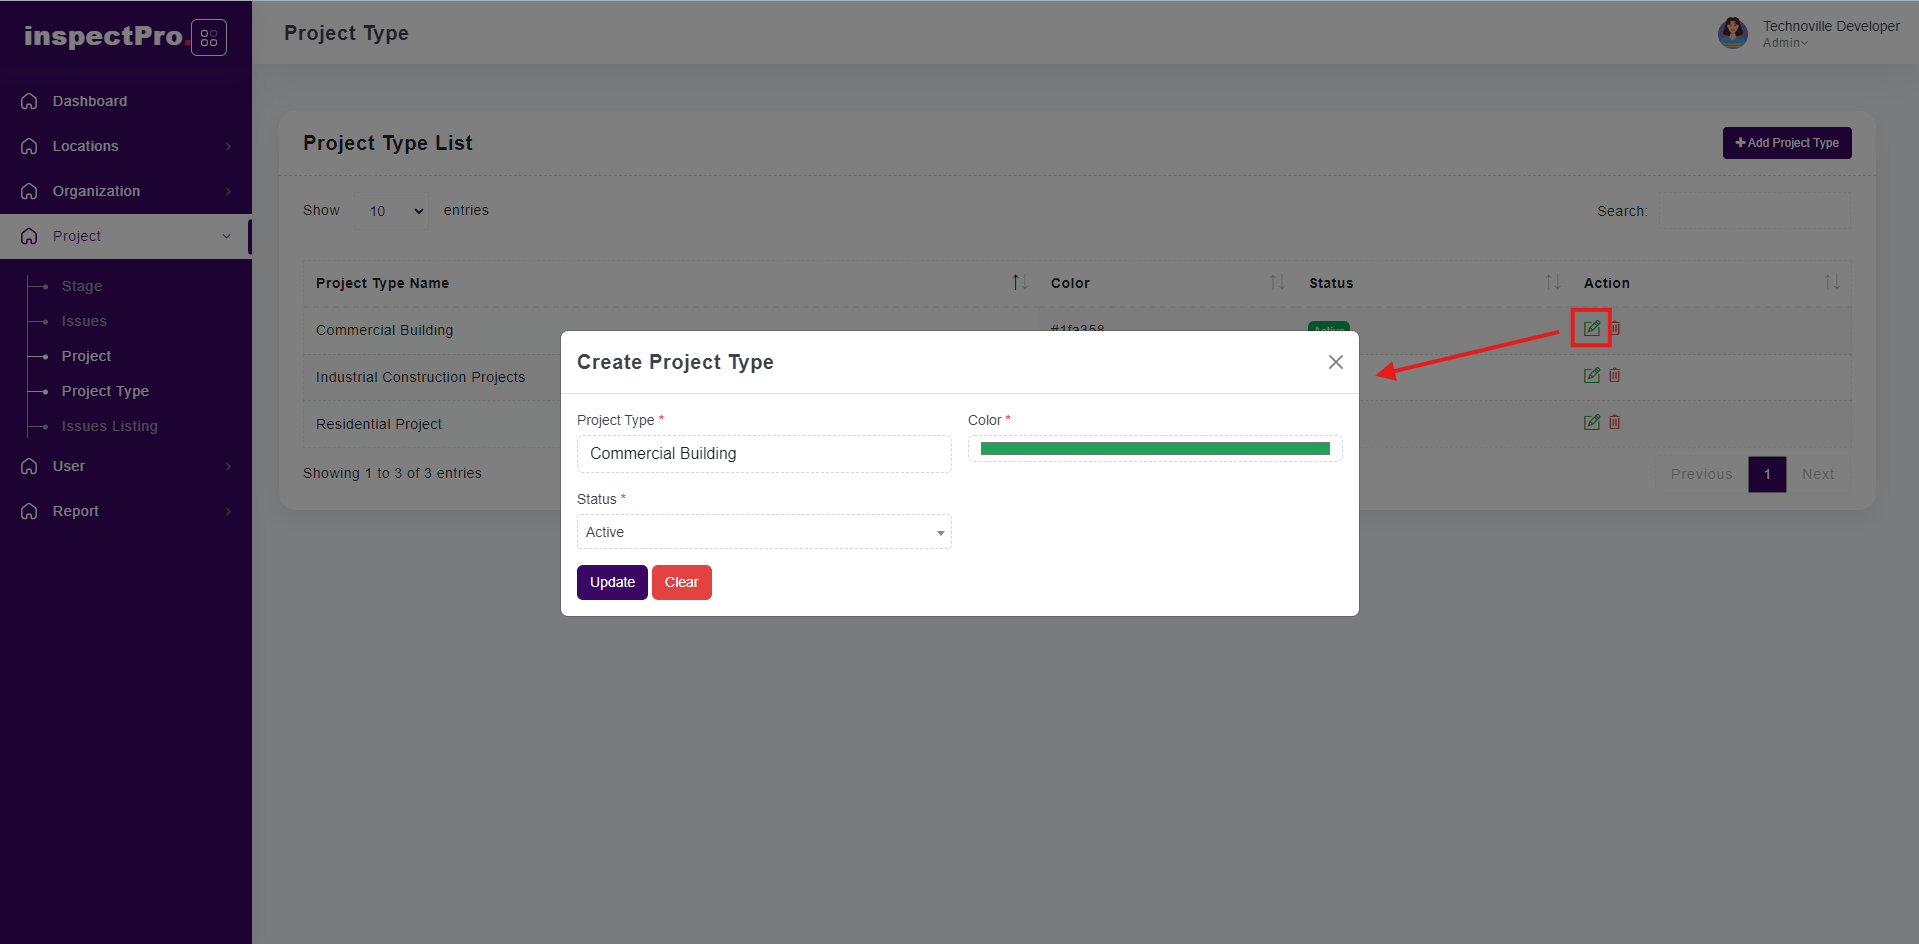
When you click on edit button at that time you will be able to edit whatever you want and click on update button
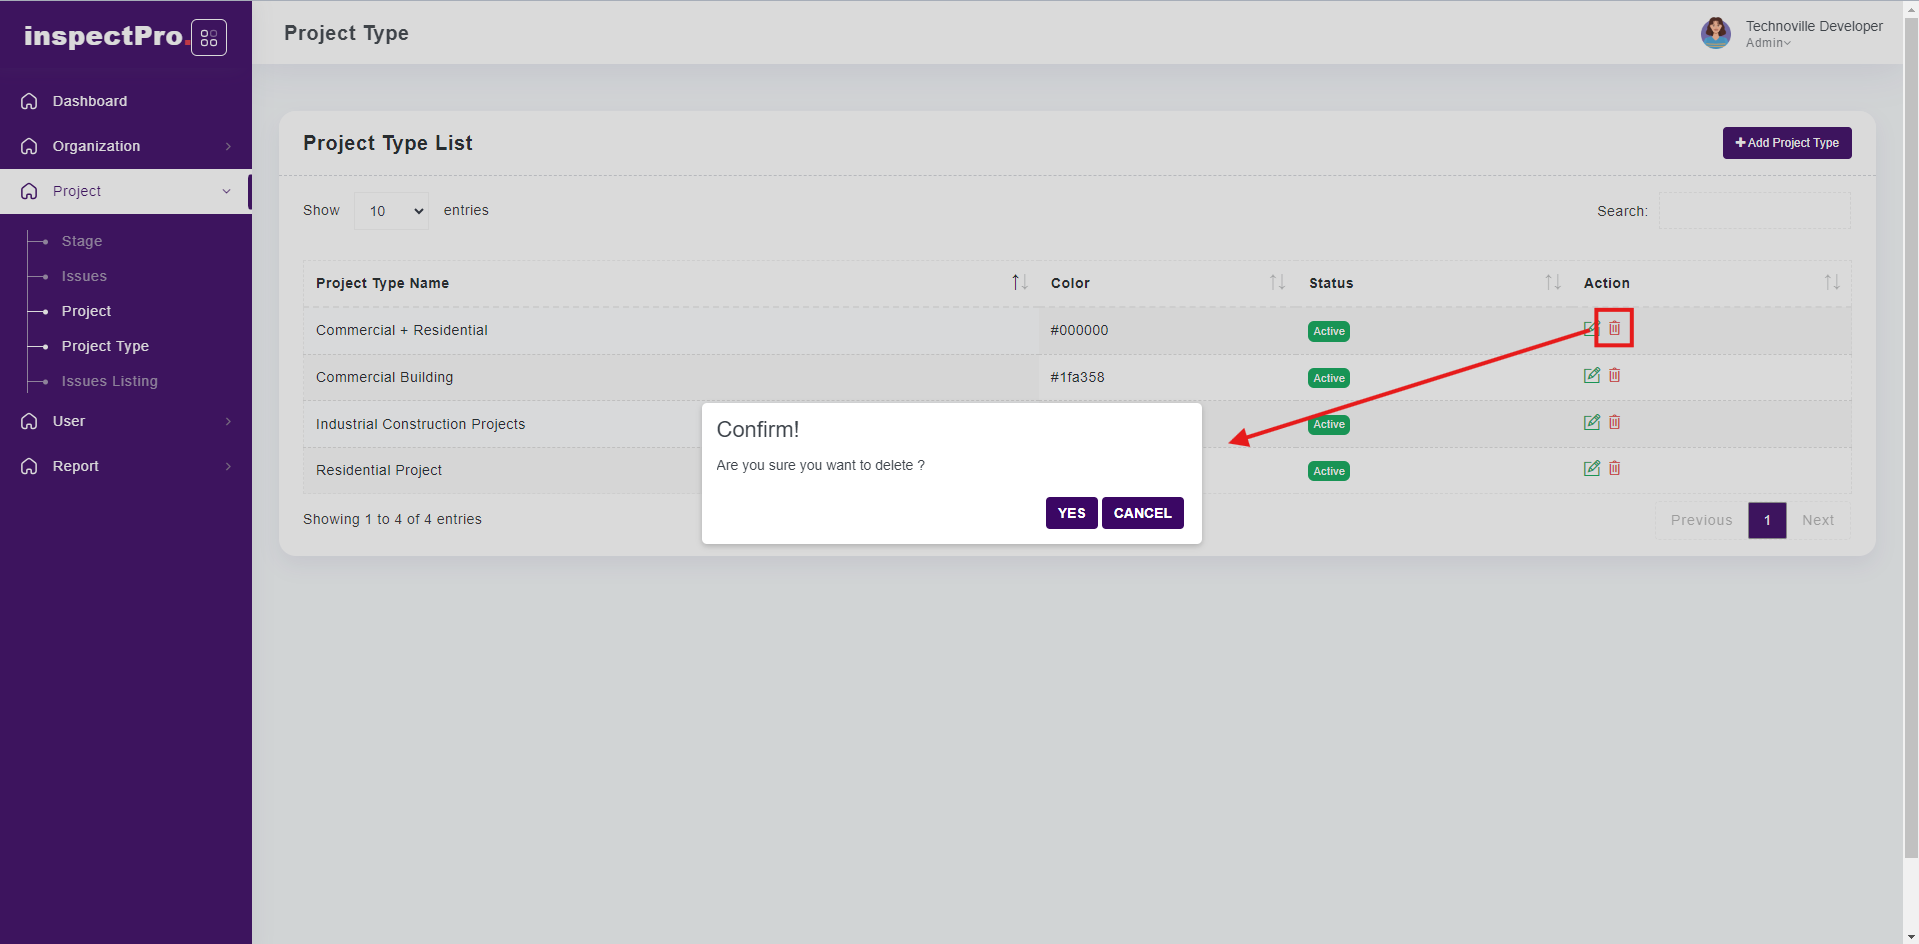
When you click on delete button at that time that particular project is inactive
If you want to active again same project then you need to click on edit button and change status from inactive to active and click on update button then that project is active
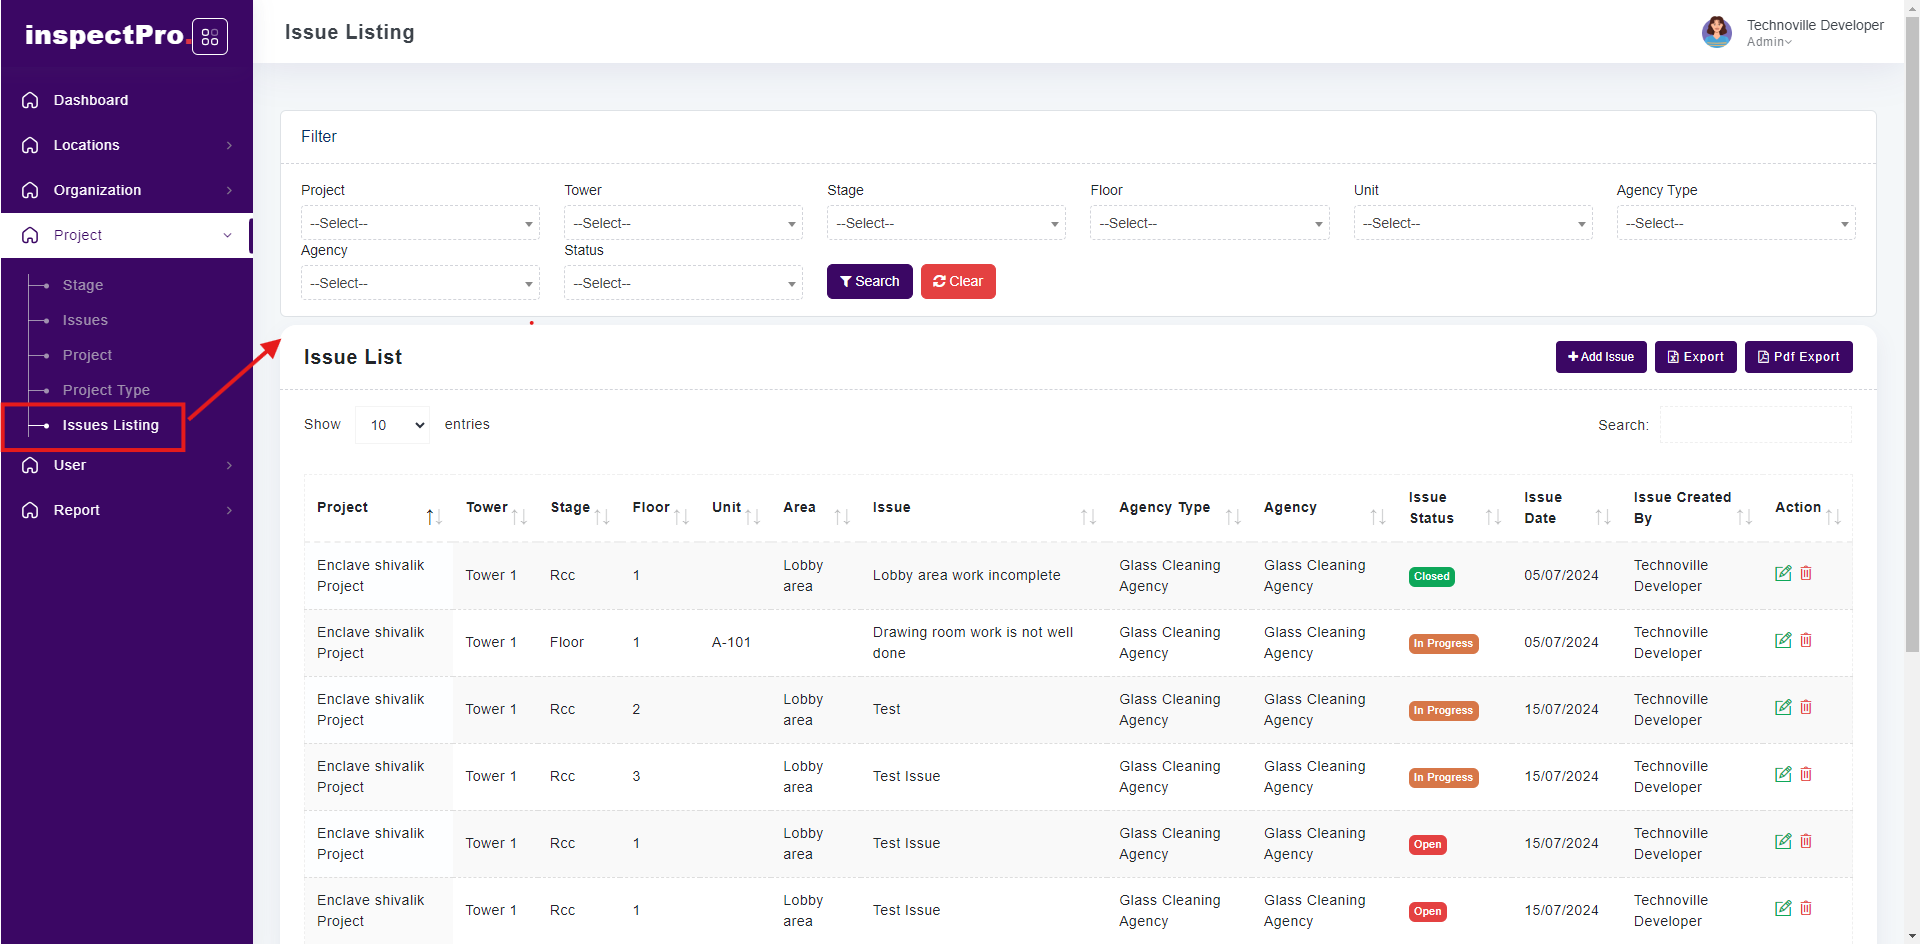
Clicking on "Issues Listing" under "Project" will display the issues listing list.
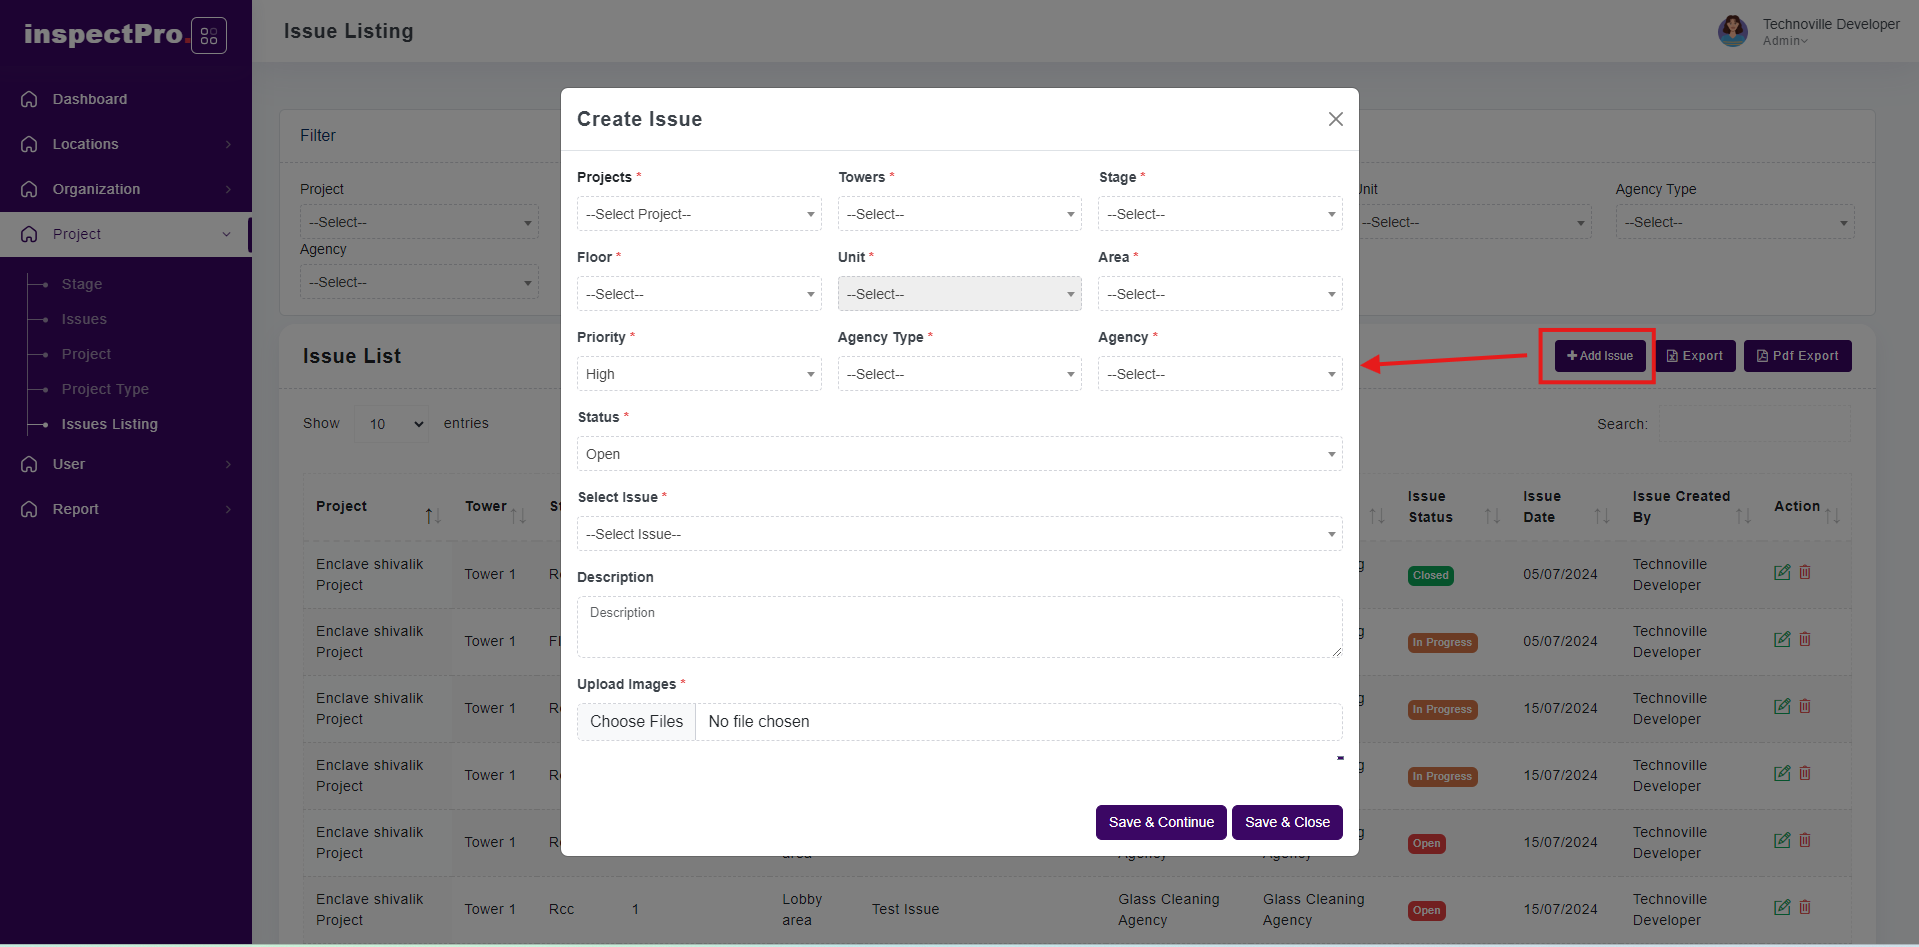
When you click on add issue first you need to select project, select tower, select stage according to stage you need to select floor & unit then select area , select agency type & agency after that select issue from drop down or else click on other and add issue with photos and click on save & continue then page remains the same and if you are clicking on save & close then that particular page is close.
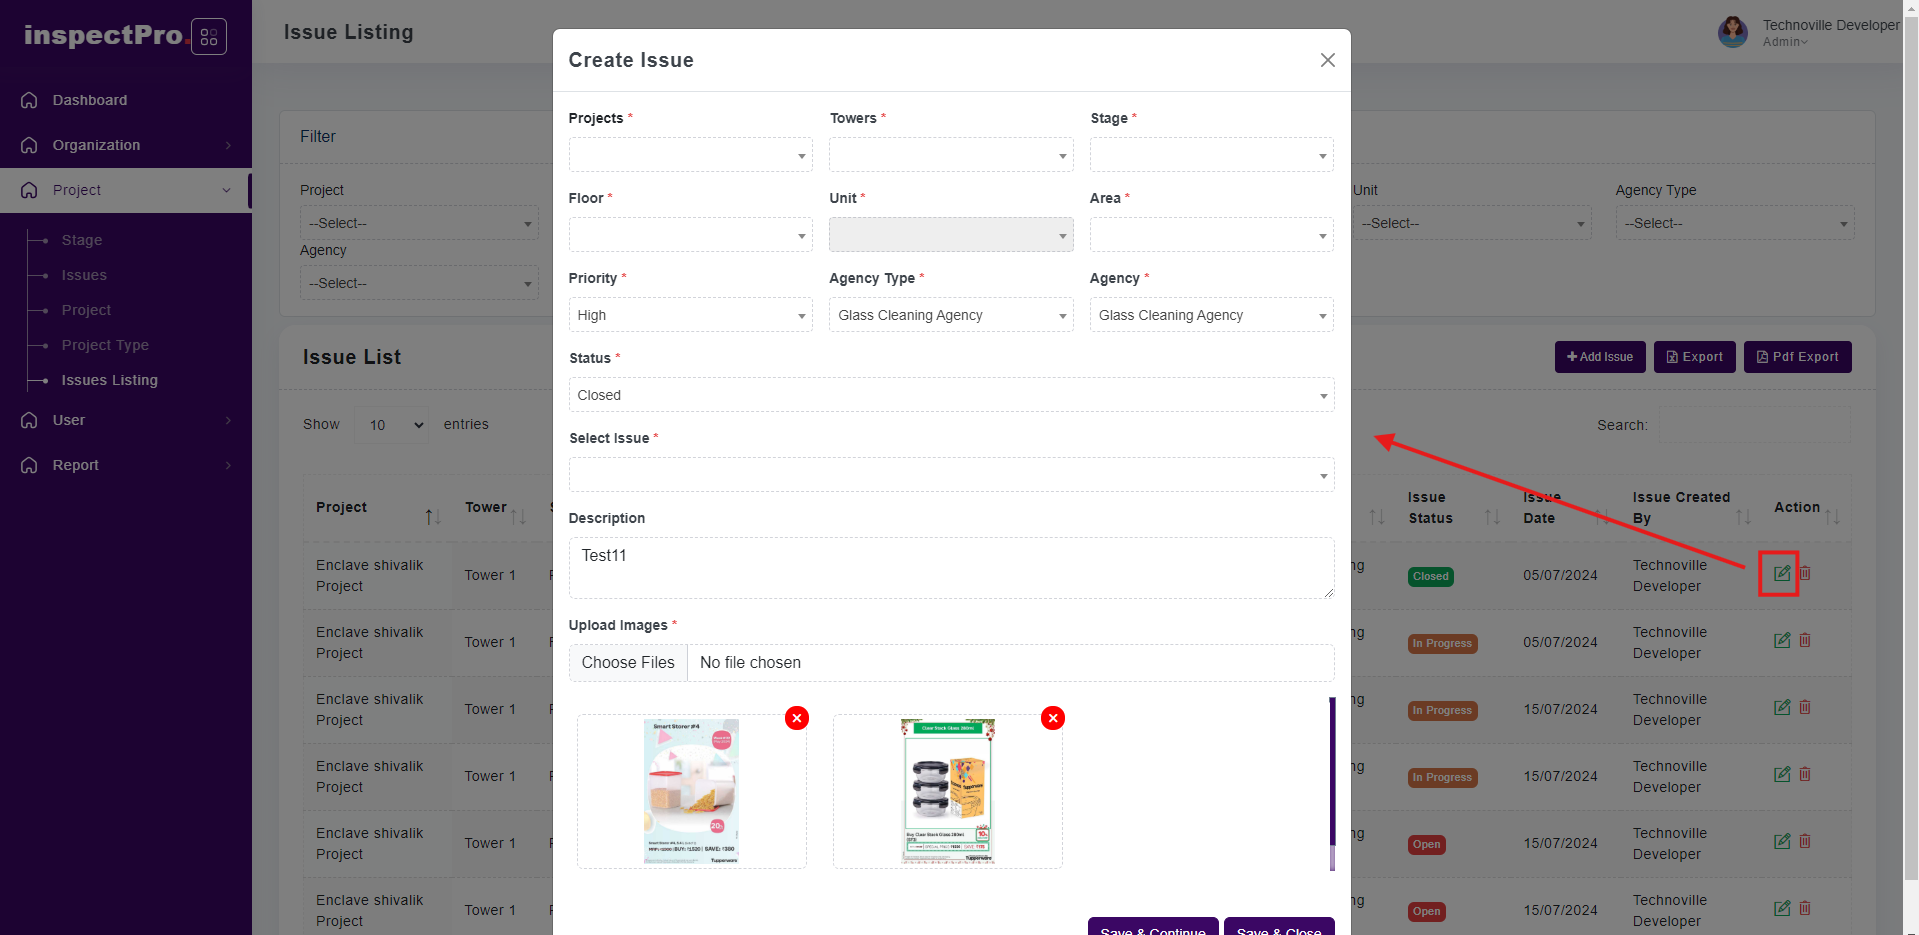
When you click on edit button you will be able to change only description and photos rest all details are auto filled.
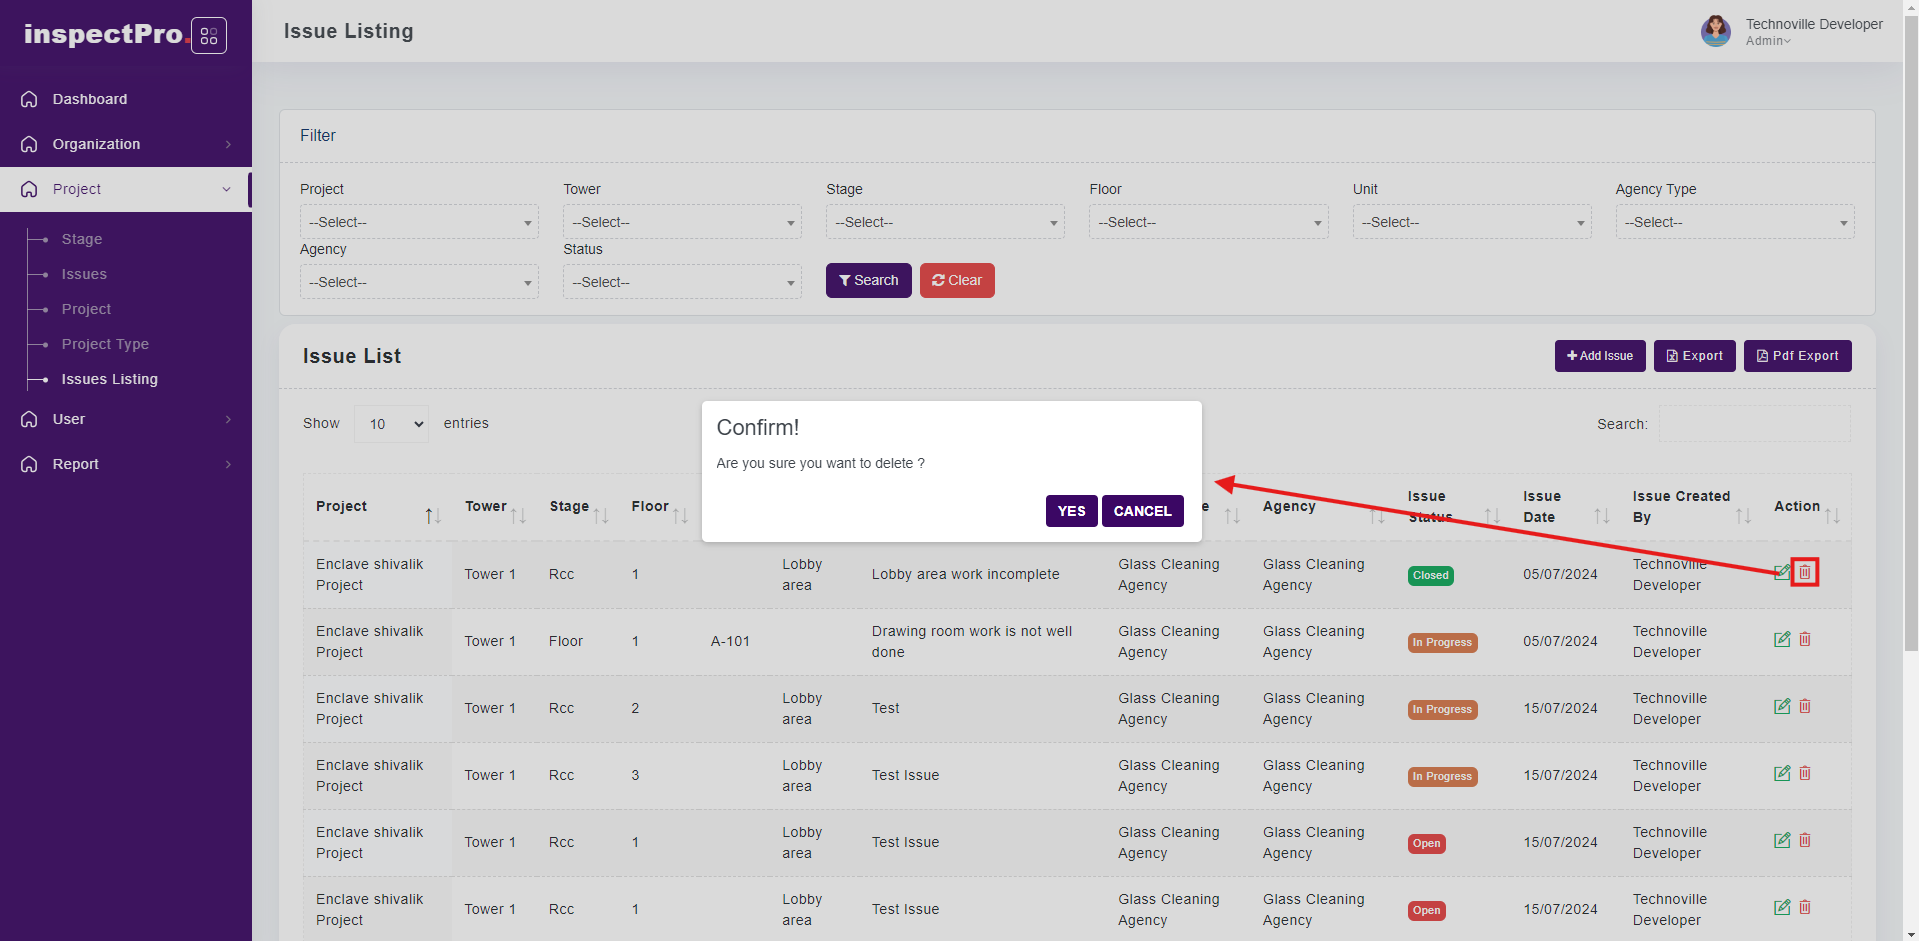
When you click on delete button at that time that issue is hard delete from data base if you want to add same issue then you have to add again
If you want to active again that particular issue at that time click on edit button and change status from inactive to active and click on save or update button then that issue is active.
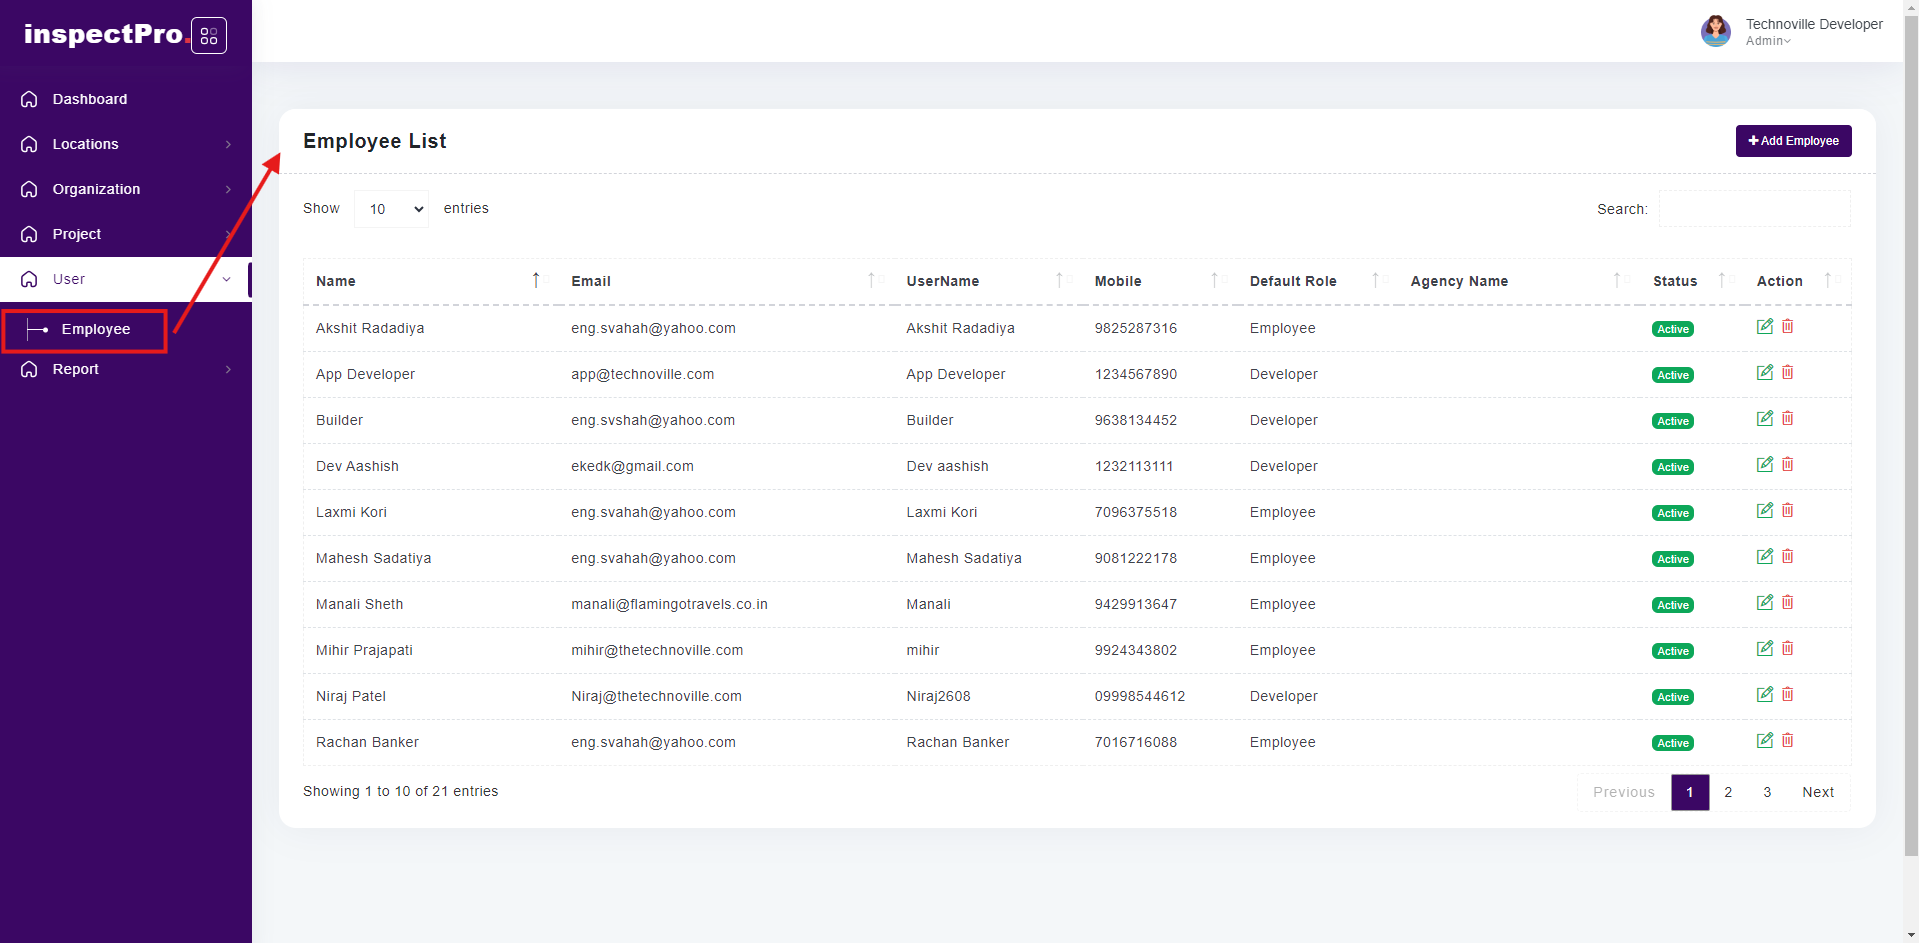
Clicking on "Employee" under "User" will display the user list.
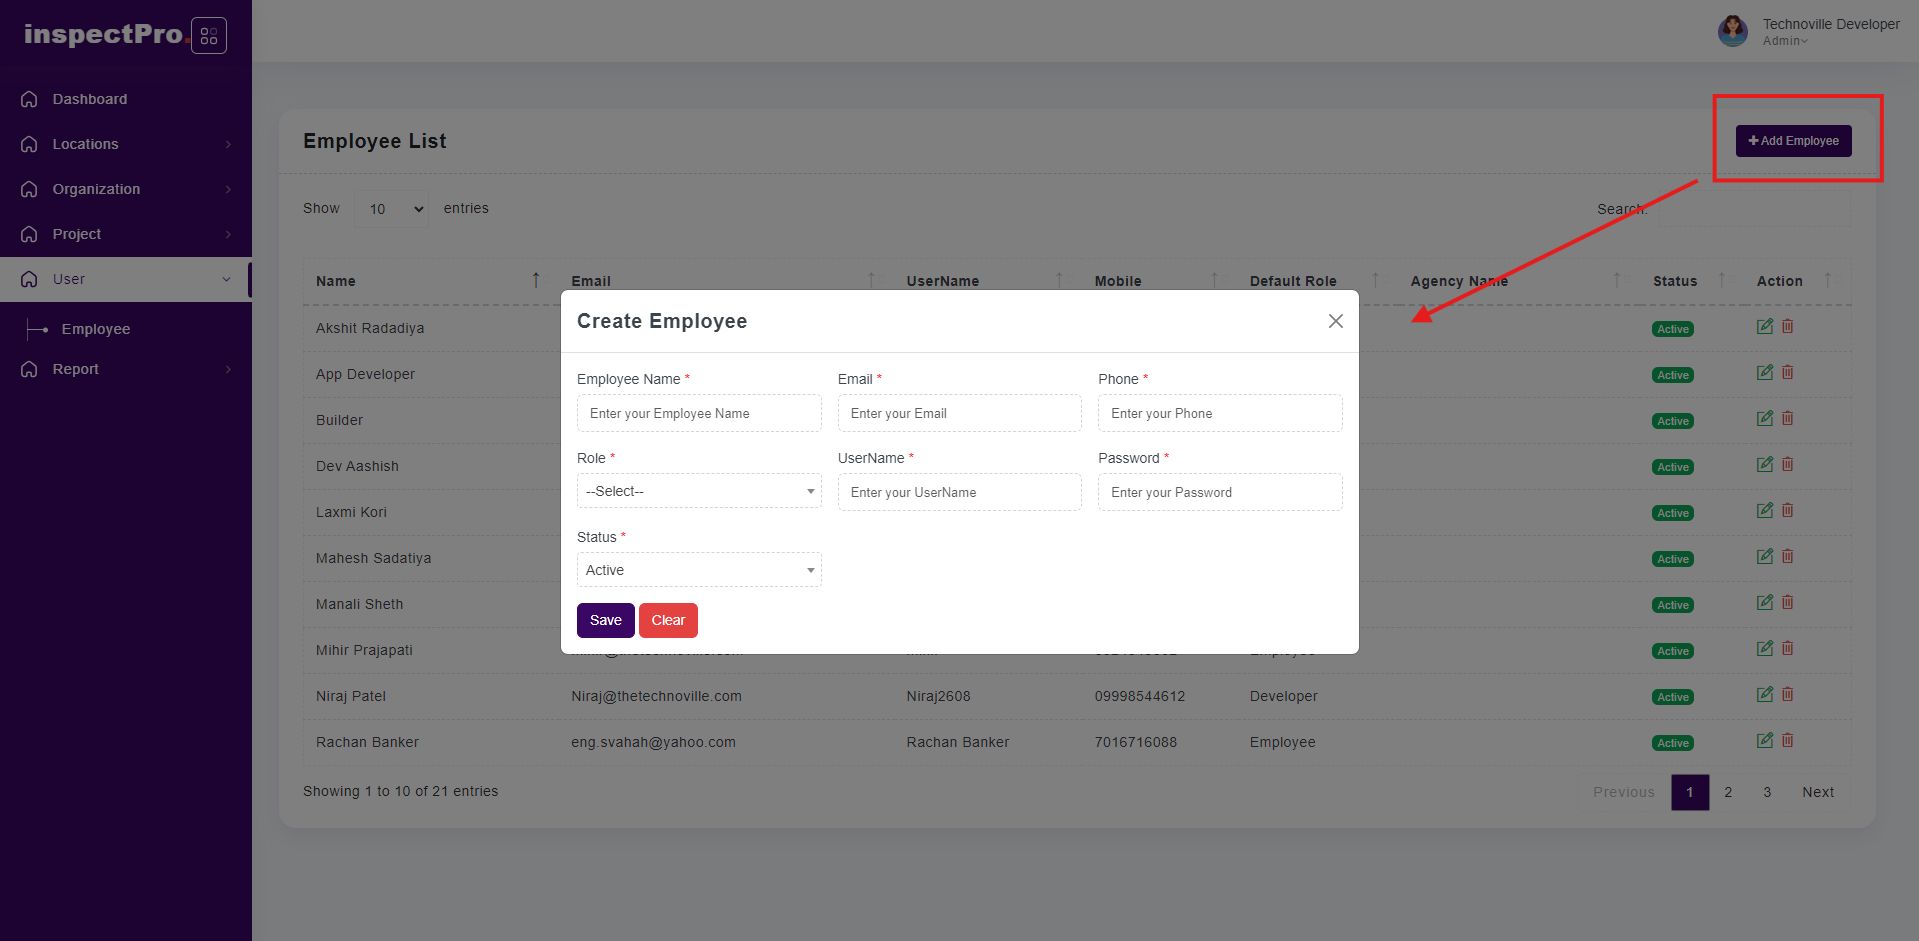
When you click on add employee you need to fill all compulsory field & set username & password & also select role according to that employee can see the pages.
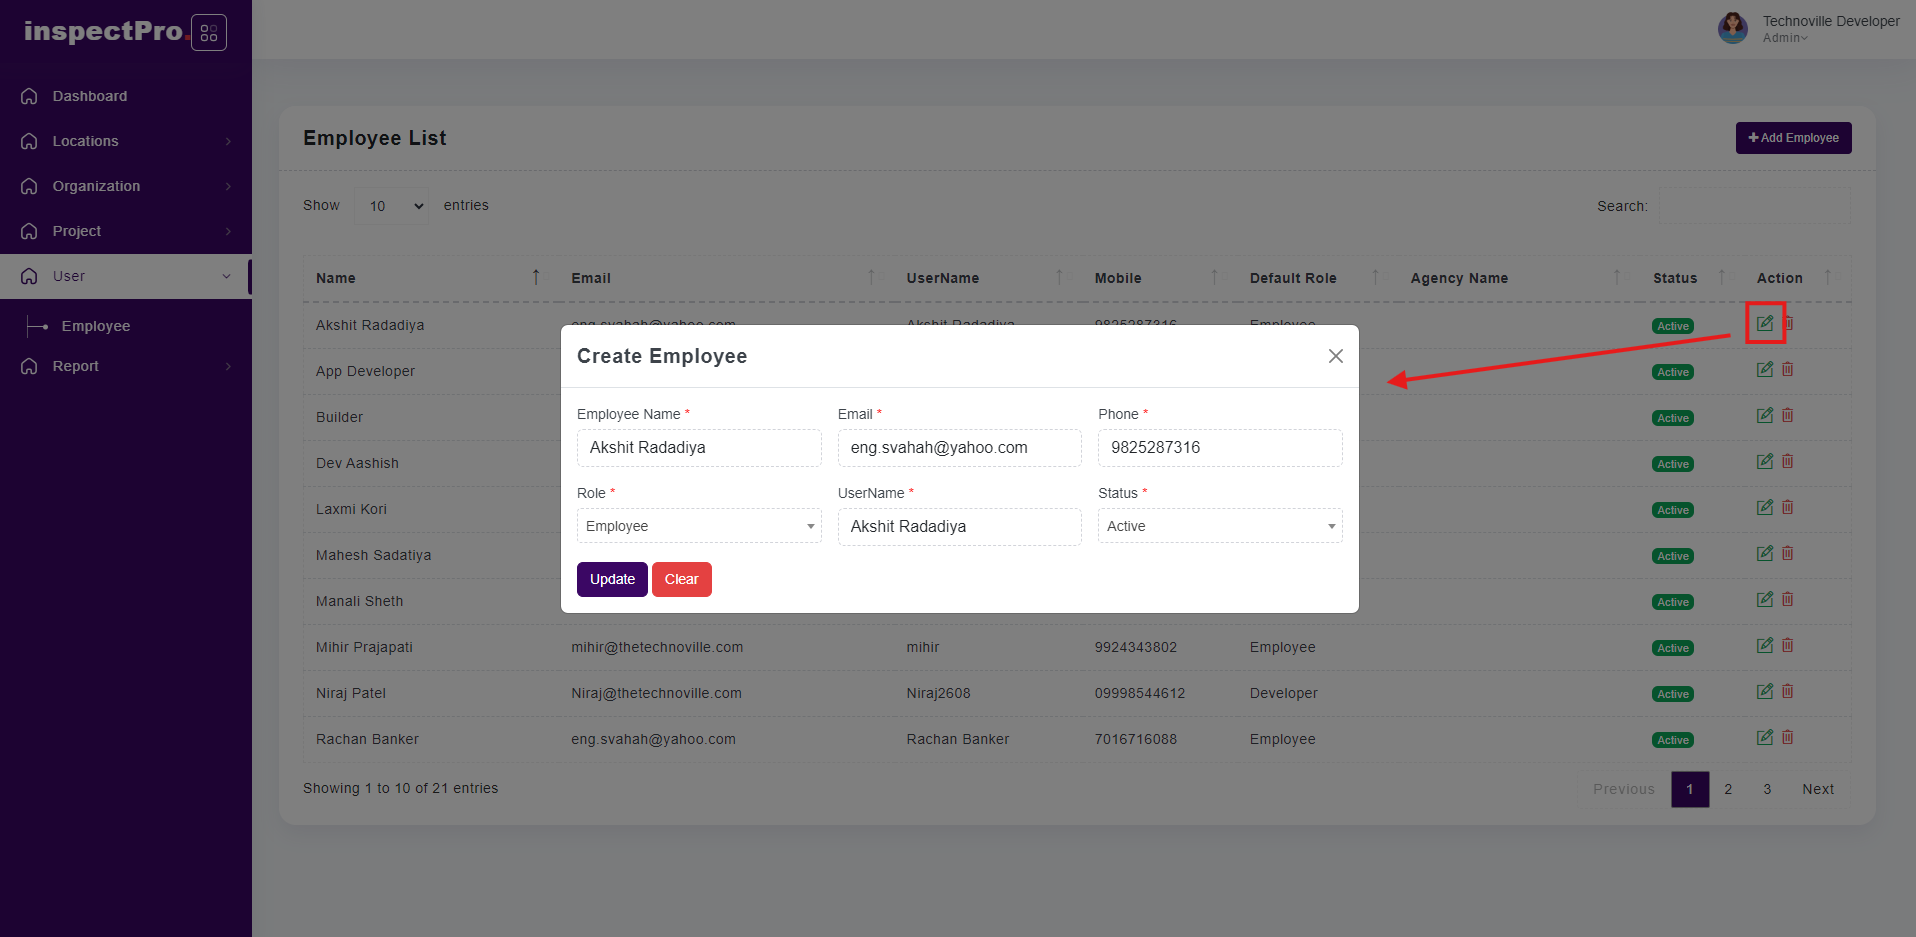
When you click on edit button you will be able to change whatever you want if you are changing role then according to that role employee can see the pages.
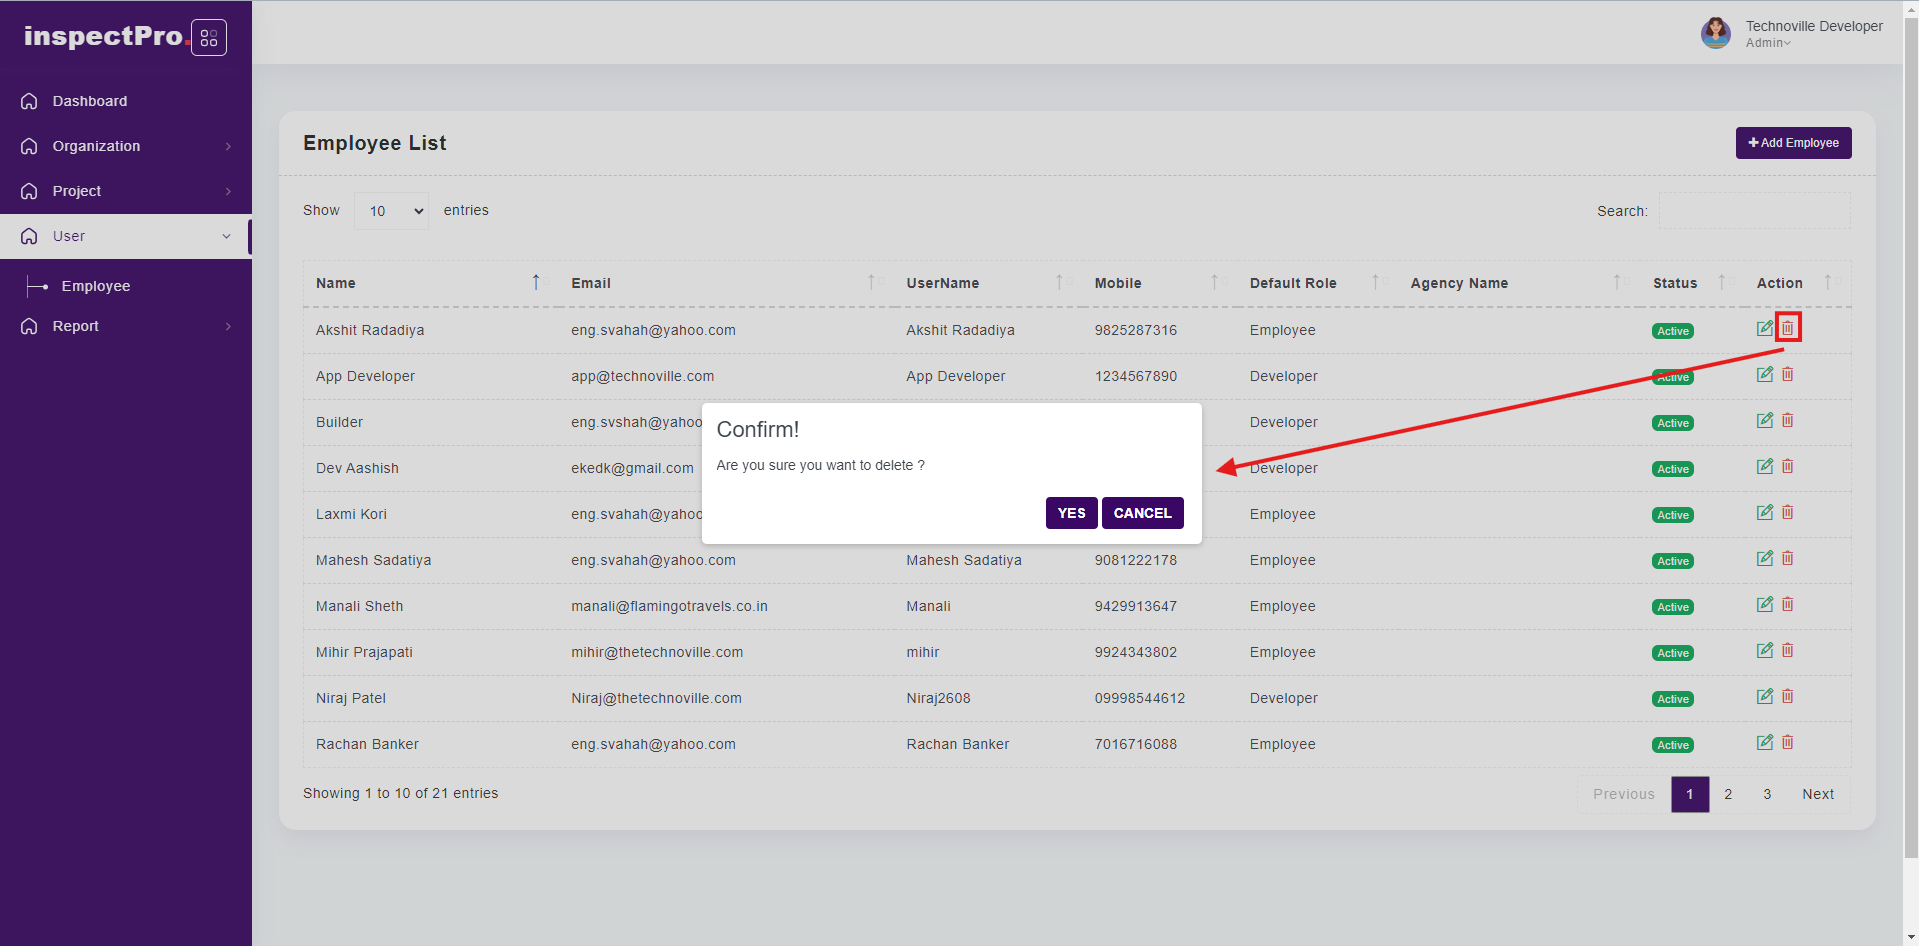
When you click on delete button then that employee is inactive and not able to login in app or web.
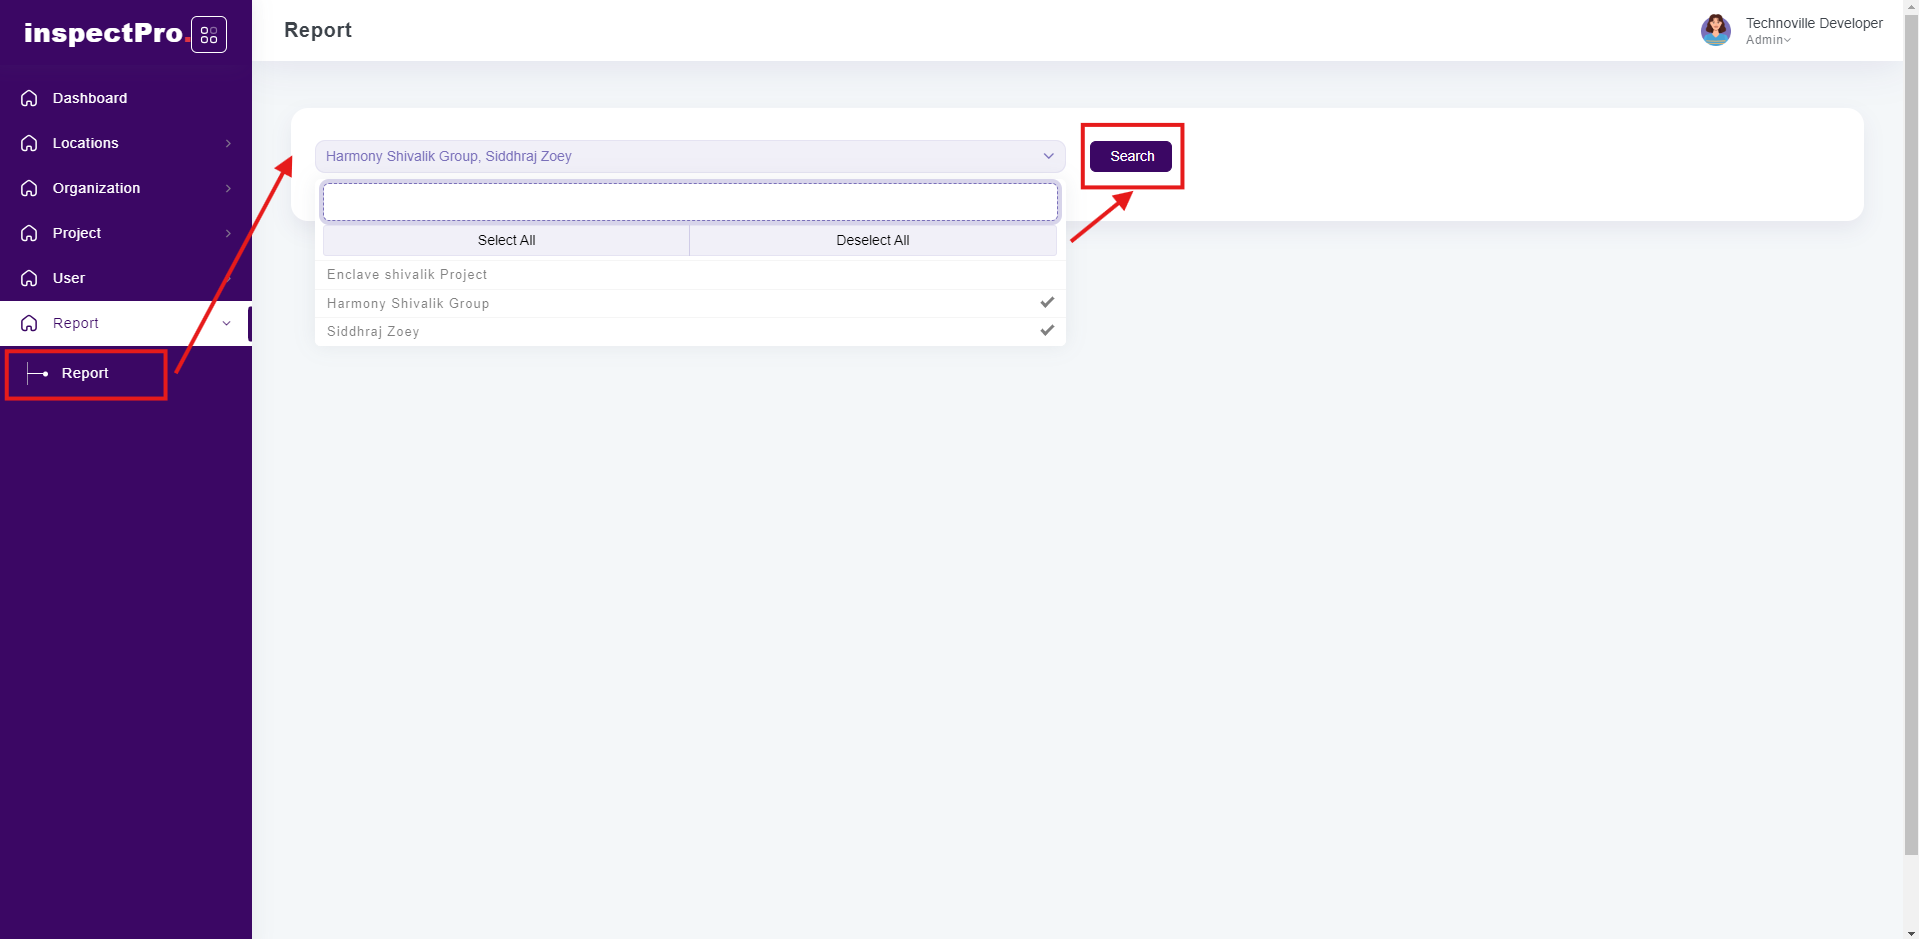
Clicking on "Report" under "Report" will display the report list.
Then you need to select project name & click on search button.
The project details will be dsiplayed.
When you click on the project name then tower listing will be displayed.
When you click on particular tower then stage listing will be visible, if you want to download pdf then click on pdf.
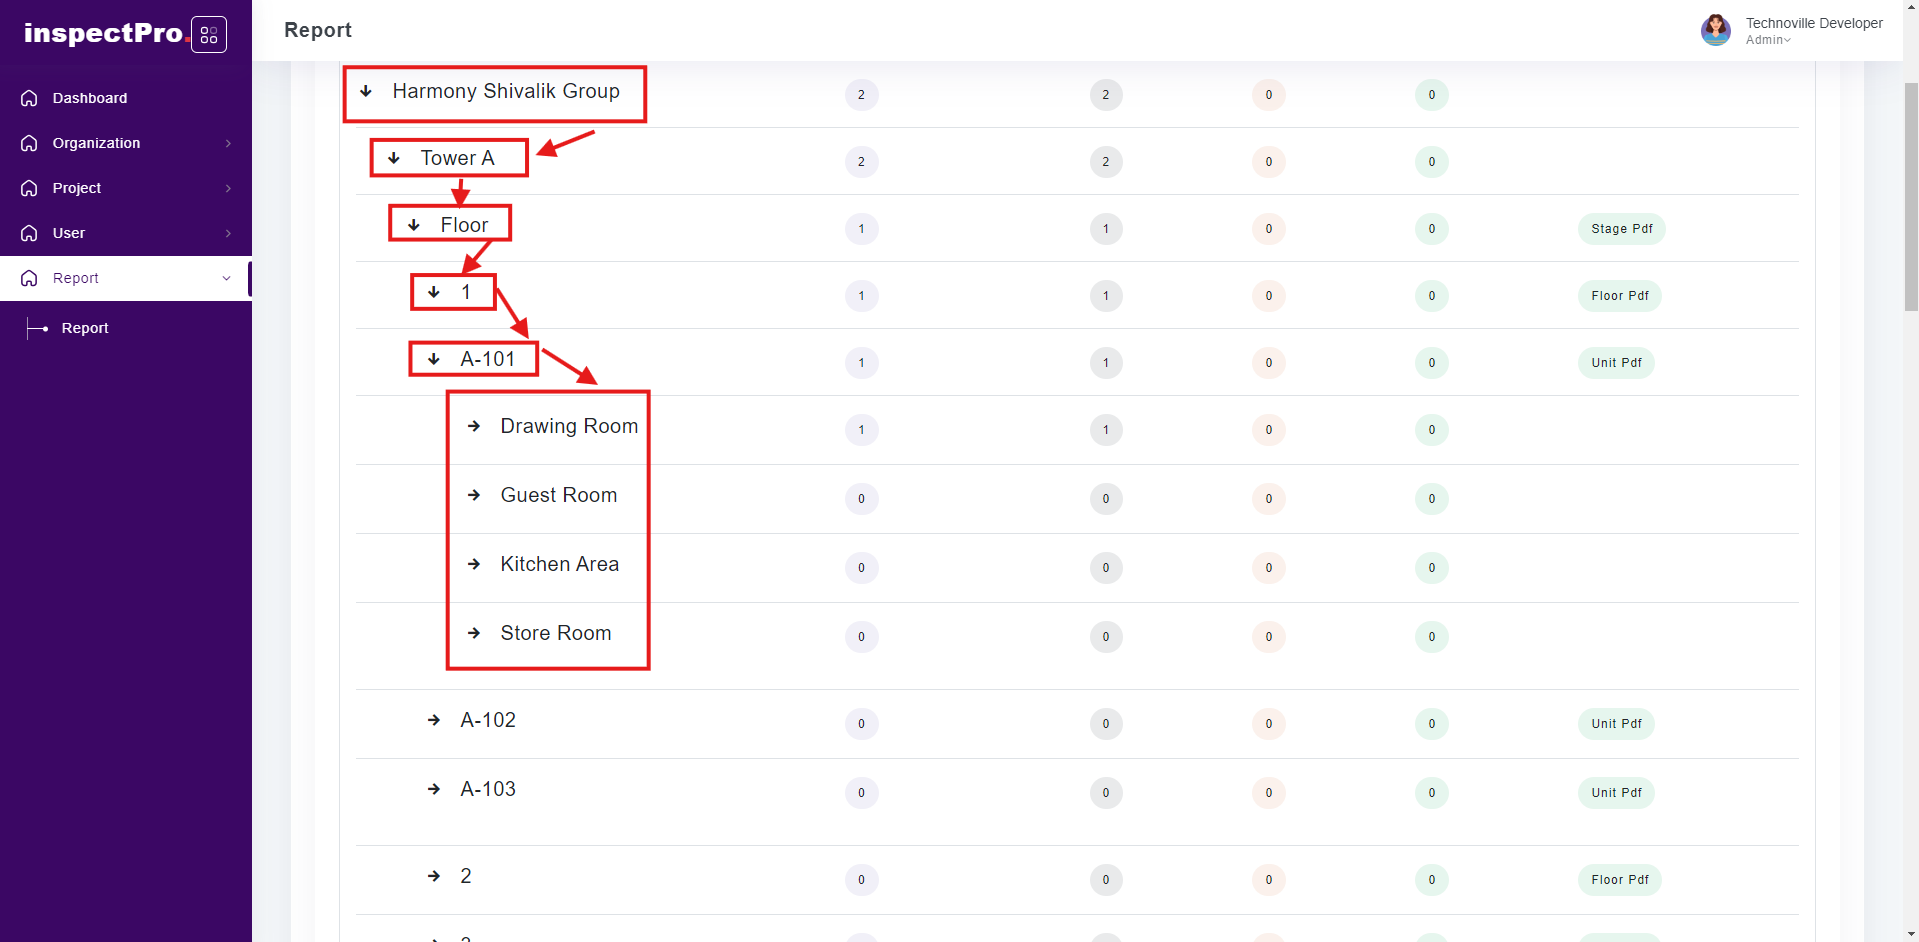
When you click on particular stage (floor wise) then first floor listing will be displayed, after that when you click on particular floor then then that floor related unit listing will be displayed & after that click on unit then that unit related area listing will be displayed & you will be able to see area wise listing.
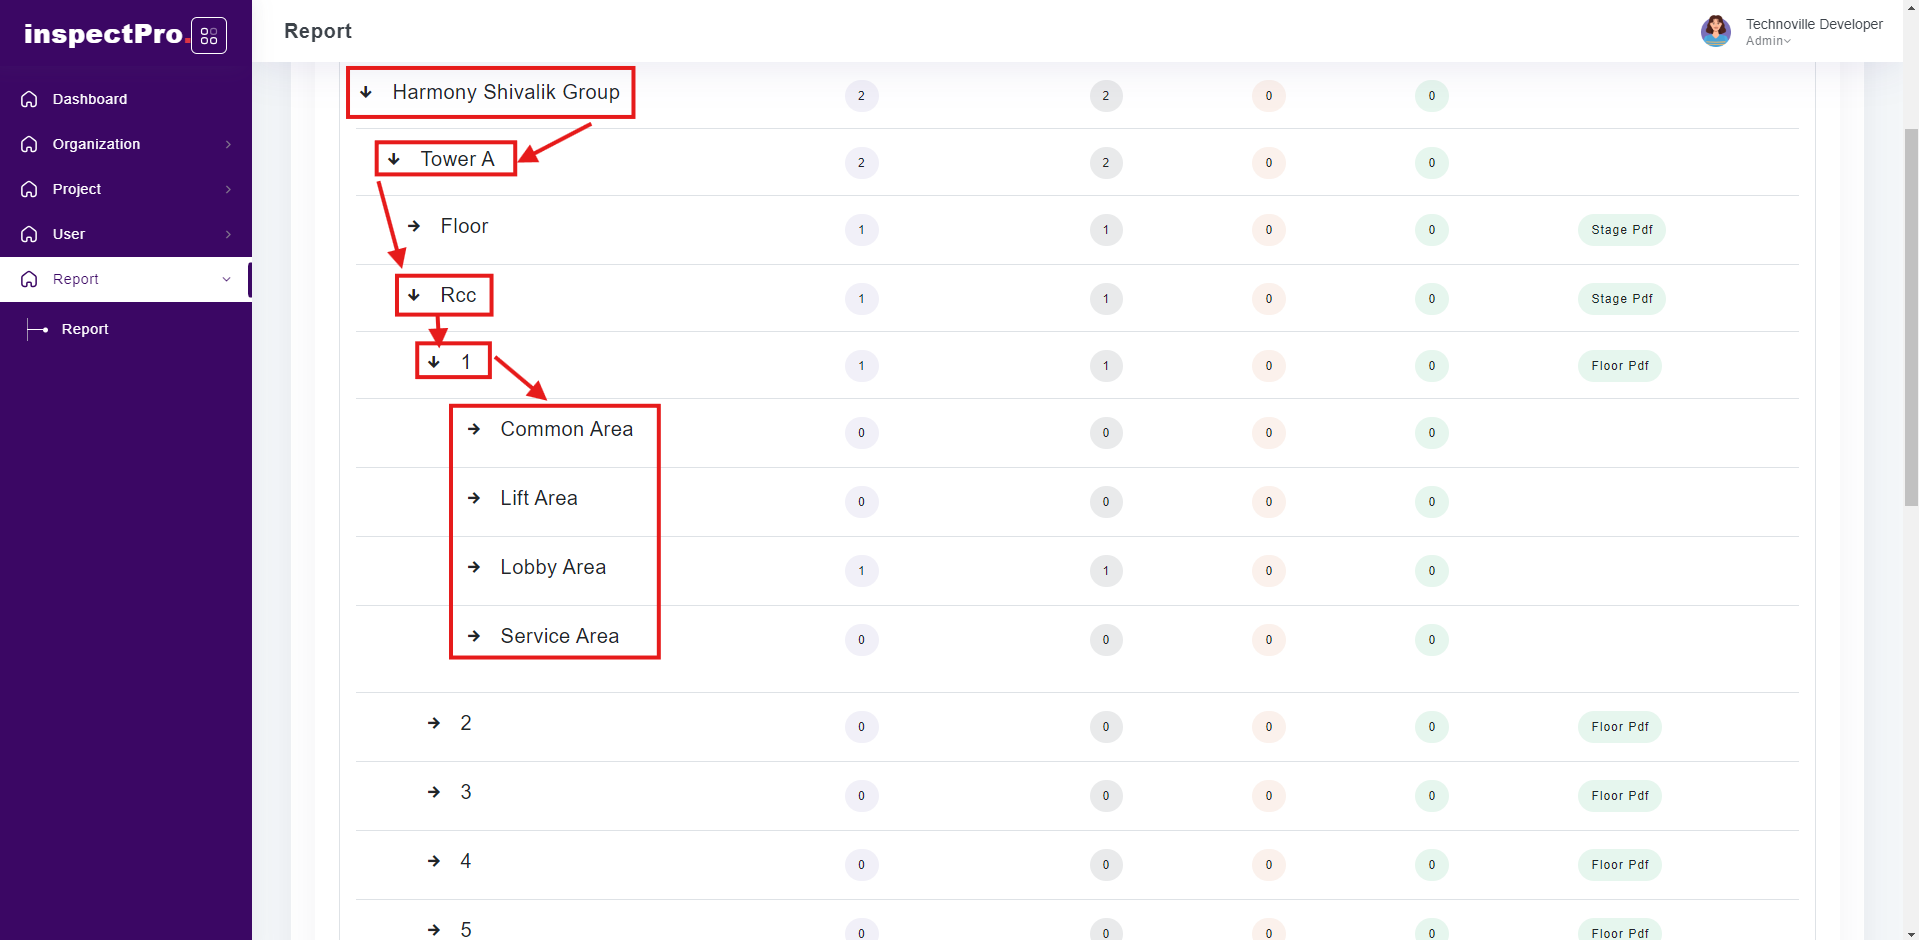
When you click on particular stage (rcc wise) then all floor listing will be displayed (download floor wise pdf), after that when you click on particular floor then that floor related area listing will be displayed & you will be able to see area wise listing.
